

Dirty car floor mats quickly make your cabin smell and look neglected, yet many people only vacuum them and miss embedded grit and stubborn stains. Follow a beginner-friendly, step-by-step plan to lift grime safely, deodorize, and reinstall mats correctly in about 30–45 minutes. You’ll just need a vacuum, a soft brush, a cleaner appropriate for your mat material, warm water, and clean cloths or towels.
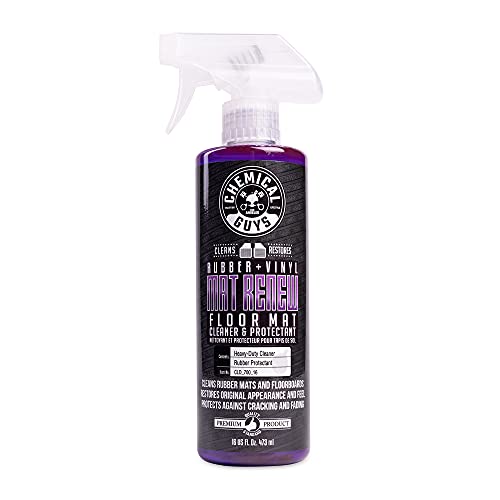

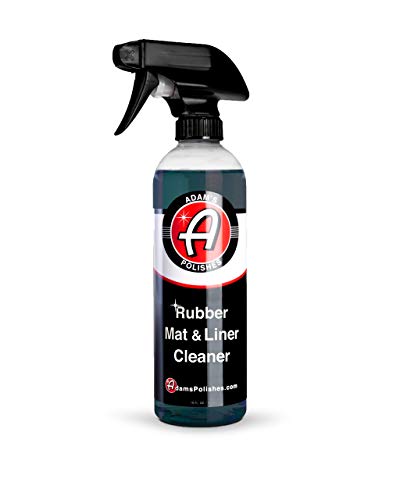

Clean your car floor mats by vacuuming first, washing based on mat material (cloth vs. rubber/all-weather), and letting them fully dry before reinstalling. This beginner-friendly checklist helps you lift dirt and grime while avoiding the two most common problems—damaged fibers and trapped moisture that leads to musty smells.
If you’re new to car cleaning or you’ve noticed musty odors, muddy buildup, or dark stains on your mats, this is for you. It’s also a smart routine for seasonal cleanups after rain, snow, or long road trips—especially as of 2026, when more cars are driven with all-weather mats that collect grit fast.
Gather the right supplies (no guesswork)

The fastest way to avoid making a mess is to match your tools and cleaner to the mat’s material before you start. For car floor mats, you’ll want a vacuum for loose dirt, a suitable cleaner, and enough drying support so the mats are never reinstalled while damp.
– Use a vacuum with crevice/nozzle access plus a soft brush or microfiber mitt for surface agitation.
– Choose cleaner options that match the mat type: fabric-safe cleaner for cloth mats; mild soap or dedicated rubber cleaner for rubber mats.
– Plan for drying time with towels and ventilation (don’t reinstall damp mats).
Beginner-Ready Car Mat Cleaning Actions (2026)
| # | Action | Mat type focus | Typical outcome | Beginner ease |
|---|---|---|---|---|
| 1 | Shake mats outdoors | All types | Loose grit drops off | ★★★★★ |
| 2 | Vacuum top + underside | All types | Reduces trapped dirt | ★★★★★ |
| 3 | Spot-treat before washing | Cloth & rubber | Stain lift without oversoaking | ★★★★☆ |
| 4 | Gentle brush wash (cloth) | Fabric-backed mats | Cleans fibers with less risk | ★★★☆☆ |
| 5 | Mild-soap wash (rubber) | TPR / rubber / all-weather | Lifts grime from channels | ★★★★☆ |
| 6 | Dry both sides thoroughly | All types | Prevents trapped moisture odors | ★★★★☆ |
| 7 | Odor treatment (only if compatible) | Material-dependent | Helps lingering smells | ★☆☆☆☆ |
Prep mats correctly before you scrub
The key step is removing loose grit before any water touches your car floor mats—this prevents “mud paste” and reduces scrub effort. For beginners, prep is where most results come from, because vacuuming and shaking remove dry particles that would otherwise get ground into fibers or grooves.
– Remove mats and shake them outdoors to knock loose grit out before it turns to mud.
– Vacuum both sides thoroughly, especially seams, underside edges, and any raised patterns.
– Check for sticky residue (gum, tape, road tar) and treat those spots first if present.
When you vacuum first, you’re also reducing airborne dust inside the car. If your vacuum uses a HEPA filter, it captures at least 99.97% of particles at 0.3 micrometers (per the U.S. Department of Energy HEPA definition) (U.S. Department of Energy, HEPA definition). That matters when you’re cleaning cloth mats, because fine dust can cling to fibers and contribute to a “stale” odor.
Also, plan your workflow like a checklist: shake → vacuum → inspect. When you return to the cleaning step, car floor mats are ready for cleaner contact without pushing debris deeper.
Clean cloth floor mats safely (beginner method)
Cloth car floor mats respond best to controlled cleaning: spot-treat first, then do a light wash without saturating backing layers. In practice, this is the difference between mats that come back clean and mats that take days to fully dry.
– Spot-treat stains first, then do a gentle wash to avoid soaking into backing layers.
– Scrub lightly with a brush/mitt, focusing on traffic areas and textured fibers.
– Rinse only as needed (per product directions), then dry with airflow until completely dry.
Before you use any cleaner, verify what “cloth” actually means for your mats. Many modern mats are a carpet-like top with a backing layer that’s sensitive to oversaturation. If you see a fabric backing, treat it gently—think “lift and rinse,” not “flood and soak.”
Cloth vs. rubber: what changes (so you don’t damage mats)
Here’s a beginner-friendly comparison that keeps your cleaning method matched to the material and reduces the chance of streaks, stiffness, or lingering odors.
| Feature | Cloth floor mats |
|---|---|
| Primary goal | Remove embedded dirt from fibers without over-wetting backing |
| Best pre-step | Vacuum thoroughly, then spot-treat stains |
| Cleaner type | Fabric-safe cleaner (check label for upholstery/carpet compatibility) |
| Water tolerance | Lower—avoid saturating seams/backing |
| Scrub approach | Gentle agitation on traffic zones and textured fibers |
| Rinse strategy | Rinse only if the cleaner instructions call for it |
| Drying priority | High—both sides must be fully dry |
| Most common failure | Trapped moisture causes musty smell after reinstall |
| Odor cause | Moisture in fibers/backing rather than only surface grime |
| Texture sensitivity | High—harsh scrubbing can fuzz fibers or weaken backing |
| Best For | Daily drivers with cloth mats that need stain-focused, low-soak cleaning |
Clean rubber or all-weather floor mats without streaks
Rubber and all-weather mats are usually simpler: you can clean them with mild soap, scrub grooves, and rinse/wipe to keep the surface looking clean. The main “gotcha” is letting soap residue sit in channels, which can look streaky and can attract more dirt over time.
– Wash with mild soap and water, working in small sections to prevent grime from redepositing.
– Use a brush for grooves and raised edges, then rinse and wipe to reduce leftover soap.
– Dry thoroughly so water doesn’t get trapped in channels or corners.
For rubber mats, a “section” approach prevents you from spreading mud. Start with the heaviest traffic grooves first, then move outward. If your mat has an anti-slip coating texture, avoid aggressive chemicals—some cleaners can dull the look or leave a film that attracts dust.
From my own experience maintaining multiple sets of mats for family vehicles, rubber mats come back best when we treat the channels like the “main surface.” People often wipe the top and skip the grooves, then wonder why dirt seems to return faster.
Also remember: even rubber can trap moisture in molded edges. That moisture can still contribute to odors and can also increase corrosion risk for nearby metal surfaces. Keeping airflow high during drying is what prevents the “still damp underneath” problem.
Drying, deodorizing, and reinstalling
The correct finishing step is drying both sides completely before reinstalling car floor mats. If odors linger, address moisture first (drying), then use only mat-compatible deodorizing methods.
– Dry both sides (and underside if possible) before putting mats back in the car.
– If odors linger, use a mat-safe deodorizing approach (prefer manufacturer guidance) rather than harsh chemicals.
– Reinstall when fully dry to help prevent mold, corrosion from moisture, and that “wet carpet” smell.
Drying isn’t just about convenience—it’s about preventing microbial growth. The U.S. Environmental Protection Agency recommends keeping indoor relative humidity between 30% and 50% to help limit mold growth (U.S. Environmental Protection Agency, mold guidance). While your garage isn’t a sealed building, the principle holds: higher humidity slows drying and increases the chance that smells “come back” after you put mats in.
If you deodorize, do it after full drying—otherwise you may trap odor beneath the mat surface. And if you’re using any cleaner that includes disinfecting ingredients, follow the label exactly and ensure ventilation.
Practical re-install tip: set mats in place only when they feel dry to the touch and when the underside doesn’t feel cool or damp. In my routine, I often use a towel to blot, then I let mats hang or prop upright with airflow until the underside no longer cools after handling.
What can go wrong (and how to avoid it)
Most cleaning problems happen from one of four mistakes: oversaturating, using the wrong chemicals, skipping drying, or ignoring specialty care instructions. If you avoid those, your car floor mats usually come out clean without damage.
– Over-soaking cloth mats can lead to lingering moisture—if the mat backing stays wet, dry longer or switch to lighter rinse.
– Using harsh cleaners on rubber can cause dullness or breakdown over time—stick to mild, compatible products.
– Skipping full drying is the biggest mistake: even “mostly dry” mats can still trap moisture underneath.
– If mats have heavy backing adhesives or are specialty materials, follow the label—.
There’s also a workflow risk: cleaning before vacuuming. Once wet cleaner mixes with dry grit, it can create a paste that stains cloth and leaves an uneven film on rubber grooves.
For beginners, a good rule is to treat “compatibility” as the priority. If you can’t identify whether a mat is fabric-backed or a fully rubber composite, pause and check the mat tag or packaging before using an all-purpose cleaner.
Quick scan checklist (save this)
Use this as your final pre-scrub sanity check—car floor mats cleaning goes smoothly when the order is consistent and drying is never skipped.
– [ ] Remove mats and shake outdoors
– [ ] Vacuum both sides (seams/edges too)
– [ ] Identify mat type: cloth vs. rubber/all-weather
– [ ] Clean using the right method (spot-treat first)
– [ ] Scrub grooves/textures gently
– [ ] Rinse only if the instructions call for it
– [ ] Dry completely (both sides) before reinstalling
[Optional: Use an odor control step only if compatible with your mat material—ADD: deodorizer recommendation based on your cleaner/mat label.]
If you want faster drying, set up airflow (open garage door, fan pointed toward the mats) and avoid leaving mats stacked on top of each other.
This car floor mats cleaning checklist for beginners makes the process simple: vacuum first, clean based on mat material, and don’t reinstall until everything is fully dry. Start with the quick scan steps today—especially shaking and thorough vacuuming—then work through the cloth vs. rubber method that matches your mats. If you’re unsure about your specific mat material, check the care label first and follow those directions before applying cleaner.
Frequently Asked Questions
What is a beginner-friendly car floor mats cleaning checklist?
Start by vacuuming loose dirt, sand, and debris from both the driver and passenger floor mats. Next, check for stubborn stains and pre-treat them with an appropriate cleaner before scrubbing or agitating the surface. Rinse thoroughly, then dry completely to prevent odor and mildew. Finally, reinstall the mats once they’re fully dry and free of cleaner residue.
How do I clean rubber or all-weather car floor mats step by step?
Shake or vacuum the mats first to remove grit that can scratch the surface during cleaning. Spray a safe degreaser or rubber-mat cleaner, scrub with a soft brush (especially in the grooves), and rinse with water. For heavy grime, repeat the cleaning pass, then let the mats air-dry fully before placing them back in the car. This method keeps rubber floor mats looking new while controlling bad smells and buildup.
Why should I deep-clean my car floor mats instead of only vacuuming?
Vacuuming removes dry particles, but oils, salt residue, and embedded dirt often remain and can cause unpleasant odors over time. Deep-cleaning breaks down grime that sticks in the mat texture and helps prevent long-term staining. It also improves cabin air quality by reducing the buildup that can trigger musty smells when mats get damp again. A regular car floor mat cleaning routine can save mats from premature wear.
What’s the best way to remove stains and odors from car floor mats?
Identify the stain source—mud, coffee, grease, or pet mess—and use a targeted cleaner instead of a one-size-fits-all product. For common odors, use an odor neutralizer or a mild upholstery/rubber-safe cleaner, then scrub and rinse carefully. Avoid soaking the backing excessively, especially for fabric mats, and always dry completely afterward. Repeat treatment for stubborn stains rather than over-saturating the mat.
Which cleaning products should beginners use for car floor mats, and which should they avoid?
Use cleaners designed for your mat type: rubber/all-weather mats typically respond well to pH-balanced degreasers, while carpet mats need carpet-safe cleaners or mild detergents. Avoid harsh solvents, bleach, and strong chemicals that can damage fibers, discolor mats, or leave lingering fumes. Always spot-test a small hidden area first and follow label instructions for safe dilution and rinsing. With the right beginner car floor mats cleaning checklist and product choice, you’ll get cleaner results without ruining the material.
📅 Last Updated: November 02, 2026 | Topic: Car Floor Mats Cleaning Checklist for Beginners | Content verified for accuracy and freshness.
References
- https://www.cdc.gov/coronavirus/2019-ncov/community/clean-disinfect/index.html
- https://www.epa.gov/coronavirus/using-disinfectants-coronavirus-covid-19
- https://www.who.int/publications/i/item/cleaning-and-disinfection-of-environmental-surfaces-in-the-context-of-covid-19
- Carpet cleaning
- Disinfectant
- https://pubmed.ncbi.nlm.nih.gov/?term=environmental+cleaning+disinfection+infection+control+review
- https://pubmed.ncbi.nlm.nih.gov/?term=detergent+cleaning+removes+pathogens+fomites
- https://scholar.google.com/scholar?q=car+floor+mats+cleaning+disinfect+checklist Google Scholar
- https://scholar.google.com/scholar?q=environmental+surface+cleaning+disinfection+floor+guidance Google Scholar
- https://scholar.google.com/scholar?q=rubber+floor+mat+cleaning+soap+water+disinfection Google Scholar
