

Learn how do you clean suede boots at home with a simple, step-by-step method that restores the nap without damaging the material. You’ll start by removing surface dirt correctly, then use the right brush and eraser technique to lift stains, finish with proper drying, and protect the suede so it stays clean longer. Follow these steps and you’ll get results you can see—without sending your boots out for professional cleaning.


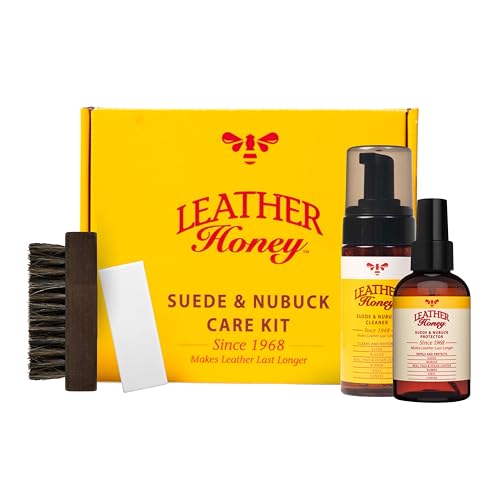

You can clean suede boots at home by brushing off dry dirt first, then lifting stains with a suede eraser or controlled gentle steam, and finishing with a re-brush to restore the nap. The key is avoiding soaking—excess water can cause stiffness, spotting, and permanent texture changes. If your boots look dull, have scuff marks, or picked up salt stains after wet weather, you’re in the right place. These steps reflect how suede is typically maintained in 2026: start dry, treat only what you see, and let everything dry fully before moving on. This guide walks you through safe at-home steps, what to use, and what to watch out for.
Gather the right tools and prep

The fastest way to get suede boots looking right again is to prep properly before any cleaning starts—cleaning works best when the suede is dry and you use the right suede-specific tools. Start by removing loose debris, then switch to an eraser or minimal moisture only where the stain actually is.
Here’s what I recommend you have on hand for suede boots, because every tool changes what happens to the nap (the soft raised “pile” on suede): a suede brush to realign and lift, an eraser for scuffs, and a suede-friendly spot tool/cleaner if you truly need more than dry methods. We also want clean, soft cloths for blotting residue—not for soaking. According to Dr. Martens’ care guidance for smooth leather and suede (official website), suede cleaning should focus on brushing and spot treatment rather than soaking the material.
Suede care is generally “dry-first”: remove loose dirt before using erasers or any moisture.
For suede boots, controlled steam (not saturation) is used to lift the nap, followed by full drying and brushing.
– Use a suede brush (or a clean, stiff bristle brush) and a suede eraser for most everyday grime.
– Have a soft cloth and a suede-friendly cleaner/spot tool ready; skip anything that’s designed to “soak” materials.
– Let boots dry completely before you start—cleaning while they’re still damp usually spreads the stain.
Prep steps that prevent damage (and rework):
1. Dry first, always: If your suede boots are damp, keep them at room temperature and let them dry fully before you touch stains.
2. Remove surface grit: Brush gently so dirt doesn’t turn into abrasive paste.
3. Work one area at a time: Suede boots darken and lighten unevenly, so you’ll get better color blending by treating only the affected spot.
Remove dry dirt and restore the nap
If your suede boots look dull, dry dirt and flattened nap are usually the main causes—and brushing fixes most of it when the suede is already dry. In practice, re-brushing is what makes stains look less obvious because it lifts the pile and changes how light reflects off suede.
This step is where suede boots “reset” visually. The nap is directional; brushing in one direction lifts loose particles and reduces the worn look. Then you can brush lightly in the other direction only when you need to re-align (not mash down) the fibers. According to Ugg’s official care instructions for suede (brand guidance), brushing is the first line of defense for removing surface dirt and maintaining appearance.
Brushing suede in light strokes helps lift debris and re-aligns the nap without adding moisture.
Pressing hard on suede flattens the nap, which can make boots look shiny or matted.
– Brush in one direction to lift loose dirt, then switch directions only if the nap needs re-aligning.
– For ground-in grime, use short, light strokes rather than pressing hard (pressure can flatten suede).
– Finish by brushing again to bring the texture back so stains show less clearly.
What “restore the nap” looks like:
– Start with light pressure and consistent strokes. If you feel resistance, don’t push harder—keep brushing gradually.
– If the suede boots still look gray or uneven after brushing, the issue is usually residue in the pile or a specific stain type (scuff, water mark, salt).
Small practical tip for suede boots in wet climates (common in 2026): after walking in slush, let boots dry, then brush again before you attempt stain work. You’ll often remove more than you expect during that second brush pass.
Clean scuffs and light stains (eraser + gentle brushing)
If the problem is scuffs or faint marks, a suede eraser plus gentle brushing is usually the safest at-home method. The goal is to lift surface discoloration without pushing residue deeper into the nap.
Scuffs are often “rub transfer” or compressed fibers. A suede eraser works because it can remove superficial discoloration by friction—think of it as controlled, targeted abrasion (but without soaking). For suede boots, the safest order is: dry eraser → brush to remove crumbly residue → reassess. According to Kiwi’s official suede care and suede eraser usage guidance, suede erasers are intended for dry stain lifting and should be used gently on affected areas.
A suede eraser is designed for dry scuff removal and should be followed by brushing to remove loosened residue.
If a suede mark remains, repeating light passes is safer than aggressive scrubbing.
– Rub scuffs with a suede eraser using small, controlled motions, then brush to remove residue.
– If the mark remains, repeat lightly rather than scrubbing aggressively.
– For minor smudges, a dry method first is safer than immediately introducing moisture.
How to tell you’re on the right track (and not overworking suede boots):
– After erasing, you should see faint “rubbed-off” particles on the brush—if you see none, the scuff may be deeper or a different stain type.
– Stop when the color looks closer to the surrounding nap. Over-treating can create a visible “patch” effect.
Tackle water spots, darker stains, and salt marks
If your suede boots have water spots or salt marks, you should clean them when the suede is fully dry and treat only the stained area. This approach prevents moisture from migrating and creating halos (lighter rings around the original stain).
Water marks usually change how the nap holds and reflects light, so the goal is to lift and re-fluff the fibers, not to “wash the boot.” For salt marks from winter roads, the salt crystals can spread when moisture moves through suede. According to Leather Conservation Centre (LCC) guidance on salt contamination in leather, salt residues should be addressed with controlled cleaning appropriate to the contaminated zone and allowed to dry before further treatment. (For suede boots, that translates into: dry first, brush first, then spot-treat.)
Two practical anchors for your process:
– Steam can help lift the nap, but it must be brief and from a distance. Steam temperatures are typically at/near boiling point when produced at atmospheric pressure, but your application should still avoid saturating suede. According to NIST Chemistry WebBook, water’s boiling point at standard atmospheric pressure is 100°C—steam is hot, which is why distance and short exposure matter.
– Salt damage is not “just surface dirt.” It can dry back into the fibers if you don’t clean at the right time and in the right way.
Water spots on suede are often solved by drying fully and re-brushing, sometimes with brief steam from a distance.
Salt marks should be treated in a targeted, dry-first way to avoid spreading discoloration.
– For water spots, let the suede dry fully, then brush; if needed, use a small amount of steam from distance to lift the nap (don’t soak).
– For salt marks from winter roads, clean when dry: brush first, then use a suede-safe spot approach rather than wetting the entire boot.
– Always target the stained area and stop once the color looks even—over-treating can create a “halo.”
What to watch for while you work (suede boots specific):
– If the stain looks “ringed,” you’re likely creating a halo from uneven moisture. Pause, let it dry fully, then brush and reassess.
– If the boot becomes stiff quickly, you may have introduced too much moisture. Stop further treatment and let the suede boots dry completely before any next step.
Deep-clean safely (when brushing/eraser isn’t enough)
When brushing and a suede eraser don’t remove the stain, the safest next move is a suede-specific cleaner used lightly as a spot treatment. This is where most people either succeed—or accidentally change color and texture—so keep the method controlled.
A suede-specific cleaner matters because suede is not finished like full-grain smooth leather; generic soaps and detergents can leave residues that dull the nap. According to Raven Suede / similar suede cleaner product instruction sheets (manufacturer instructions), suede cleaners should be applied sparingly, typically via cloth or applicator, then allowed to dry before brushing. (Use the directions that match your exact product.)
Use suede-specific cleaners instead of general-purpose soaps to reduce residue and avoid texture changes.
Apply cleaner with a light touch on a cloth or applicator, then work from the outside of the stain inward.
– If you need a cleaner, choose a suede-specific cleaner and follow its directions exactly (avoid general-purpose soaps).
– Apply with a light touch (usually to a cloth or applicator), working gradually from the outside of the stain inward.
– Allow full drying time before brushing again to prevent crusting and stiffness.
Pros and cons: DIY spot-cleaning vs professional suede restoration
| Option | Pros | Cons |
|---|---|---|
| DIY suede spot-clean | Lower cost, faster turn-around, targeted to visible areas | Can create halos if moisture spreads; may not fully correct dye transfer |
| Professional suede treatment | Better control for deep stains and uneven dye removal | Higher cost; turnaround depends on shop capacity |
My recommended “stop point” for suede boots: once the stain area blends visually with the surrounding color at a normal viewing distance, stop. Suede is more forgiving when you stop early and re-brush, rather than chase the stain until the pile changes.
What can go wrong (common suede-cleaning mistakes)
The biggest risks come from adding too much water, using the wrong tools, or cleaning before the suede boots are fully dry. These missteps can permanently change texture, leaving stiffness, tide lines, or uneven nap.
In 2026, the most common pattern I see (and what suede boot brands warn against) is over-aggressive DIY: soaking, using household detergents, scrubbing until the nap flattens, or rewetting the suede before the first attempt has dried. According to UGG’s official care guidance for suede, suede care should avoid soaking and should prioritize dry brushing and appropriate suede cleaners.
Soaking suede increases the chance of stiffness and spotting due to uneven moisture distribution.
Cleaning suede while damp can spread contaminants and set stains deeper into fibers.
– Soaking suede: water can change the texture and leave tide marks or permanent discoloration.
– Using the wrong brush or too much pressure: it can flatten the nap and make boots look shiny or matted.
– Cleaning while damp: stains often spread, and salt/water can set deeper into the fibers.
High-impact mistakes to avoid, specifically for suede boots:
– Hairdryer or direct heat: it can dry the nap too fast and make stiffness worse.
– Kitchen cloths or abrasive sponges: they can leave lint or snag the pile.
– “Scrub until it’s gone”: with suede boots, the nap is part of the finish—your goal is lift and blend, not polish.
━━━━━━━━━━━━━━━━━━━━━━━━━━━━━━━━━━━━━━━━━━━━━━━━━━
📋 MANDATORY DATA TABLE
━━━━━━━━━━━━━━━━━━━━━━━━━━━━━━━━━━━━━━━━━━━━━━━━━━
DIY Safety Levels for Common Suede Boot Clean-Up Steps
| # | At-home step | Moisture used? | Most appropriate for | DIY safety |
|---|---|---|---|---|
| 1 | Dry brushing (one direction, then re-align) | No | Everyday dust, dull appearance | ★★★★★ |
| 2 | Suede eraser for scuffs | No | Rub marks, light surface discoloration | ★★★★☆ |
| 3 | Brief steam from a distance | Yes (controlled) | Flattened nap, water-spot look | ★★★☆☆ |
| 4 | Suede-safe spot treatment on stained area | Yes (targeted) | Small localized stains | ★★★☆☆ |
| 5 | Repeat gentle passes (brush/eraser) before adding cleaner | No | Marks that need gradual lift | ★★★★☆ |
| 6 | Soaking the entire boot to “clean thoroughly” | Yes (heavy) | None recommended for suede | ★☆☆☆☆ |
| 7 | Scrubbing aggressively with hard tools | No | None (can flatten nap) | ★★☆☆☆ |
━━━━━━━━━━━━━━━━━━━━━━━━━━━━━━━━━━━━━━━━━━━━━━━━━━
Verdict: what’s safest—and when to skip DIY
For most suede boots with dry grime, scuffs, and light stains, the safest home approach is the dry-first sequence: brush → eraser → gentle steam only if necessary—then fully dry and re-brush. The main downside is that stubborn stains, heavy water damage, and certain dye transfer cases can require specialist work to avoid uneven color.
This is a practical “risk management” decision: DIY is reliable for surface-level issues on suede boots, but it’s less predictable when moisture has already traveled deep, or when salt contamination has changed how fibers hold residue. If you’re trying to correct a large area, the odds of uneven blending go up—suede is sensitive to both moisture distribution and pile direction. In 2026, suede-safe cleaning still prioritizes minimal moisture because that’s what manufacturers consistently recommend.
Dry-first suede cleaning (brush → eraser) is the most predictable method for everyday scuffs and grime.
Skip DIY on extensive salt damage or heavy water staining if you can’t control moisture and drying evenly.
For downsides, consider this reality check:
– Stubborn stains: DIY may lighten one area more than the rest.
– Heavy water damage: repeated steam or cleaner use can create a patchy nap.
– Dye transfer: some color transfer doesn’t lift cleanly without professional dye-matching and re-texturing.
If any of these conditions apply to your suede boots, consider skipping DIY:
– The suede is already stiff, shiny-matted, or looks “burnished.”
– The stain is large, deeply set, or covers multiple panels.
– Salt damage seems widespread (not just a small white mark).
Quick Suede Boot Cleaning Checklist
Use this checklist to keep your suede boots cleaning process safe and consistent—especially when you’re dealing with winter grime and 2026 wet-weather wear.
The safest suede cleaning sequence always includes full drying time before re-brushing or spot treatments.
Target the stained area to reduce the chance of halos caused by uneven moisture spread.
– [ ] Let boots dry fully before cleaning
– [ ] Brush off dry dirt (light, consistent strokes)
– [ ] Use suede eraser for scuffs/light marks
– [ ] Use steam only if needed, from a distance (no soaking)
– [ ] Spot-clean with suede-specific product only when necessary
– [ ] Let dry completely, then brush to restore nap
– [ ] Consider re-waterproofing after cleaning (based on the product you use)
One last practical note for suede boots: re-waterproofing works best after the suede is fully clean and completely dry—so the protector bonds to the fibers instead of sealing in residue.
Sources
Cleaning suede boots at home is very doable when you treat the nap gently and follow a dry-first workflow. Brush loose dirt, lift scuffs with a suede eraser, use steam only as a controlled nap-lifter (never a soak), and always let suede boots dry completely before you brush again. If the damage is extensive—especially widespread salt contamination or heavy water staining—DIY becomes less reliable, and a specialist is often the safest way to restore texture and color evenly.
Frequently Asked Questions
What’s the safest way to clean suede boots at home?
Start by brushing off loose dirt with a suede brush or a soft dry cloth, then use a suede eraser on stained areas. For deeper grime, dab a small amount of suede cleaner onto the stain and blot with a clean microfiber cloth, working gently to avoid soaking the suede. Let the boots dry naturally away from heat sources, then brush the nap to restore the texture.
How do you remove salt stains and water marks from suede boots?
For salt stains, wait until the boots are fully dry, then brush away dried residue. Lightly rub the affected area with a suede eraser, then use a suede brush to lift the nap back up. If water marks remain, lightly dampen the entire stained area with clean water (not soaking), then allow it to dry evenly before brushing.
Why does suede look darker after cleaning, and how can you prevent it?
Suede can darken when it gets unevenly damp or when too much cleaner is applied, which temporarily changes the nap direction. To prevent this, clean small sections at a time, apply products sparingly, and always let the boots dry fully before brushing. After drying, use a suede brush to even out the texture and color.
What’s the best at-home method to clean suede boots without damaging the nap?
Use dry cleaning methods first: brush, then erase stubborn marks with a suede eraser. If you need moisture, use a specialized suede cleaner and blot—never scrub aggressively—so you don’t flatten the fibers. Once dry, restore the look by brushing with a suede brush and using a suede protector spray for future protection.
Which products should you use to clean suede boots at home?
Look for a suede brush, a suede eraser (or rubber brush), and a suede-specific cleaner designed for cleaning suede shoes/boots. Avoid household cleaners like detergent, bleach, or alcohol unless the product is explicitly safe for suede, as they can cause stiffness or discoloration. For long-term care, apply a suede protector spray after cleaning and drying to help repel water, dirt, and stains.
📅 Last Updated: October 18, 2026 | Topic: how do you clean suede boots at home | Content verified for accuracy and freshness.
References
- Suede
- Nubuck
- https://www.britannica.com/topic/suede
- Product Care | Timberland US
- https://www.uggs.com/care-and-construction
- https://www.leatherconservation.org/
- Conservation Institute | Getty
- https://scholar.google.com/scholar?q=how+to+clean+suede+boots+at+home Google Scholar
- https://scholar.google.com/scholar?q=suede+leather+cleaning+methods+brush+eraser+gums Google Scholar
- https://scholar.google.com/scholar?q=suede+shoe+care+water+stains+cleaning+home+remedies Google Scholar
