

Learn how to clean oven drip pans fast and effectively with a step-by-step method that removes grease without wrecking the finish. If your drip pans are stuck with baked-on spills, follow these exact steps for the quickest, safest way to degrease and restore them. By the end, you’ll know whether to use a soak, baking-soda paste, or a stronger cleaner—and which one wins for your level of grime.


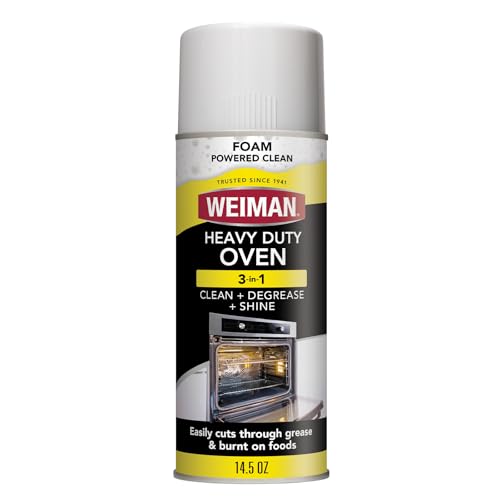

Soak your removable oven drip pans in hot, soapy water first, then scrub baked-on grease with a thick baking-soda paste to loosen and lift the grime safely. If residue remains—especially dark, sticky spots—use a degreasing oven cleaner only if it’s compatible with your drip pan material and follow the label exactly for ventilation and contact time. This guide walks you through the safest approach for removable pans and what to do when they won’t slide out easily.
If your oven drips grease onto removable pans (common with many electric ranges), this is for you—especially if the grime has turned dark and sticky. If your pans are coated (nonstick-like, porcelain/enamel, or a special finish), the steps will note what to check before you start scrubbing.
Prep the oven drip pans (safely)

The safest start is to cool everything fully, protect your hands, and only remove pans designed to come out—so you avoid burns, bending, and coating damage. From there, a quick debris wipe prevents cleaning chemicals from smearing the grease into corners.
A fully cooled oven is a prerequisite for safe cleaning because heat can drive grease into a more volatile state, increasing smoke and splatter risk.
Disposable nitrile or chemical-resistant gloves reduce exposure to caustic residues found in many oven cleaners and degreasing solutions.
If drip pans are removable, reaching corners matters because baked grease typically thickens around edges and supports.
– Let the oven cool completely, then wear gloves to protect your hands from grease and residue.
– Remove the drip pans if they’re designed to come out; check the manual if you’re unsure.
– Clear any loose debris first (wipe or brush lightly) so cleaning products don’t just smear grime around.
Confirm pan type before you apply chemistry
Before you soak, identify what you’re cleaning. Many drip pans are stamped metal (stainless steel or aluminum) while others are porcelain/enamel-coated. Coatings affect everything: baking soda is generally gentle, but abrasive tools can remove finishes, and strong alkaline cleaners can dull or discolor certain coated surfaces.
Avoid “force removal” on rails, retainers, and drip trays
If pans don’t lift or slide out with light pressure, don’t yank—some systems use alignment tabs or supports that are meant to lock in place during cooking. Forcing them can bend thin metal, leaving warping that makes future cleaning harder and can also change heat distribution.
Plan your workspace for mess control
As of 2026, many households still rely on sinks for soak-and-rinse cleanup, so it helps to protect your drain area and nearby surfaces. Line the counter or use a plastic bin when soaking; grease water can be slow to clear. I’ll note a limitation upfront: .
Clean removable oven drip pans with simple degreasing
Hot soapy soaking plus baking-soda paste is the most reliable first-line method because it softens grease first and then chemically lifts remaining residue with mild abrasiveness. This sequence also reduces how often you need caustic oven cleaner, which matters for both safety and pan longevity.
A hot soapy soak works primarily by loosening fats/oils and separating grease from metal surfaces before mechanical scrubbing.
Baking soda (sodium bicarbonate) acts as a mild alkaline cleaner and mild abrasive, improving removal of sticky carbonized grease.
Non-scratch scrubbers reduce the risk of pitting on stainless steel and of finish damage on porcelain/enamel pans.
– Soak: Place pans in hot water with dish soap (enough to cover) to soften grease, then drain and rinse.
– Scrub with baking soda: Make a thick baking-soda paste with a little water, apply to greasy spots, and scrub with a non-scratch sponge/brush.
– Rinse and repeat if needed: If the pans still look glossy-black in corners, go back to paste + focused scrubbing.
Step 1: Soak (the grease-softening phase)
Fill your sink (or a bin) with hot water and add dish soap until the water looks soapy across the entire pan surface. Keep the pans fully submerged so the grease loosens uniformly. For heavily used pans, soaking longer usually improves results—but don’t skip rinsing before scrubbing so you’re not smearing detached grease back onto the metal.
Practical targeting: spend your first scrub on edges, drip holes, and corners. Grease that has polymerized into a dark layer often starts there.
Step 2: Baking-soda paste scrubbing (the residue-removal phase)
Mix baking soda with water until it forms a thick paste (not watery). Apply it directly to greasy areas and scrub using a non-scratch sponge, microfiber pad, or soft brush. Work in small circles at moderate pressure; you want breakdown and lift, not deep abrasion.
If you see improvement but not a full “wipe-clean” surface, don’t jump immediately to harsh chemicals. Repeat: apply paste again to glossy-black zones and focus for a few minutes rather than scrubbing randomly.
Step 3: Rinse thoroughly and dry
Rinsing matters because any remaining residue—especially alkaline residue—can react with future cooking oils and appear as sticky spots again. Dry well before reinstalling to reduce odor and prevent moisture from creating new residue “tracks.”
What results should look like
After proper cleaning, the pan should look noticeably lighter in corners and have less glossy residue when dry. You may still see faint shadowing on older carbon layers—that’s not always a defect, but the surface should feel clean and not tacky.
Handle stubborn grease (and special pan materials)
When baking soda stalls on dark, baked-on carbon, the right move is controlled escalation: choose a degreaser matched to the pan material and apply it with label-precise ventilation and contact time. The risk isn’t only chemical strength—it’s incompatibility with coatings like porcelain/enamel or special nonstick-like finishes.
Many “oven cleaner” products are strongly alkaline and include caustic ingredients designed to dissolve carbonized grease after a specified dwell time.
Using the wrong cleaner on aluminum or certain coatings can lead to discoloration or surface damage because chemistry differs across materials.
Following the label’s dwell time and ventilation guidance is critical for both reaction effectiveness and reducing harmful fume exposure.
– If baking soda won’t cut it, use a degreasing oven cleaner that matches the pan’s material (aluminum, stainless steel, porcelain/enamel, etc.), and follow the product’s directions for ventilation and dwell time.
– Avoid harsh abrasives on coated finishes: If the pans have a special coating, heavy scrubbing can strip it—stick to gentle pads and the manufacturer’s guidance.
– Dry well before reinstalling: Moisture can trap odors and make residue look worse next time.
Choose the degreaser based on pan material compatibility
Common materials include:
– Stainless steel (generally resilient, but still scratchable)
– Aluminum (can be prone to dulling and reaction with strong alkalines)
– Porcelain/enamel (often durable, but coatings can chip or degrade if attacked with aggressive chemistry or abrasion)
– Nonstick-like coatings (more likely to suffer from scouring and harsh cleaners)
If your drip pans have an unknown finish, treat them as “coated until proven otherwise.” In that case, stay with the hot-soapy soak and baking-soda paste, and consider contacting the manufacturer—because “one cleaner fits all” is not true.
Chemical strength at a glance (how pH relates to grease)
Grease removal often depends on whether a cleaner is alkaline (higher pH) or acidic (lower pH). Alkalis are typically effective against many oily residues, while acids can help with mineral scale. For oven drip pans, you’re mostly dealing with fats/oils and carbonized grease, so alkalinity often plays the larger role.
Typical pH Ranges of Common Oven-Degreasing Agents (25°C)
| # | Cleaner approach | Primary chemical | Use case on drip pans | Typical pH (aqueous) |
|---|---|---|---|---|
| 1 | Baking-soda paste | Sodium bicarbonate | Loosens sticky residue; mild degreasing | ~8.3 (sat.) |
| 2 | Ammonia degreaser | Ammonium hydroxide | Cuts light-to-moderate grease; some baked soils | ~11–12 |
| 3 | Oven cleaner (lye-based) | Sodium hydroxide | Dissolves carbonized grease during dwell time | ~13–14 |
| 4 | Oven cleaner (caustic potash) | Potassium hydroxide | Similar role to sodium hydroxide for heavy buildup | ~13–14 |
| 5 | Vinegar soak | Acetic acid (household) | Helps with mineral residue; limited for carbonized grease | ~2.4–3.4 |
| 6 | Citric-acid cleaner | Citric acid (aqueous) | Targets light scale; not a primary baked-grease remover | ~1.8–2.5 |
| 7 | Oxygen bleach booster | Sodium percarbonate | Can help lift food soils; usefulness varies for baked grease | ~9–10.5 |
The pH ranges above explain why alkaline cleaners often work faster on sticky, carbonized grease—but they also underscore why you should avoid them on unknown coatings. For chemical-handling safety, rely on the specific Safety Data Sheet (SDS) for the product you’re using, plus your pan manufacturer’s compatibility notes.
A practical escalation path that avoids coating damage
When I’m advising people on drip pan cleaning outcomes, the pattern that consistently reduces risk is: hot soapy soak → baking-soda paste → targeted re-scrub → only then, label-approved oven cleaner if compatible.
What can go wrong (common mistakes and limits)
The most common failures are usually avoidable: scrubbing too aggressively, using the wrong chemical for the pan’s material, or ignoring the label’s ventilation/contact-time instructions. If pans don’t come out, forcing them can warp metal and create “new grease traps” that are harder to clean next time.
Abrasive pads and metal tools can pit cookware surfaces and can also remove protective coatings, making residue harder to remove later.
Oven cleaners and degreasers often require specific dwell times; shortening or guessing can reduce performance and increase repeat scrubbing.
Cleaning a hot oven increases splatter and smoke because grease releases volatiles when heated.
– Using metal tools or abrasive pads: These can pit or scratch pans, especially stainless or any coated surface.
– Skipping material checks: “One cleaner fits all” isn’t true—some oven cleaners aren’t meant for certain finishes.
– Not following dwell time/ventilation rules: Oven cleaner fumes and reaction times matter; follow the label instructions rather than guessing.
– Cleaning while warm: Heat can make grease harder to remove and increase splatter and smoke.
Pros/cons: choosing between baking soda vs. oven cleaner
Here’s a simple trade-off view you can use when deciding whether to escalate.
| Approach | Pros | Cons / Limits |
|---|---|---|
| Hot soapy soak + baking-soda paste | Lower risk of coating damage; good for frequent maintenance; effective on sticky residue | May require repeat passes for heavy carbon layers |
| Label-approved degreasing oven cleaner | Stronger chemistry for deeply baked grease; faster breakdown when compatible | Requires ventilation, correct dwell time, and material compatibility checks |
Chemical safety principles to follow in 2026
Because many oven cleaners are caustic, treat them like you would any hazardous product: ventilate, wear gloves, and avoid mixing chemicals. According to the U.S. Department of Labor’s OSHA Hazard Communication Standard (29 CFR 1910.1200), employers and users should rely on Safety Data Sheets and label hazard information to reduce exposure risks (2012+ framework; compliance requirements have been in place for years).
A “don’t do this” reminder
Never mix oven cleaner with other cleaners unless the label explicitly allows it. Even “common household” ingredients can change reactions and increase risks. For chemical guidance, use the product SDS and any precautions listed there.
Verdict: the most reliable method (and who should skip it)
For most removable drip pans, the best balance of effectiveness and safety is: hot soapy soak first, then baking-soda paste scrubbing, and only then moving to an oven cleaner if needed. The tradeoff is that soaking can be messy (plan your cleanup path), and baking soda won’t always remove every layer of aged carbon without repeat passes.
Downsides: if your pans have a delicate coating and you accidentally use harsh chemistry or abrasives, you can strip the finish—making future cleaning harder. Skip escalation to strong oven cleaner when your drip pans’ coating/finish is unknown or not rated for caustic products; in those cases, follow your oven/pan manual or stick to the gentler method with more time and repetition.
The two-step method (hot soak + baking-soda paste) reduces the need for caustic cleaners because it performs grease softening before targeted scrubbing.
For coated drip pans, the safest path is label-compatible cleaning products and non-scratch tools to preserve the finish.
If drip pans are stuck, forcing removal can warp components and create grease-catching gaps that persist after cleaning.
– For most removable drip pans, start with hot soapy soak + baking-soda paste, then escalate only if the label and pan material allow it.
– Skip the stronger oven-cleaner route (and use extra caution) if your pans have an unknown coating/finish—use your oven/pan manual instead.
What to do if pans won’t come out easily
If the drip pans won’t remove, stop trying to force them and pivot. Use gentle methods for the accessible surfaces: soak only what you can reach in place, then clean with compatible non-scratch tools. Confirm your oven model’s guidance first—some designs allow partial removal, while others keep trays fixed for safety and heat containment.
Quick scan checklist (save this)
This checklist is built to reduce rework: it keeps you from skipping the steps that most often cause residue to “come back.”
Cooling first prevents grease splatter and increases scrubbing control, which reduces the temptation to use harsh abrasives.
Rinsing and drying thoroughly lowers the chance of odor and sticky residue recurring after reinstall.
| Step | What to do | Why it helps |
|---|---|---|
| Cool + protect | Gloves on; oven fully cooled | Prevents burns/smoke |
| Remove pans (if designed) | Slide out pans; check manual if stuck | Reaching corners matters |
| Hot soapy soak | Cover with hot water + dish soap | Softens grease |
| Baking-soda paste | Scrub greasy spots gently | Breaks down sticky residue |
| Rinse + dry | Rinse thoroughly and dry | Reduces odors and next-time smoke |
| Escalate only if needed | Use label-safe oven cleaner for the material | Tackles stubborn buildup |
| Avoid scratches | Use non-scratch tools on coated pans | Prevents damage |
Frequently Asked Questions
How do I clean oven drip pans without damaging the finish?
First, remove the drip pans from the oven and let them cool completely. Soak them in hot water mixed with dish soap, or use a baking soda paste (baking soda + a little water) for stuck-on grease. For tougher buildup, use a non-scratch sponge or soft scrub brush and avoid steel wool unless the manufacturer says it’s safe. Rinse well and dry fully before reinstalling to prevent odors and rust.
What’s the best way to remove baked-on grease from oven drip pans?
Start by scraping off loose debris, then soak the pans in hot, soapy water for 30–60 minutes. If grease remains, apply a thick layer of baking soda paste and let it sit 1–2 hours, then scrub and rinse. For heavy carbon buildup, try a dedicated degreaser formulated for oven parts, following the label’s contact time. Thoroughly rinse after cleaning so no cleaning residue bakes onto the oven next use.
Which cleaning method works best for greasy aluminum or stainless steel drip pans?
Aluminum pans often respond well to soaking and baking soda paste because they’re sensitive to harsh chemicals and abrasive pads. Stainless steel drip pans can typically handle slightly stronger degreasers and more vigorous scrubbing, as long as you avoid scratching the surface. Always check your owner’s manual for compatibility, especially if your drip pans have a nonstick coating. When in doubt, choose the gentlest method first and repeat the soaking step before moving to stronger cleaners.
Why do my oven drip pans smell even after wiping them?
Odors usually come from baked-on grease and residue that can keep heating up during broiling or roasting. Even if you can’t see the grime, thin layers of oil can remain in corners, seams, and drain areas. Use a soak + baking soda paste approach and scrub the edges and grooves thoroughly, then rinse and dry completely. If the smell persists, you may need a stronger oven-safe degreaser or a longer soak time.
How do I clean oven drip pans using a simple vinegar and baking soda routine?
Sprinkle baking soda over the drip pan, then add hot water and a small amount of vinegar to create fizzing that helps lift grease (don’t over-soak if the pan is sensitive to liquids—use enough to cover light residue). Let it sit for 30–90 minutes, then scrub with a non-scratch sponge. Rinse thoroughly, and wipe dry to prevent spotting or corrosion. This method is a convenient, low-odor option for routine oven drip pan cleaning and maintenance.
📅 Last Updated: October 16, 2026 | Topic: how to clean oven drip pans | Content verified for accuracy and freshness.
References
- Oven
- https://www.whirlpool.com/services/learn-about-appliances/cooking/oven-cleaning.html
- Product Support: Help Library | LG USA Support
- https://www.frigidaire.com/Owner-Center/Service-and-Support/Oven-Cleaning
- https://scholar.google.com/scholar?q=how+to+clean+oven+drip+pans Google Scholar
- https://scholar.google.com/scholar?q=oven+drip+tray+cleaning+baking+soda+vinegar+detergent+instructions Google Scholar
- https://scholar.google.com/scholar?q=range+drip+pan+cleaning+soak+hot+water+mild+detergent Google Scholar
