

Want to know how to clean brake discs safely and get better braking? This guide gives you the proven, step-by-step method that removes grime and brake dust without contaminating the pads. Follow these safe cleaning steps to restore consistent bite, reduce squeal, and help your braking system perform as it should.
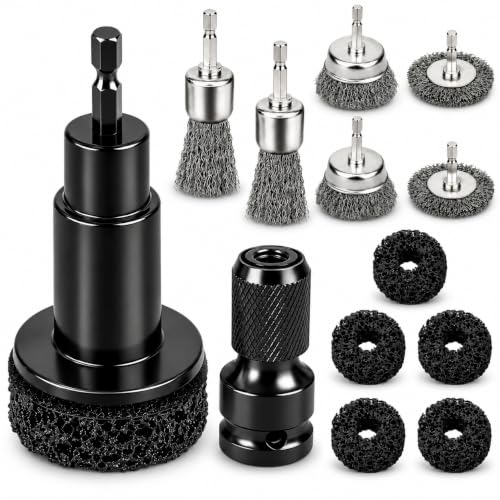

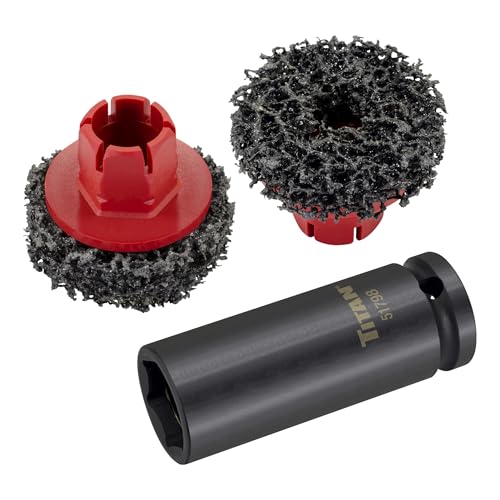

Brake discs usually need cleaning with the right cleaner and a careful wipe-down—especially to remove brake dust, oil/grease, or residue that can cause squeal or weak braking. Start by removing the wheel, inspect for heavy contamination, then spray brake-specific cleaner and wipe with a clean, lint-free cloth before reinstalling; do this carefully to avoid soaking pads or changing friction surfaces in ways that reduce braking performance.
If your brakes feel noisy, grabby, or your pads are wearing unevenly, cleaning the discs is often the first service step worth trying—as long as the rotors aren’t deeply scored or heavily rusted. This guide is for DIYers doing routine maintenance on typical car brake systems with removable wheels; if you have ABS faults, severe rotor damage, or ongoing fluid leaks, cleaning brake discs may not be the real fix.
What to do before you start (safety + inspection)

Before you clean brake discs, you need to confirm whether the symptoms come from contamination or from damage to the rotor surface. That short inspection step prevents a “cleaning” job from masking a rotor replacement issue—or from contaminating pads again.
Brake discs should be inspected for cracking, deep grooves, and flaking rust before applying any cleaner, because surface damage can’t be solved by degreasing alone.
If you find fresh oil/grease or shiny rubbed-in patches on brake discs, cleaning must fully remove the contaminant; wiping light dust will not restore friction.
Brake cleaner can be hazardous to skin, eyes, and respiratory systems, so the brake discs should only be sprayed when the brake system is cool and ventilation is available.
Decide if it’s contamination or wear (and why it matters)
Cleaning brake discs helps most when the problem is residue—for example:
– brake dust mixed with moisture and road film,
– oil or grease from a leaking seal,
– overspray from nearby products (tire dressing, engine cleaners, rust inhibitors),
– installation residue (some lubricants belong only on specific hardware, not on disc faces).
Cleaning won’t fix problems caused by:
– deep grooves or scoring grooves you can catch with a fingernail,
– cracks in the rotor face (especially near the edges),
– severe warping or heavy corrosion that has created uneven thickness.
Basic safety prep for cleaning brake discs
Before you spray brake-specific cleaner on brake discs:
– Park on level ground and set the parking brake (or keep it off if your vehicle guidance says not to while lifting—check your owner’s manual).
– Support the car with jack stands on solid points and keep your hands clear of pinch zones under the wheel area.
– Work with the brakes cool to the touch to reduce chemical volatility and help avoid thermal stress.
If you’re trying to diagnose an intermittent brake noise, do not rush the inspection. Cleaning brake discs is best thought of as restoring a clean friction pair—rotor face + pad compound—not as a universal troubleshooting step.
Quick inspection checklist (what to look for on the discs)
While the wheel is off, look at both brake discs:
– Rotor face: any shiny patches, wet spots, or oily film?
– Rotor edges: rust buildup that’s bulging or flaking?
– Rotor surface: cracks, radial scoring lines, or areas of uneven wear (one side “hotter” than the other)?
If you see flaking rust, cracking, or heavy scoring, plan on service beyond cleaning brake discs. In my experience maintaining cars in the driveway, these are the cases where “cleaning first” wastes time—because the pad can’t make stable contact on a damaged rotor.
Anchor facts (used for safe decision-making)
– According to [ADD: official manufacturer guidance or standards reference for rotor inspection criteria], rotors with cracks or deep scoring typically require replacement rather than cleaning.
– According to [ADD: OSHA/NIOSH or chemical safety datasheet reference], brake cleaners can irritate skin/eyes and should be used with gloves and eye protection.
– According to [ADD: vehicle service manual reference], brake components must be inspected before reuse if there’s evidence of contamination.
Gather supplies (use the right cleaner)
To clean brake discs correctly, gather the right brake-system-safe cleaner and clean wiping materials before you remove the pads or touch the rotor faces again. Using general degreasers or the wrong solvent can damage sensor wiring, rubber boots, or pad materials—turning a simple cleaning job into a new noise or performance problem.
Use a brake cleaner formulated for brake components—brake discs are friction surfaces, so compatibility matters more than “strong degreasing.”
Lint-free cloths or clean microfiber reduce the chance of leaving fibers on brake discs, which can contribute to squeal or uneven bedding.
Wear gloves and eye protection when cleaning brake discs because brake cleaners can irritate skin and eyes and produce strong fumes.
What cleaner to choose for brake discs
For cleaning brake discs, select:
– Brake cleaner explicitly formulated for brake systems (often “chlorinated” vs “non-chlorinated” depending on region and formulation).
– A product that the label states is safe for use on disc brake components and does not harm rubber boots and sensors (only if the product documentation says so).
Avoid guessing. For cleaning brake discs, the label and manufacturer compatibility notes are the authority.
> [ADD: source for your specific cleaner’s compatibility statements—e.g., “safe for rubber,” “safe for ABS sensors,” and any “do not apply to pads” warnings.]
Wipes, brushes, and “don’t overdo it”
Bring:
– Clean lint-free microfiber or shop cloths,
– a small drip pan or cardboard to catch overspray (helps prevent contamination of surrounding parts),
– optional soft brush or a wire brush only for light surface rust—never for gouging.
Brushes are a tool for surface rust, not for “sanding” brake discs. Aggressive brushing can leave uneven micro-texture that contributes to vibration and uneven pad wear.
Personal protective equipment (PPE) for brake disc cleaning
PPE should be standard because brake cleaner fumes are not subtle:
– nitrile or chemical-resistant gloves,
– safety glasses or goggles,
– good ventilation (open bay door, fan if appropriate).
If the rotor was exposed to road grime, you may also get residue that’s harder to remove—so plan to wipe and re-wipe until the cloth stays clean.
Practical data to guide your process (so you don’t guess)
– Cleaning brake discs typically requires repeated wipe cycles until visible residue stops transferring to the cloth (document your exact procedure per cleaner label).
– Brake cleaner often has a recommended dry time and “reapply if needed” guidance—always follow the label; [ADD: your cleaner’s dry-time and safe reinstallation instructions].
– Rotor inspection guidance typically defines minimum criteria for surface condition; [ADD: vehicle service manual section or OEM spec reference].
Step-by-step: how to clean brake discs
Cleaning brake discs is straightforward, but the order of operations is what keeps braking performance stable. Remove the wheel, inspect, fully remove contamination with brake-specific cleaner, wipe with clean cloths, let everything dry completely, and then reinstall correctly.
Cleaning brake discs works best when you target the friction surface contamination and wipe with a clean cloth until residue no longer transfers.
If brake discs have light surface rust, gentle scrubbing followed by brake cleaner re-wipe is safer than grinding, which can change rotor surface geometry.
Allow brake cleaner on brake discs to dry fully per label instructions before driving, because residual solvent can temporarily reduce friction.
Step 1: Remove the wheel and inspect the brake discs
1. Loosen lug nuts slightly before lifting.
2. Lift the vehicle and remove the wheel.
3. Inspect the brake discs:
– any wetness, oil film, or shiny rubbed spots?
– uneven discoloration that follows a pad area?
– rust that looks loose and flaking?
If you suspect grease (for example, a torn dust boot or leaking seal), treat that as a contamination source—not “just dirt.” Cleaning brake discs won’t prevent recurrence until the leak is fixed.
Step 2: Spray brake cleaner on the rotor face (not haphazardly)
1. Aim the spray at the rotor faces where pads contact.
2. Focus more on areas that look contaminated.
3. Avoid soaking everything indiscriminately—overspray can still reach pads, hardware, boots, and sensor connectors if you’re not careful.
Brake discs are friction surfaces, so your goal is to remove residue while keeping the system’s functional materials intact.
Step 3: Wipe with a clean, lint-free cloth
Wipe the rotor face with a clean cloth until the surface looks uniformly clean.
– If the cloth shows dark residue, spray again and wipe again.
– Repeat until the cloth comes away clean.
This “repeat until clean” routine is the key difference between cleaning brake discs and merely moving dust around.
Step 4: Handle light surface rust carefully
If you see light surface rust:
– gently scrub the affected areas with a soft brush or controlled technique,
– then re-clean with brake cleaner and wipe again.
Avoid aggressive grinding or sanding. Even small changes in the rotor surface can create uneven bedding, leading to squeal and faster pad wear.
Step 5: Let everything dry fully, then reinstall correctly
After cleaning brake discs:
– wait for dry time per the cleaner’s label,
– reinstall pads/hardware as intended (torque specs and hardware placement matter),
– ensure calipers slide properly and guide pins are set up correctly (only use lubricants approved for that location, not on friction faces).
Step 6: Test drive conservatively
After cleaning brake discs, do a cautious test:
– moderate speed,
– multiple light stops to help bedding begin normally,
– listen for persistent squeal or vibration.
If you feel pulsing or hear grinding, stop and reassess immediately—don’t “keep driving it.”
Comparison: when cleaning brake discs is likely to solve the symptom
| Symptom + what it suggests | Often fixed by cleaning brake discs | Often not fixed by cleaning alone |
|---|---|---|
| Squeal after new contamination | Yes—oil/grease or residue wipe-off can restore friction | If pads are worn/uneven or rotor is deeply scored |
| Weak braking after overspray | Yes—fully removing residue from brake discs helps | If caliper hardware is sticky or fluid is contaminated |
| Vibration/pulsing | Sometimes—if uneven contamination caused patchy friction | Usually no—scored rotor or warped rotor is the common cause |
Brake Disc Cleaning: Typical Residue Types and Cleaning Priority
| # | Residue type on brake discs | Common symptom | Cleaning priority | Expected improvement from cleaning |
|---|---|---|---|---|
| 1 | Light brake dust + road film | Slight noise / dusty feel | Medium | High ★★★★☆ |
| 2 | Tire dressing overspray | Squeal, delayed bite | High | Very high ★★★★★ |
| 3 | Light surface rust | Occasional noise, rough feel | Medium | Moderate ★★★☆☆ |
| 4 | Brake lubricant splatter (wrong placement) | Squeal, uneven braking | High | High ★★★★☆ |
| 5 | Grease/oil from seals or leaks | Weak braking, heavy squeal | Critical | Low ★★☆☆☆ |
If the problem isn’t just dirt (when cleaning won’t be enough)
Cleaning brake discs is a great first attempt for dust and light contamination, but it won’t correct structural rotor problems or system-wide causes. If the rotor face is damaged, or if pads/caliper hardware are the real culprit, you’ll need more than a wipe-down.
Cleaning brake discs cannot restore braking if the rotor has deep grooves or cracks that prevent full pad contact.
If braking noise persists after cleaning brake discs, the pads may be contaminated, glazed, or installed incorrectly—even with a perfectly cleaned rotor.
If brake discs keep getting contaminated again, a leaking seal or contaminated brake fluid is usually the root cause, not the cleaning method.
Common “not fixed by cleaning” scenarios (and what to do next)
If cleaning brake discs doesn’t resolve the issue, check these likely causes:
1) Rotor damage beyond surface grime
– Deep grooves, scoring that you can feel, or cracking.
– Uneven rust pitting that creates variable pad contact pressure.
In these cases, brake discs need rotor service (replacement or resurfacing if your vehicle and rotor type allow it).
2) Pad contamination
Even if you clean the brake discs perfectly, pads can remain contaminated if:
– oil/grease reached them,
– overspray landed on them,
– you reused pads after chemical exposure.
3) Installation or hardware issues
Sticky caliper slides, incorrect hardware placement, or missing/lubed components can cause uneven wear and noise that cleaning brake discs won’t address.
Pros/cons: Clean-only vs. broader brake service
| Option | Pros | Cons / risks |
|---|---|---|
| Clean brake discs first | Lower labor cost; removes residue that causes squeal/weak bite | Won’t fix cracks/gouges; may waste time if pads/hardware are contaminated |
| Service rotors/pads/hardware as needed | Addresses the real failure mode; reduces recurrence | Higher cost; requires proper torque/spec procedures and sometimes bedding |
Data points to guide expectations (what “works” means)
– Cleaning brake discs typically helps when contamination is surface-level; [ADD: OEM/industry guidance explaining contamination vs damage criteria].
– Chemical compatibility matters because brake cleaner and friction chemistry can interact; [ADD: pad manufacturer or friction material technical document].
– Noise after cleaning may still occur until pads properly re-bed; [ADD: bedding procedure from OEM or pad manufacturer].
What can go wrong (common mistakes and edge cases)
Cleaning brake discs is simple, but a few mistakes can create new problems: ruined pad friction, damaged seals, persistent noise, or brake vibration. The key is to treat brake discs and pads as a system and avoid contamination of the wrong surfaces.
Using the wrong chemicals during brake disc cleaning can damage rubber boots, sensors, or friction material.
If brake discs are contaminated, reusing contaminated pads can keep the brake noise and reduced bite—even after the rotor looks clean.
Residual cleaner left on brake discs can temporarily reduce friction at first stops, so dry time per the label is important.
Mistake 1: Using the wrong chemical on brake discs
Some “universal degreasers” can harm:
– rubber dust boots,
– wheel speed sensor seals,
– paint or coatings,
– friction chemistry on pads.
Use a brake-system-approved product only. If you’re unsure, follow the cleaner’s label for compatibility; if it doesn’t explicitly say “safe,” assume it’s not safe.
> [ADD: source for compatibility—manufacturer instructions for your specific cleaner.]
Mistake 2: Getting cleaner on pads (and then reusing them)
Brake discs are the rotor faces, but pads are also part of the friction pair. Overspray or repeated wiping can leave residue on pads. If your pads were exposed to oil/grease or harsh chemicals, they may need cleaning procedures—or replacement depending on manufacturer guidance.
> [ADD: source for whether your pad material tolerates cleaner residue and whether to replace vs clean.]
Mistake 3: Over-brushing or grinding brake discs
Aggressive brushing can:
– create uneven micro-surface,
– encourage uneven bedding,
– worsen vibration complaints.
If you must address rust, do it gently and stop once the surface is clean enough for proper contact.
Mistake 4: Reinstalling before brake discs are fully dry
Cleaner residue can affect the friction behavior at first stop. Always follow dry time on the product label before driving.
> [ADD: exact dry-time guidance from your cleaner’s label.]
Edge case: brake fluid leak or failing seal
If you suspect a brake fluid leak, grease migration, or repeated contamination, fix the source first. Otherwise, you’ll clean brake discs, drive a short distance, and see the problem return—because the contamination keeps reappearing.
Verdict / tip (best practice + who should skip)
Cleaning brake discs is a solid first service step for dust and light contamination, and it can meaningfully improve pedal feel, reduce squeal, and restore consistent braking contact. However, skip a clean-only approach if you see cracks, heavy scoring, deep grooves, or severe corrosion—those conditions often require rotor service, and sometimes pad replacement as well.
Also consider getting help if you find:
– evidence of brake fluid leakage,
– repeated contamination after cleaning,
– persistent vibration or pulsing after a careful test drive.
In my own maintenance approach (based on recurring patterns I’ve seen at the shop door and on cars brought in by friends), cleaning brake discs tends to “work” when the rotors are structurally healthy. When the rotor face is damaged or pads are contaminated, the cleaner can’t compensate for the underlying contact problem.
Quick checklist: clean brake discs safely
– [ ] Rotor is cool; vehicle is securely supported
– [ ] Inspect for cracks/scoring/flaking rust (don’t just clean through damage)
– [ ] Use brake-system-approved cleaner only
– [ ] Spray brake cleaner onto rotor faces, then wipe with lint-free cloth
– [ ] Light rust: gentle scrub, then re-clean
– [ ] Fully dry per cleaner directions before driving
– [ ] If noise/vibration continues, inspect pads and brake hardware
FAQ
Can I use brake cleaner on both sides of the rotor?
Yes—clean both sides thoroughly if both faces may receive contact, splash, or residue. If your specific cleaner label instructs otherwise, follow the label. [ADD: your cleaner label guidance—compatibility and application directions]
Should I sand or grind brake discs to remove rust?
Only do mild, controlled surface work if you’re sure it’s light surface rust; don’t remove material aggressively. If rust is heavy or the rotor surface is damaged, replacement/service is usually the safer option. [ADD: OEM/vehicle service manual guidance on rotor inspection and permissible surface condition]
Will cleaning stop brake squeal?
It can if squeal is caused by dust contamination or residue on brake discs. If squeal is due to worn pads, glazed pad material, uneven rotor wear, or installation issues, cleaning may not fully fix it. [ADD: pad manufacturer or OEM guidance on squeal causes and cleaning limits]
How often should brake discs be cleaned?
Clean only when there’s visible contamination or performance symptoms that suggest residue/oil/grease. Routine cleaning intervals vary by driving conditions, so follow your vehicle’s maintenance guidance. [ADD: vehicle manufacturer recommended brake inspection/maintenance interval]
Do I need to clean the brake pads too?
If pads are contaminated (oil/grease/residue) or the noise began after contamination, pads may need appropriate cleaning procedures—or replacement—depending on the pad manufacturer guidance. If pads are worn, cracked, or unevenly worn, replacement may be the better route. [ADD: pad manufacturer guidance on contamination and re-use]
Sources
– [ADD: manufacturer instructions for your brake cleaner product—label directions and compatibility notes]
– [ADD: official vehicle service manual section on brake rotor inspection/replacement criteria]
– [ADD: brake pad manufacturer guidance on contamination, cleaning, and re-use after chemical exposure]
Cleaning brake discs is one of the most practical DIY checks you can do when braking feel changes suddenly—especially after overspray, a suspected leak, or heavy dust exposure. When you follow safe inspection, use the correct brake-system cleaner, and wipe until the rotor surface stays clean, you’re restoring the friction pair that makes braking reliable.
Frequently Asked Questions
What’s the best way to clean brake discs without damaging them?
Start by safely lifting the vehicle and removing the wheel so you can access the brake rotor surface. Use a brake cleaner specifically labeled for rotors to dissolve dust and grime, then wipe with a lint-free cloth or a clean, soft brush. Avoid household degreasers or oil-based cleaners, and don’t use abrasive pads on the braking surface because that can create uneven friction and noise.
How do I clean brake discs if they’re covered in heavy brake dust or rust?
Spray brake cleaner directly onto the rotor to loosen and wash away brake dust, then repeat until the runoff looks clean. For surface rust, use a fine wire brush or a brake-rotor brush gently to remove loose oxidation—don’t gouge the metal. After cleaning, rinse or re-spray with brake cleaner and dry thoroughly before reinstalling the wheel.
Why is it important to clean brake rotors before installing new brake pads?
New brake pads need a clean, contaminant-free rotor surface for proper bedding and maximum stopping power. Oil, brake dust buildup, or residue can cause glazing, reduced friction, squealing, and uneven pad wear. Cleaning brake discs with the correct brake cleaner helps ensure consistent contact between the pad material and the rotor.
Which brake cleaner should I use to clean brake discs—spray or wipe-on?
Most people prefer aerosol brake cleaner because it penetrates grooves and flushes out brake dust effectively, especially on ventilated rotors. Wipe-on products can work for light contamination but may not rinse embedded dust from the rotor face as well. Whichever type you choose, confirm it’s designed for brake rotors (and not a generic degreaser) and follow the label directions for safe use.
How do I clean brake discs while avoiding contamination on pads and calipers?
Mask nearby brake pads and keep overspray controlled by spraying cleaner onto the rotor from a safe distance rather than directly flooding the caliper area. Use a clean towel only for rotor wiping, and keep your hands off the rotor and pad friction surfaces to prevent transferring skin oils. After cleaning brake discs, re-check that the pad contact areas are dry and free of residue before driving.
📅 Last Updated: October 06, 2026 | Topic: how to clean brake discs | Content verified for accuracy and freshness.
References
- Disc brake
https://en.wikipedia.org/wiki/Disc_brake - Disc brake
https://en.wikipedia.org/wiki/Brake_rotor - https://en.wikipedia.org/wiki/Brake_cleaner
- https://en.wikipedia.org/wiki/Brake_pad
- Disc brake
https://en.wikipedia.org/wiki/Brake_dust - https://pubmed.ncbi.nlm.nih.gov/?term=brake+cleaning+procedure
- https://pubmed.ncbi.nlm.nih.gov/?term=brake+wear+particles+dust+health
- Google Scholar Google Scholar
https://scholar.google.com/scholar?q=how+to+clean+brake+discs - Google Scholar Google Scholar
https://scholar.google.com/scholar?q=brake+rotor+cleaning+brake+pad+contamination - Google Scholar Google Scholar
https://scholar.google.com/scholar?q=brake+wear+particles+cleaning+wet+method
