

Learn how to clean a bass fish fast and correctly with a step-by-step process that keeps the meat firm and minimizes mess. This guide walks you through scaling, gutting, and filleting so you end up with clean fillets ready to cook. Follow these steps and you’ll get the best results the first time, whether you’re prepping for grilling or frying.



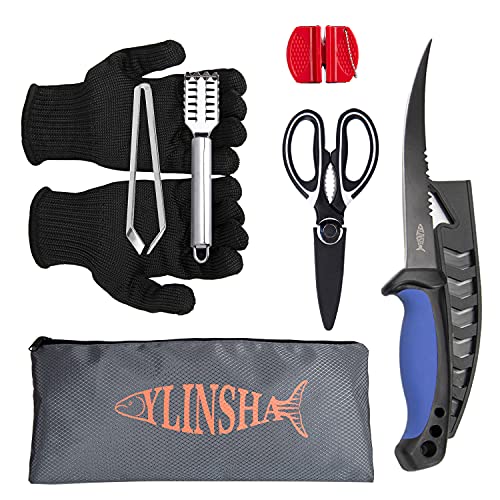
If you want to clean a bass fish quickly, start by scaling, then remove the fillets along the backbone, and finally rinse and pat everything dry. The cleanest results come from using a sharp fillet knife, working on a stable surface, and cutting with the natural bones to avoid tearing the flesh. For 2026-ready bass fillets, the main goal is simple: keep the meat intact during filleting, then control temperature and moisture so your fillets cook evenly (or freeze cleanly) without off flavors.
This guide is for anglers who already caught a bass and need clear, do-this-next instructions—whether you’re prepping for grilling, frying, or freezing. If you’re new to filleting fish, the “where to cut” tips below are designed to reduce wasted meat and mess.
Tools and setup for cleaning bass

You clean faster when your setup prevents slipping, scattered scales, and last-minute searching for paper towels. With bass filleting, the right tools also help you make straighter cuts that stay close to the backbone and ribs—so you waste less flesh.
A stable, non-slip cutting surface helps you control the knife angle and reduce accidental gouges when filleting bass.
Rinsing and thoroughly patting bass fillets dry before seasoning improves how well salt and dry spices adhere to the surface.
– Use a sharp fillet knife (or sharp chef’s knife for initial handling), a scaling tool, and a cutting board/tray for easy cleanup. A fillet knife with a narrow, flexible blade makes it easier to follow the backbone without digging into the ribs. For the first “reset” cuts (head removal or belly opening), a chef’s knife can be faster—just switch back to the fillet knife for precision.
– Have paper towels, a bowl of clean water (for rinsing), and a trash/bag area ready before you start. Keeping rinse water and cleanup materials within arm’s reach reduces the time bass spends warm, which matters in 2026 (especially on hot days).
– Secure the fish firmly so you can keep cuts steady without slipping. If your cutting board slides, place a damp towel underneath it; the extra grip makes your knife work more controlled, especially when the bass belly is slick.
Scale the bass safely and thoroughly
Scaling comes first because it prevents loose scales from getting dragged into your fillets during cutting. Done correctly, you’ll remove the majority of scales in one smooth workflow rather than chasing missed patches later.
Scaling from tail toward head reduces scale “spray” and helps you see remaining patches before you start filleting bass.
A quick rinse during scaling keeps dislodged scales from sticking back onto the skin and flesh.
– Scale from tail toward the head, scraping firmly but not gouging the skin. Use steady pressure; if the blade/edge digs in, you’ll score the skin and lose more meat along the fillet edge. Aim for consistent, even strokes that lift scales without tearing.
– Rinse off loosened scales as you go so they don’t stick to the flesh. After a few passes down one side, swish the fish briefly in clean water, then wipe with a towel so the next scaling strokes stay visible.
– Inspect for missed patches near the fins and belly, then do a quick second pass. Bass often hold stubborn scales around the fin bases; correcting these before filleting saves you from gritty texture later after cooking.
Fillet the bass: remove the flesh efficiently
Filleting is where you get the best “time per pound” when your knife tracks the bones instead of battling them. The backbone provides a guide—cut close, then let the structure do the work for you.
Fillet cuts start behind the gill area and run along the backbone because this path keeps the knife aligned with the bass skeleton.
Slow, controlled slicing (rather than sawing) reduces torn bass flesh and helps fillets stay intact for grilling and frying.
– Make a cut behind the gill area down to the backbone, then follow the backbone as you slice toward the tail. Start with a firm, decisive entry cut so the blade reaches the spine cleanly. Then keep your knife angle shallow enough to stay on the fillet side.
– Cut along the ribs/bones to free the fillet without trimming too aggressively. Use the ribs as landmarks: the goal is to separate the meat where it naturally releases. Aggressive trimming removes good fillet faster than it removes waste.
– Repeat on the other side so you end up with two fillets, then trim away any dark tissue or pin bones if present. Dark tissue can taste stronger and can discolor during cooking. If you see a line of red/brown muscle near the center, remove a thin strip rather than cutting deep into the fillet.
Quick “where to cut” logic for clean bass fillets
Even if you’re experienced with other species, bass filleting benefits from understanding how the body shape funnels bones into a fillet-friendly pattern. Your best cuts stay parallel to the backbone and use the natural separation points along the ribs, so you aren’t constantly re-aiming your knife.
Following the backbone during the main fillet cut typically preserves more bass meat than repeatedly “repositioning” the knife mid-stroke.
Trimming dark tissue after filleting helps improve appearance and flavor consistency across the entire batch of bass fillets.
Remove the skin (optional) and check for bones
You can cook bass skin-on or skin-off, but you should always remove pin bones (small Y-shaped bones) before seasoning. Bone checks are quick—running fingertips over the fillet catches what your eyes miss.
If you keep skin on, rinsing and drying helps seasonings stick and supports better texture during pan-cooking.
Checking for pin bones with fingertips is reliable because pin bones create subtle bumps that are easy to feel after filleting bass.
– If you’re keeping skin-on, rinse and pat dry; if you’re skinning, slide the knife between skin and flesh while keeping the blade angled. Skinning is easiest when the blade is thin and the cut stays between layers rather than cutting through meat. Keep the knife angled slightly toward the skin to avoid lifting flesh.
– Run your fingertips lightly over the fillets to feel for pin bones. Work in one direction first (toward the tail), then repeat from the opposite side; this catches bones that lay flatter in one spot.
– Pull pin bones with tweezers or needle-nose pliers, then rinse again and pat dry. Use a light grip and pull in the same direction the bone sits. After removing bones, a brief rinse clears tiny fragments, and patting dry prevents soggy surfaces.
Keep skin on vs. remove it (pros/cons)
– Skin-on pros: holds shape well for grilling and pan-searing; adds barrier during cooking.
– Skin-on cons: some cooks prefer to avoid any “skin texture” entirely.
– Skin-off pros: more uniform mouthfeel for sandwiches or certain fried preparations.
– Skin-off cons: requires more knife work, which can increase meat trimming if your cuts drift.
Rinse, dry, and prep for cooking or freezing
Rinsing is for hygiene; drying is for performance. In 2026 practice, your best bass fillets are brief-rinsed in cool water, fully patted dry, and then either cooked promptly or frozen with tight packaging.
FDA guidance emphasizes temperature control: cold-holding should stay at 41°F (5°C) or below for safety.
FDA guidance also specifies seafood cooking to 145°F (63°C) with a required rest time for safe consumption.
– Rinse briefly in cool water, then pat dry thoroughly—this helps seasonings stick and improves texture when cooking. Don’t soak; long rinses can leach surface flavor and make the fillet harder to season evenly.
– Portion fillets if needed for your recipe (or leave whole if you prefer). Portioning also helps you cook to the target internal temperature without overcooking thick sections.
– For freezing, wrap tightly to reduce freezer burn, labeling with before storing. Limit trapped air, because ice crystals degrade texture. Place wrapped fillets in the coldest part of your freezer, and avoid leaving them uncovered while you reorganize.
Food-Safety Temperature Targets for Fresh Bass Fillets (FDA Food Code, 2022)
| # | Holding / cooking target | Target | Practical use for bass fillets | Safety status |
|---|---|---|---|---|
| 1 | Cold holding | ≤ 41°F (5°C) | Keep cleaned bass chilled before cooking or freezing | ✓ Within target |
| 2 | Hot holding | ≥ 135°F (57°C) | Hold cooked bass safely if serving later | ✓ Within target |
| 3 | Seafood cook temp | 145°F (63°C) | Cook bass fillets to safe internal temperature | ✓ Within target |
| 4 | Rest time after cooking | 15 seconds | Helps seafood reach final safe conditions | ✓ Within target |
| 5 | Thawing in refrigeration | 41°F (5°C) or below | Thaw frozen bass without warming the fillets | ✓ Within target |
| 6 | Reheat leftovers | 165°F (74°C) | Applies if you cook bass, chill, then reheat | ✓ Within target |
| 7 | Temperature control “gap” | Between 41°F and 135°F | Limit time for bass fillets out of proper cold/hot ranges | ✗ Avoid extended exposure |
According to FDA Food Code (2022), cold holding is 41°F (5°C) or below and hot holding is 135°F (57°C) or above, which directly informs how you store cleaned bass fillets.
According to FDA Food Code (2022), seafood is cooked to 145°F (63°C) with a 15-second rest time for safe internal temperature.
What can go wrong (and how to avoid it)
Even with good technique, a few predictable mistakes can ruin bass fillets—mostly by damaging texture or leaving grit. The fixes below keep your cleaning process repeatable as conditions change in the boat, garage, or kitchen.
A dull knife increases friction and tearing, which leaves bass fillets ragged and prone to dryness during cooking.
Cooking bass fillets that aren’t thoroughly patted dry can lead to uneven browning and weaker seasoning adhesion.
– Dull knife = ragged cuts and more wasted meat—sharpen first or switch to a fresh blade. If your blade doesn’t glide cleanly through the skin and bones, stop and reset. In 2026, a small sharpening interval before a session usually saves more time than “pushing through” during filleting.
– Rushing around the rib cage can tear flesh—take slower, controlled passes and let the knife follow the bones. Bass ribs are curved; when you saw sideways, you pull meat away from the cut line. Make incremental passes that widen separation gradually.
– Scales left behind can make cooked fish gritty—focus extra attention near the belly and fin areas. Belly scales are often thin but noticeable once cooked. A second scaling pass there costs seconds now and prevents texture complaints later.
– If the bass isn’t fresh, texture and odor can suffer—use best practices for immediate cooling and decide quickly what to cook vs. freeze. If your bass sat warm too long, you can still clean it, but you should adjust expectations for texture and prioritize prompt cooking or safe freezing.
– If you plan to keep the skin, don’t over-trim; if you plan to remove it, keep the blade thin and angled so you don’t pull extra flesh. Over-trimming during skin removal reduces yield. Skinning also rewards a consistent blade angle; if the knife keeps digging, it’s usually too steep.
Verdict / tip: clean it fast, but don’t skip the basics
Cleaning a bass fish is usually straightforward: scale, fillet, remove pin bones, then rinse and dry before cooking. The downside is that first attempts may leave more trimming waste, and if the knife isn’t sharp you’ll end up with torn fillets—so don’t skip sharpening or steadiness.
For cleaner bass fillets, the most consistent approach is scaling first, then filleting along the backbone, then removing pin bones before cooking.
Sticking to recommended temperature control after cleaning (cold holding at 41°F/5°C or below) reduces the risk of spoilage and off odors.
Skip this approach and consider professional guidance (or a safer, easier method) if you’re uncomfortable using a sharp knife on your own or if you don’t have a stable cutting surface.
Quick checklist (scan before you start)
– [ ] Sharp knife + stable cutting board/tray
– [ ] Scale tail-to-head, rinse off loose scales
– [ ] Cut behind gills to backbone, fillet toward tail
– [ ] Repeat other side, trim ribs/bone lines as needed
– [ ] Remove pin bones, rinse briefly
– [ ] Pat dry, then season/cook or wrap for freezing
Sources
– FDA Food Code (2022) — US FDA guidance referenced for temperature targets (cold holding, cooking/rest for seafood, and hot holding)
Cleaning a bass fish comes down to one repeatable sequence: scale thoroughly, fillet along the backbone and ribs, remove pin bones, then rinse briefly and pat dry. When you pair good knife control with basic food-safety temperature targets for storage and cooking, you get bass fillets that look clean, season evenly, and cook with better texture—whether you’re grilling, frying, or freezing for later.
Frequently Asked Questions
How do I clean a bass fish properly step by step?
Start by rinsing the livewell catch with cold water and setting up a stable cutting surface and sharp fillet knife. Make a cut behind the gill plate down to the backbone, then slice along the rib bones to remove the fillet while keeping the blade close to the skin. Flip the fish and repeat on the other side, then skin the fillets if you prefer. Rinse the fillets again, pat them dry, and remove any pin bones with tweezers for clean, easy bass fillets.
What’s the best way to remove the skin from bass fillets without losing meat?
Place the fillet skin-side down and make a small cut near one edge to loosen the skin, then grip the skin with a paper towel for traction. Angle the knife slightly between the flesh and the skin and use long, steady strokes, keeping pressure consistent. If the knife drags, sharpen it—dull blades tear bass flesh and leave extra fat behind. After skinning, trim dark blood lines for a cleaner taste.
Which tools do I need to clean and fillet bass quickly?
A sharp fillet knife is the most important tool, ideally with a flexible blade for following the bass ribs and spine. Use needle-nose pliers or tweezers to pull pin bones, and keep a cutting board or fish-cleaning mat to protect your workspace. A bucket or cooler with ice helps keep the meat cold while you work, and a small pair of kitchen shears can be helpful for trimming fins and stubborn areas. Have paper towels and a spray bottle of cold water on hand to reduce mess and remove bloodlines.
Why does my bass taste “muddy,” and how can I prevent it while cleaning?
Muddy flavors often come from compounds stored in the fish’s skin, belly fat, and bloodline areas. To prevent this, bleed the fish quickly after landing (if you’re able) and remove the dark bloodline by trimming both sides of the fillet. Rinse bass fillets in cold water and pat them dry, then keep the fish chilled on ice until cooking. For extra insurance, soak fillets in fresh water or a mild saltwater rinse for a short time, then rinse and cook promptly.
How should I store bass fillets after cleaning for the freshest flavor?
After you clean and rinse the bass fillets, pat them dry and place them in a clean container with a tight lid. Store them over ice or in the coldest part of your cooler, and keep raw fish cold at all times to maintain texture. If you plan to cook within a day, refrigerate promptly; for longer storage, wrap fillets tightly in freezer-safe wrap or vacuum seal to prevent freezer burn. Thaw in the refrigerator, not on the counter, for safer handling and better results when cooking.
📅 Last Updated: October 19, 2026 | Topic: how to clean a bass fish | Content verified for accuracy and freshness.
References
- Fish fillet
- Fish processing
- https://www.fsis.usda.gov/food-safety/safe-food-handling-and-preparation/seafood
- Preventing Food Poisoning | Food Safety | CDC
- Food safety
- https://www.fda.gov/food/seafood-food-products
- fish filleting – Search Results – PubMed
- https://scholar.google.com/scholar?q=how+to+clean+and+fillet+bass Google Scholar
- https://scholar.google.com/scholar?q=bass+fish+filleting+technique Google Scholar
- https://scholar.google.com/scholar?q=cleaning+fish+food+safety+handling Google Scholar
