

You can remove dust and debris from a keyboard using compressed air in about 10 minutes, without taking it apart. Start by powering off and unplugging the device, then use short bursts of air while holding the keyboard at an angle to let loosened particles fall out. With a can of compressed air and a soft brush or microfiber cloth for final cleanup, you can restore smoother key feel and reduce buildup safely.
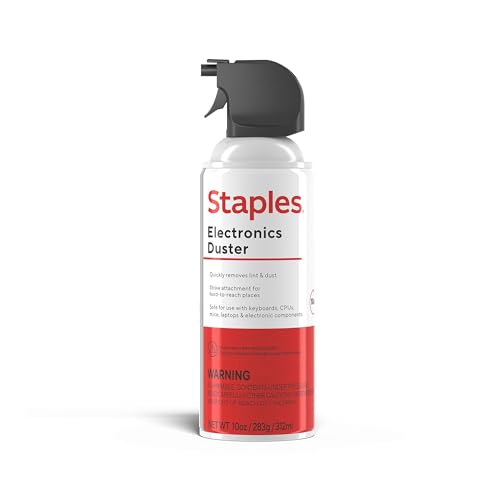

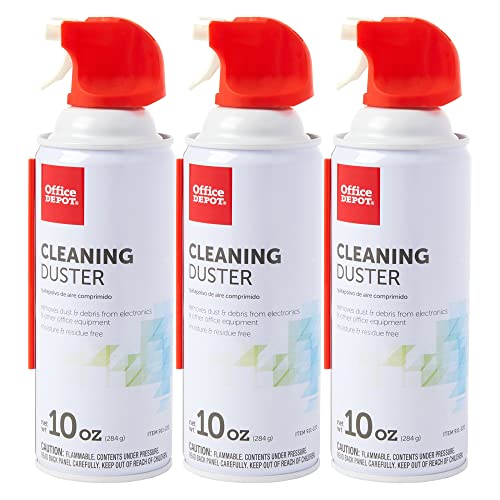
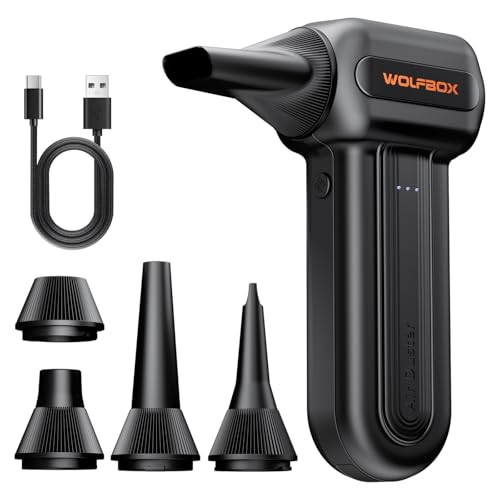
Compressed air is the fastest way to clear dust and crumbs from between keyboard keys—use short bursts, keep the can upright, and avoid spraying any liquid propellant. After you’ve blown out the debris, wipe key surfaces with a lightly damp microfiber cloth, and only do deeper keycap cleaning if your keyboard is designed for it.
This guide is for anyone dealing with visible dust under keys, sticky grime on keycaps, or a keyboard that’s started to feel “gunky.” It works for most standard keyboards, including many mechanical and membrane models—though some specialty keyboards may need different handling.
What You’ll Need (and What to Avoid)

Compressed air works best when you have the right accessories on hand—and the right boundaries for where not to apply force or liquids. Start with a plan for external cleaning (between keys and on key surfaces) and treat the keyboard’s internals as off-limits.
– Compressed air canister (held upright) and a microfiber cloth for wiping surfaces
– Optional: isopropyl alcohol (for stubborn residue on keycaps only, not inside switches)
– Avoid soaking the keyboard, using wet cleaners directly on it, or tilting the can upside down
Common Duster Propellants: Normal Boiling Points (°C)
| # | Propellant | Typical use in dusters | Normal boiling point | Condensation/mist risk ★ |
|---|---|---|---|---|
| 1 | 1,1-Difluoroethane (R152a) | Electronics dusting cans | -24.7 °C | ★★★☆☆ |
| 2 | Tetrafluoroethane (R134a) | Electronics dusting cans | -26.3 °C | ★★★☆☆ |
| 3 | Dimethyl ether | Aerosol dusters (varies) | -24.8 °C | ★★★★☆ |
| 4 | Sulfur hexafluoride (SF₆) | Specialty electronics use | -64.0 °C | ★★☆☆☆ |
| 5 | Carbon dioxide (CO₂) | Some duster products | -78.5 °C | ★☆☆☆☆ |
| 6 | Nitrogen (N₂) | Inert gas dusting (bulk) | -195.8 °C | ★☆☆☆☆ |
| 7 | Trifluoromethane (R23) | Specialty applications | -82.1 °C | ★☆☆☆☆ |
The takeaway for keyboard cleaning in 2026: keeping the can upright reduces the odds of the propellant turning into a liquid mist. That’s the core reason compressed air instructions consistently warn against tilting.
Prep the Keyboard for Cleaning
Before you blast debris with compressed air, you need to prevent power issues and help gravity do the work. The fastest, safest approach is to disconnect power first, then angle the keyboard so loosened crumbs fall away rather than back onto keycaps.
– Unplug the keyboard or power it off (and disconnect if it’s wireless) before you blow anything out
– Turn the keyboard at an angle that lets debris fall away from the keys
– If there’s loose debris on the surface, gently shake or tap first to reduce what you’ll blow deeper
Start by unplugging a wired keyboard or powering down the device before using compressed air. For wireless keyboards (Bluetooth or dongle-based), disconnect from the system first—this avoids any unexpected behavior if propellant residue ever reaches openings near the connector.
Angle matters for compressed air cleaning. Hold the keyboard slightly tilted so dust and crumbs migrate away from the key gaps; if you keep it flat, gravity loses the battle and you can push grit around instead of removing it.
If you see visible crumbs on top of keys, do a gentle shake first. This shortens the compressed air session and reduces the chance you end up blasting larger food bits further inside the keyboard assembly.
How to Use Compressed Air Safely (Step-by-Step)
You’ll get the best results when compressed air is used in controlled, repeatable bursts—never as a continuous stream. For external keyboard cleaning, method and direction are more important than how strong the blast feels.
– Use short bursts (instead of one long spray) and keep the can upright to prevent moisture spray
– Aim between keys and in corners, moving across the keyboard methodically
– After a few passes, pause and check whether more debris is still loosening before continuing
Short bursts protect the keyboard from two risks: (1) pushing debris deeper between switch housings, and (2) encouraging condensation or liquid propellant release if the can cools or tilts. With compressed air, “less time in one spot” usually cleans more effectively than “one long blast.”
Aim between keys and along the edges of the key rows where dust collects. Work methodically—move left-to-right and top-to-bottom, pausing every few passes. After each pause, visually check whether crumbs are coming loose. If nothing moves, keep wiping rather than escalating the compressed air pressure with repeated blasting.
Extra care for different keyboard types
Compressed air technique changes slightly depending on how your keyboard is built, even when the same goal—removing under-key dust—remains the same.
– Mechanical keyboards: consider whether keycaps come off easily and safely before doing deeper cleaning
– Membrane/laptop keyboards: avoid aggressive angles and repeated blasting in one spot to reduce risk of pushing grime further in
– If your keyboard has removable keycaps, follow the manufacturer’s guidance for what’s safe to remove
For mechanical keyboards, check whether keycaps are designed for removal (for example, many use a consistent pull force and standard layouts). If you do remove keycaps, do it carefully so springs and stabilizers don’t become misaligned. Compressed air can clear dust from switch areas, but it doesn’t dissolve sticky residue—wiping is still necessary.
For membrane and laptop keyboards, reduce aggressiveness. A steep angle plus repeated compressed air can drive grime toward seams and internal openings. If your keyboard is thin and the key deck is close to the electronics, use fewer bursts per section and rely more on gentle wiping afterward.
Wipe the Keys and Remove Sticky Grime
Compressed air clears loose debris, but it doesn’t fix stickiness—so the wipe step is where your keyboard goes from “clean-looking” to “actually usable.” After blowing out dust, wipe key surfaces with a lightly damp microfiber cloth, then allow complete drying before powering back on.
– Lightly wipe key surfaces with a microfiber cloth—use minimal moisture
– For sticky spots, apply cleaner to the cloth (not directly onto the keyboard) and wipe gently
– Let everything fully dry before reconnecting or powering on
Use microfiber because it captures fine particles without scratching most keycap coatings. “Lightly damp” matters: too much moisture increases the chance that cleaner migrates into gaps. In my own maintenance workflow, I treat microfiber wipes as the final pass for compressed air cleaning—because it’s the step that addresses skin oils, beverage residue, and partial grime layers that blowing alone can leave behind.
If you use isopropyl alcohol, use it thoughtfully. Apply alcohol to the cloth first, wipe gently, and keep it external—don’t flood seams or spray directly into the keyboard. For disinfecting guidance, CDC commonly recommends alcohol solutions for cleaning hard, non-porous surfaces (for example, 70% isopropyl alcohol is a common effective concentration)
Finally, dry time is not optional. If you’re cleaning in late 2026 on a humid day, drying can take longer than you expect. Wait until the key surfaces feel completely dry to the touch before reconnecting.
What Can Go Wrong (Common Mistakes to Watch for)
Even the right method—compressed air—can create problems when technique slips. Most issues come from moisture spray, excessive blasting, or cleaning the keyboard while it’s still powered.
– Spraying upside down can release liquid propellant that may leave residue or damage internals
– Blasting too long in one area can push debris deeper instead of clearing it out
– Cleaning without unplugging can create risk if liquid or condensation finds its way where it shouldn’t
– If keys feel stuck or the keyboard is malfunctioning, compressed air alone may not solve the underlying issue
The most common failure mode is tilting the can. When compressed air isn’t upright, propellant can condense into a liquid mist; that liquid can leave residue that feels tacky, especially on translucent or coated keycaps.
Second, long continuous bursts can move debris from one gap to another. Instead of clearing, you can pack particles under adjacent keys. That’s why the “pause and check” habit is central to safe compressed air use.
Third, power state matters. A keyboard that’s on increases risk if any condensation reaches ports or circuitry. Unplugging or powering down before compressed air use is one of the easiest safeguards.
Finally, if keys are stuck mechanically (not just dirty), compressed air may not fix the root cause. Sticky key switches can require keycap removal, careful internal cleaning, or service—especially if the keyboard experienced a spill and residue hardened.
Verdict: When Compressed Air Works (and When It Doesn’t)
Compressed air works when your keyboard problem is primarily loose dust, crumbs, and general under-key buildup—and it’s usually faster than partial disassembly. Here’s why: compressed air has enough force to remove dry debris, but it doesn’t reliably dissolve sticky spills, sugar-like residue, or oils that bond to keycap surfaces.
Compressed air is also less risky than aggressive liquids when you follow the upright, short-burst technique, which manufacturers emphasize for moisture protection. For alcohol-based cleaning on external surfaces, many manufacturers and public health guidance recommend using alcohol on hard surfaces in controlled amounts
When you should skip relying on compressed air alone:
– If a spill dried into residue, start with wiping and targeted keycap cleaning (when safe)
– If keys are electrically malfunctioning (random inputs) after cleaning, stop and troubleshoot per the keyboard manufacturer
– If you notice corrosion, discoloration, or persistent sticky texture after wiping, stop compressed air and consider professional cleaning or warranty service
Compressed Air vs. Wiping vs. Keycap Removal (quick decision)
Verdict in one line for your keyboard: use compressed air first for loose debris, then wipe for stickiness, and only remove keycaps if your keyboard’s design and manufacturer guidance support it.
Quick Checklist (Scan & Save)
Compressed air cleaning is simple—but consistency is what prevents messy outcomes. Use this scan-and-save list before you start, while you clean, and right before you reconnect power.
– [ ] Unplug/power off the keyboard (and disconnect wireless)
– [ ] Hold the compressed air can upright
– [ ] Use short bursts between keys; don’t blast continuously
– [ ] Wipe key surfaces with a lightly damp microfiber cloth
– [ ] Allow full drying time before reconnecting
Sources
–
–
Compressed air is the quickest way to clear dry dust and crumbs from under your keys—provided you use upright, short bursts and then finish with a careful microfiber wipe. If your keyboard feels sticky, prioritize wiping (and keycap cleaning only when supported), because compressed air alone won’t remove oils, spills, or baked-on residue. Follow the checklist, allow full drying time, and you’ll usually restore a keyboard’s feel and responsiveness without opening it up.
Frequently Asked Questions
How do you clean a keyboard with compressed air without damaging it?
Turn off and unplug your keyboard (or power down your laptop) before using compressed air. Hold the can upright and use short bursts from a few inches away to avoid forcing liquid propellant onto the keys. Angle the keyboard so debris can fall out, and stop if you notice moisture or condensation.
What’s the best way to remove dust and crumbs from between keyboard keys using compressed air?
Flip the keyboard over or tilt it at an angle and spray compressed air between the keys in sweeping passes. Focus on areas with visible buildup, such as around the spacebar and enter key, using brief bursts to dislodge particles. Finish by wiping the surface with a microfiber cloth to pick up loosened dust.
Why should you avoid holding the compressed air can upside down when cleaning a keyboard?
When the can is inverted, compressed air products can release liquid or propellant instead of air, which can damage switches and leave residue. This can cause keys to stick or create corrosion over time. Keeping the can upright helps ensure you’re using clean, dry air to blow out debris.
Which is better for keyboard cleaning: compressed air alone or compressed air plus gentle wiping?
Compressed air is great for lifting dust and crumbs from between keys, but it won’t remove grime that’s stuck to keycaps. For thorough cleaning, follow up with a slightly damp microfiber cloth (or a keyboard-safe wipe) to remove oils and smudges. If you have visible buildup, consider removing keycaps only if your keyboard design supports it safely.
How often should you clean your keyboard with compressed air to prevent sticky keys and buildup?
If you eat near your keyboard or notice visible dust, clean it every 1–3 months with short compressed air bursts. For office or light-use environments, every 3–6 months is often sufficient to keep dust from collecting under keycaps. Regular cleaning helps reduce sticky keys caused by debris and helps maintain smoother key travel.
📅 Last Updated: November 04, 2026 | Topic: How to Clean a Keyboard With Compressed Air | Content verified for accuracy and freshness.
References
- 1910.242 – Hand and portable powered tools and equipment, general. | Occupational Safety and Heal…
- https://www.cdc.gov/coronavirus/2019-ncov/community/disinfecting-building-facility.html
- https://www.cdc.gov/coronavirus/2019-ncov/prepare/disinfecting-your-home.html
- Compressed air
- Computer keyboard
- Keyboard
- Electrostatic discharge
- https://scholar.google.com/scholar?q=how+to+clean+a+keyboard+with+compressed+air Google Scholar
- https://scholar.google.com/scholar?q=keyboard+cleaning+compressed+air+guidelines Google Scholar
- https://scholar.google.com/scholar?q=compressed+air+cleaning+electronics+best+practices Google Scholar

[…] wipes can sanitize a keyboard safely if you power down first, lightly wipe key surfaces (without pushing liquid into gaps), and then let the keyboard dry completely before reconnecting. […]