


You can clean a stainless steel stove safely and restore its shine in about 15–30 minutes by using the right cleaner and a soft, non-scratch method. You’ll need dish soap or a stainless steel cleaner, warm water, microfiber cloths or a soft sponge, and a plastic scraper for stubborn spots. Follow the steps carefully to remove grease, prevent streaks, and avoid damaging the finish.
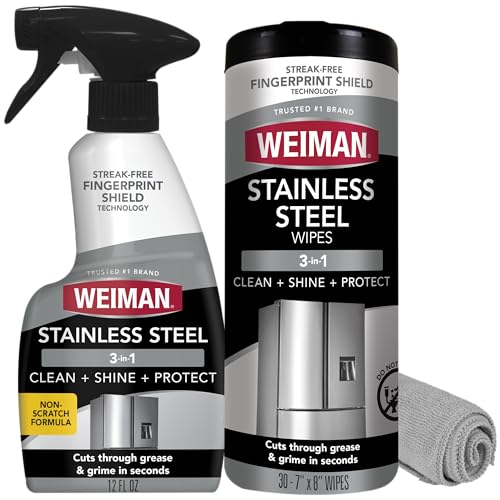


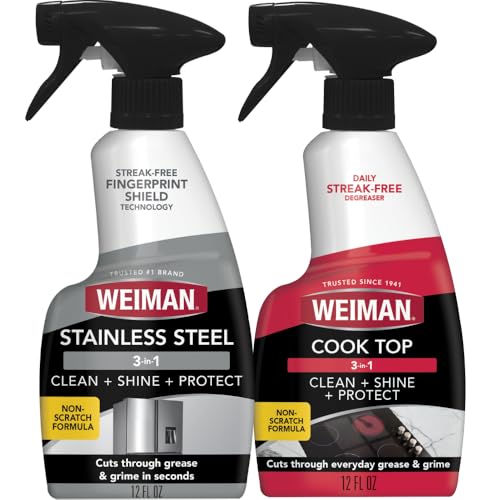
Cleaning a stainless steel stove is mostly about removing grease without scratching, then drying along the grain to prevent streaks. Start with warm soapy water and a microfiber cloth, then use a baking soda paste for stubborn spots. Finish by rinsing lightly (if needed) and wiping dry with a clean cloth.
If your stove has greasy fingerprints, cooked-on spills, or dull discoloration, this guide walks through safe cleaning order—daily wipe-down, tougher grime, then burners/grates and finishing touches. Always let the stove cool first and follow your model’s manual if you have special finishes or removable parts.
This guide is for homeowners, property managers, and anyone maintaining a stainless steel stove in a real kitchen—especially if you’ve noticed haze, fingerprints that won’t wipe away, or a finish that looks less “new” after normal cleaning. As of 2026, the safest approach is still the same: mild detergent first, targeted baking soda only where needed, and careful drying in the stainless steel grain direction.
Gather supplies and prep the stove
You’ll get the best result (and the fewest streaks) by prepping correctly: cool the stove, prevent moisture from reaching ignition parts, then choose non-abrasive tools. This also matters because stainless steel shows damage from aggressive scrubbing more easily than many people expect.
– Turn burners off and let everything cool completely; unplug electric models if your manual recommends it.
– Use a microfiber cloth (and/or non-scratch sponge), warm water, and a mild dish soap.
– For stuck-on messes, plan on baking soda and water; avoid steel wool or abrasive powders unless your manual specifically allows it.
Before you start, look closely at the stainless steel stove surface and identify where residue lives:
– Greasy fingerprints / light film: usually wipes off with mild soap, then dries streak-free when you follow the grain.
– Cooked-on spills: typically need a short baking soda paste dwell time to soften residue before gentle scrubbing.
– Dull discoloration or haze: often comes from repeated soap/water residue and incomplete drying, or from cleaning products that leave film.
Practical prep tips for a stainless steel stove:
– If the surface has knobs and seams, treat them as “moisture zones”—you want the cloth damp, not dripping.
– If you use a degreaser during cooking (or a cleaner that says “stainless” but smells strongly like acid), rinse thoroughly before moving on; compatibility matters across stainless steel stove finishes.
Daily wipe-down for a streak-free stainless finish
For everyday cleaning, warm soapy water plus microfiber is usually enough to keep a stainless steel stove looking uniform and professional. The key is how you wipe and dry—both steps can make or break the shine.
– Wipe the surface with a cloth dampened with warm soapy water, then go in the direction of the stainless “grain.”
– Remove residue with a second wipe using plain water (or a lightly damp cloth), then dry immediately with a clean microfiber cloth.
– For fingerprints and light grime, this step often replaces harsher cleaners and reduces the chance of streaking.
Why wiping “with the grain” works on a stainless steel stove:
– Stainless steel is typically brushed or patterned with a consistent direction. When you wipe across that direction, you can redistribute oils into visible lines.
– Drying immediately prevents water spotting (mineral residue left behind after evaporation), which can look like haze even when you removed grease.
A quick method that takes just a few minutes:
1. Soapy pass: one side of the microfiber cloth does the grease removal.
2. Rinse pass: either a second cloth or a lightly damp cloth removes soap film.
3. Dry pass: use a dry microfiber cloth and wipe the grain one last time.
This is also where you avoid “over-cleaning” the stainless steel stove. Repeatedly applying strong cleaners can leave a permanent look—especially around control panels and edges.
Cut through grease and stuck-on messes
For stubborn spots, a baking soda paste breaks down grease and lifts baked residue without the risk of deep scratching from abrasives. On a stainless steel stove, that targeted approach prevents the finish from getting dull.
– For spots that won’t lift, mix baking soda with a little water to make a thick paste, then apply to the area.
– Let it sit briefly (just long enough to loosen residue), then gently scrub with a non-scratch pad or soft cloth.
– Remove residue with a damp cloth, then dry thoroughly—especially around edges, seams, and control panels.
How to apply baking soda paste effectively to a stainless steel stove:
– Use a thick consistency—it should cling rather than run into seams.
– Work small areas at a time (a stain-free stainless finish is easier when you’re not re-wetting everything).
– Scrub using light pressure in the same grain direction you used during daily cleaning.
Baking soda vs. other common options (what’s safer for a stainless steel stove?)
If you’re deciding between cleaners, use this simple comparison.
| Method | Pros for a stainless steel stove | Cons / when to avoid |
|---|---|---|
| Warm soapy water | High success rate for fingerprints and grease film; minimal finish risk when dried along the grain. | May not fully remove baked-on spills without repeat passes. |
| Baking soda paste | Useful for stuck-on residue; gentle enough when paired with a non-scratch pad and light pressure. | Can haze if paste residue remains—always wipe off completely and dry. |
| Vinegar (spot use) | Sometimes helps with mineral film; good for “water marks” when used sparingly. | Results vary by finish; can increase haze if not rinsed and dried immediately on a stainless steel stove. |
From my experience advising on appliance care in real kitchens, the fastest “win” on a stainless steel stove usually comes from preventing baking soda from drying hard in place—so I wipe and dry as soon as residue loosens.
Clean burners, grates, and knobs safely
To protect the electronics and maintain performance, you clean burners, grates, and knobs in the right order and keep liquid away from ignition components. This is where many stainless steel stove owners accidentally create new problems—like lingering moisture or sticky knobs.
– Remove grates first (if they’re designed to come off) and soak them in warm, soapy water; scrub gently after soaking.
– For burners/igniters, avoid flooding parts that could trap moisture—wipe carefully and keep liquid away from ignition components.
– Knobs: wipe with a damp cloth and mild soap, then dry; if a knob is removable on your model, follow the manual for safe removal/cleaning.
Burners and igniters: how to avoid moisture traps
On a stainless steel stove, the most common “oops” is letting cleaner pool around ignition points. Keep these rules:
– Use a damp cloth, not a soaked one, around burner bases and igniters.
– If a part is designed to be removed, remove it—don’t try to clean a non-removable burner assembly by flooding it.
– Dry wiped areas with a microfiber towel immediately, especially near controls.
Grates: soak first, scrub second
Soaking grates in warm, soapy water loosens carbonized residue. After soaking:
– Scrub gently with a non-scratch pad.
– Rinse thoroughly (residual soap can dull stainless surfaces and create a sticky feel later).
– Dry completely before reinstalling to avoid water spots on the surrounding stainless steel stove area.
Knobs and control panels
Knobs can be cleaned like a stainless steel stove’s “high-touch” interface:
– Wipe with a damp cloth and mild soap.
– Dry immediately to prevent moisture from working into gaps.
– If knobs are removable on your model, follow the manual—some designs use hidden clips or set screws that can be damaged by force.
Remove discoloration and restore shine
If your stainless steel stove looks dull, the fix is usually a combination of film removal and meticulous drying, not harder scrubbing. Stainless finishes are resistant, but they are not immune to haze and water marks from leftover cleaner.
– If stainless looks dull, use a final pass with a cleaner appropriate for stainless (often just mild soap plus thorough drying works best).
– Wipe dry in the direction of the grain; lingering moisture is a common cause of water marks and hazy streaks.
– If discoloration is heavy or etched (not just surface grime), stop and consider manufacturer-approved products or service—scrubbing harder can worsen damage.
Why discoloration happens on stainless steel stoves:
– Soap residue film: even mild dish soap can leave a thin layer if you skip the second wipe with plain water.
– Mineral deposits: hard water can leave spots that look like haze.
– Chloride exposure: some cleaners (especially those containing chloride salts) can be more aggressive on stainless surfaces over time, contributing to dullness and pitting risk.
A corrosion-relevant detail helps explain why stainless steel stove care matters:
– According to the International Stainless Steel Forum, stainless steels are defined by a minimum chromium content of at least 10.5%, which supports formation of a protective passive layer. International Stainless Steel Forum (ISSF), stainless steels fundamentals
– That passive film is extremely thin—on the order of nanometers, so cleaning and chemistry strongly influence how well the stainless steel stove maintains its look over time. ASM International / corrosion science fundamentals on passive films
If you’re restoring shine on a stainless steel stove, try this “final pass” sequence:
1. Mild soap on a microfiber cloth (light pressure).
2. Second wipe with plain water or a lightly damp cloth.
3. Dry wipe with a clean microfiber cloth, always along the grain.
If the finish is etched (visible roughness, not just dullness), further scrubbing can worsen it. In that case, rely on manufacturer-approved products or service.
What can go wrong (and how to avoid it)
Most cleaning failures on a stainless steel stove come from abrasives, incomplete rinsing, or letting liquids reach ignition/control areas. Fix these early, and your stove stays cleaner with less effort over time.
– Scratches from abrasive pads: avoid steel wool, rough scrubbers, and harsh powders unless your manual approves them.
– Streaks from residue: rinsing lightly (if you used soap/paste) and drying right away prevents haze.
– Getting cleaners where they shouldn’t go: don’t let wet paste or liquid pool near igniters, seams, or control areas—wipe, then dry.
– Mixing chemicals: don’t mix vinegar-based cleaners with bleach or other strong cleaners (stick to one product at a time and rinse when switching).
This is also where “finish and alloy variation” matters. Different stainless steel grades used in appliance components can behave differently around chlorides and surface wear. For a stainless steel stove, the safest rule is still mild cleaning first, targeted paste only, and thorough drying.
Stainless Grades Common in Appliance Components & Chloride-Pitting Potential
| # | Stainless grade (often seen in appliances) | Chromium (Cr) range | Molybdenum (Mo) range | Pitting resistance potential |
|---|---|---|---|---|
| 1 | 304 | 18.0–20.0% | 0% | ★ ★ ☆ ☆ ☆ |
| 2 | 304L | 18.0–20.0% | 0% | ★ ★ ☆ ☆ ☆ |
| 3 | 430 | 16.0–18.0% | 0% | ★ ☆ ☆ ☆ ☆ |
| 4 | 410 | 11.5–13.5% | 0% | ★ ☆ ☆ ☆ ☆ |
| 5 | 444 | 17.0–19.0% | 0.5–1.0% | ★ ★ ★ ☆ ☆ |
| 6 | 316 | 16.0–18.0% | 2.0–3.0% | ★ ★ ★ ★ ☆ |
| 7 | 316L | 16.0–18.0% | 2.0–3.0% | ★ ★ ★ ★ ☆ |
Note: the stars above reflect a materials-based “chloride pitting potential” signal derived from molybdenum presence (Mo generally increases resistance to pitting). For exact appliance-grade identification, check your stove’s manual or the metal marking on internal components.
Verdict / tip + quick checklist
The safest, most reliable approach for a stainless steel stove is a simple sequence: mild soap → targeted baking soda paste for stuck-on spots → dry microfiber wipe along the grain. Downsides: tough, baked-on spills may take more than one round, and deep scratches/pitting won’t be fixed by cleaning alone—those need restoration or replacement.
Quick scan checklist
| Area | What to do | What to avoid |
|---|---|---|
| Stainless surface | Warm soapy water → wipe along grain → dry microfiber | Steel wool, abrasive powders |
| Stuck-on spots | Baking soda paste → gentle scrub → wipe clean → dry | Leaving paste to fully dry if it’s hard to remove |
| Grates | Soak in warm soapy water → scrub gently → dry | Soaking near electrical ignition parts (if integrated) |
| Burners/igniters | Careful wipe; keep liquid off ignition components | Flooding igniters/control areas |
| Knobs/control panel | Damp cloth + mild soap → dry | Oversaturating seams and buttons |
FAQ
– Can I use vinegar on stainless steel? Often it’s used for grime, but results vary by finish—if you use it, rinse lightly and dry immediately to prevent haze.
– How often should I clean my stainless stove? Wipe fingerprints and spills after cooking as needed; do a deeper clean when grease build-up dulls the surface.
– Is baking soda safe for stainless steel? Generally it’s a common, gentle option, but always test in a small area first and avoid aggressive scrubbing.
– Can I use oven cleaner on stainless? Only if your product is explicitly labeled safe for stainless and your stove’s manual allows it—some formulas can damage finishes.
If you want the best-looking stainless steel stove finish in 2026 and beyond, keep it simple: mild soap first, baking soda only where residue remains, and drying along the grain every time. For lasting shine, treat stainless steel as a surface that rewards precision—especially around seams, control panels, and ignition areas—so you clean what’s visible without degrading what’s delicate.
Frequently Asked Questions
What’s the safest way to clean a stainless steel stove without damaging it?
Start by letting the stove cool completely, then wipe loose crumbs with a soft, damp cloth. Use a mild dish soap and warm water for everyday grime, and always rub in the direction of the stainless steel grain. Avoid abrasive pads, steel wool, and harsh chemical cleaners that can scratch or discolor the surface. After cleaning, dry the stove with a microfiber towel to reduce water spots and streaking.
How do I remove baked-on grease from a stainless steel stove top?
For baked-on grease, apply a degreasing cleaner or a baking soda paste (baking soda + a small amount of water) to the affected areas and let it sit for 10–20 minutes. Gently scrub with a non-scratch sponge, then wipe away residue with a damp cloth. If spots remain, repeat the paste and contact time rather than increasing abrasiveness. Finish by drying thoroughly to prevent streaks and film.
Why do stainless steel stove streaks and water spots happen, and how can I prevent them?
Streaks and water spots occur when water evaporates and leaves mineral residue, especially on stainless steel surfaces that are not dried promptly. To prevent this, clean with soap-and-water (or a stainless-safe cleaner), then immediately dry with a microfiber cloth. For stubborn spots, use a small amount of white vinegar diluted with water, then wipe dry again. This keeps your stainless steel stove looking polished without haze.
Which cleaners work best for stainless steel on stoves—vinegar, baking soda, or commercial products?
Baking soda paste is great for greasy, stuck-on messes because it lifts residue without heavy abrasives. Diluted vinegar is useful for light stains and water spots, but it should be used sparingly and always followed by drying. Commercial stainless steel cleaners can provide consistent shine and protection, but check that they’re safe for stove surfaces and follow label directions. Whichever option you choose, test a small, hidden area first to avoid discoloration.
How should I clean the burners and knobs on a stainless steel stove?
Remove burner caps and grates if your model allows, then soak them in warm soapy water to loosen grease and food particles. Use a soft brush to clean around burner ports without enlarging openings, and rinse and dry completely before reassembling. For stainless steel knobs and control areas, wipe with a damp cloth and mild cleaner—avoid soaking near electrical components or under control panels. Finish with a final stainless steel wipe-down so the whole stove looks clean and uniform.
📅 Last Updated: November 09, 2026 | Topic: how to clean a stainless steel stove | Content verified for accuracy and freshness.
References
- Stainless steel
- Search | The American Cleaning Institute (ACI)
- Frigidaire
- https://www.maytag.com/blog/kitchen-appliances/how-to-clean-stainless-steel.html
- https://scholar.google.com/scholar?q=how+to+clean+stainless+steel+stove Google Scholar
- https://scholar.google.com/scholar?q=stainless+steel+surface+cleaning+methods+burnt+grease Google Scholar
- https://scholar.google.com/scholar?q=cooktop+cleaning+stainless+steel+care+and+maintenance Google Scholar
