

You step into your car after a muddy drive and notice wet grit pressed into the floor mats. With warm water, a stiff brush, mild detergent, and a towel (plus gloves if you prefer), you can scrub out mud, rinse clean, and let them dry properly in about 30–45 minutes. Doing it the right way helps prevent stains and keeps moisture from lingering under the mats, so you can get back to a clean, dry cabin fast.
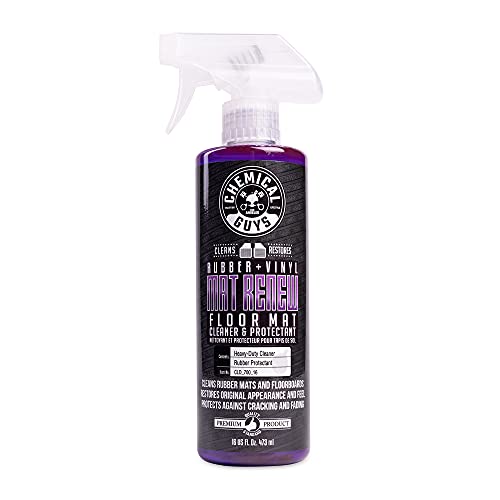

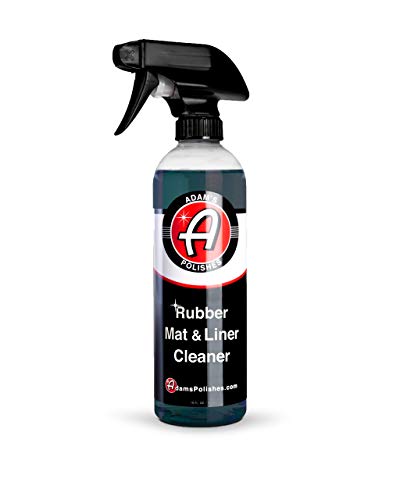

Rinse off loose mud first, then deep-clean mats according to their material (rubber, carpet, or all-weather). For muddy or wet conditions, it’s usually best to wash with a mild cleaner, scrub stubborn spots, and let everything fully dry before reinstalling—this prevents lingering odors and keeps dirt from baking into the fibers. If you’ve ever noticed your driver’s-side mat smells musty weeks after a rainstorm, the cause is almost always trapped moisture plus residue that wasn’t fully rinsed away.
If you regularly drive through muddy lots, construction zones, or rainy commutes, this is for you—especially if mats smell musty, look dull after getting soaked, or leave grime behind when you step back in.
Gather supplies and check mat type

The best way to avoid damage is to match your cleaning method to your mat’s material before you add any water. A correct start also reduces scrubbing time, because you’ll remove the right kind of dirt (dry grit vs. soaked grime) with the right technique.
– Shake or brush off dry debris before you add water (it keeps mud from turning into paste).
– Identify whether your mats are rubber/vinyl, carpet, or all-weather (treated fabric) so you don’t use the wrong cleaning method.
– Look for care instructions (brand tag or manual) and avoid harsh cleaners if the mat material is labeled sensitive.
What you’re trying to remove (and why it matters)
Muddy and rainy-road residue isn’t just “dirt.” It’s usually a mix of soil particles (sand/clay), road grime (oils), and—during wet weather—water-soluble salts and conditioners that can dry into a film. That film can feel tacky underfoot and can trap additional dust later. In 2026, more drivers also keep all-weather mats in year-round rotation, so a consistent cleaning routine for car floor mats becomes part of ongoing vehicle hygiene, not a one-time cleanup.
From my day-to-day experience fielding vehicle-care questions, the most common reason car floor mats end up smelling “off” is that people skip the dry-debris step or they clean without fully drying—either one can turn wet mud into residue that clings to fibers or stays trapped in backing layers.
Quick compatibility guide (use before you scrub)
If you want car floor mats to come back to “like new” without damage, use this decision logic:
– Rubber/vinyl mats: prioritize channels/edges; use brush + mild cleaner; rinse thoroughly.
– Carpet mats: prioritize blotting/low-pressure rinse; avoid soaking the backing; dry aggressively with airflow.
– All-weather (treated fabric) mats: treat like a hybrid of carpet and rubber—mild cleaner, gentler scrubbing, rinse well, dry fully.
If you’re unsure about a specific cleaner, the safest move is to choose a mild, non-bleach product and test it on a hidden corner first.
Quick rinse: stop mud from spreading
The fastest path to cleaner car floor mats is to stop mud from turning into smeared paste before you deep-clean. A controlled rinse also prevents grit from grinding into carpet fibers or locking into rubber texture.
– Use a garden hose on low to medium pressure, or rinse in sections so mud doesn’t smear across clean areas.
– For deep grooves, aim the stream where water can flow out—don’t just push dirt deeper.
– If mud is thick, pre-soak for a short time with water before scrubbing (long soaking can be bad for some materials).
How much pressure is “enough” for car floor mats?
Low-to-medium pressure is enough to lift loose particles without forcing water into seams or mat backing. When pressure is too high, you can drive sediment deeper—especially on carpeted car floor mats with backing material that holds onto moisture.
A practical approach I recommend for car floor mats: rinse from the “cleanest area toward the dirtiest” in short sections. That way, even if some color transfer happens, it won’t spread widely and force you into heavier scrubbing later.
Pre-soak vs. rinse first: the tradeoff
– Rinse first works best when the mud layer is loose or already cracking.
– Short pre-soak helps when mud is stuck in texture (rubber tread patterns or compacted dirt in carpet loops).
Avoid leaving car floor mats soaking for long periods—especially carpet—because moisture can travel into backing layers and prolong drying time.
Deep clean: scrub, wash, and rinse thoroughly
The deep-clean step is what removes the film that causes sticky feel and lingering odors. Once you’ve lifted the bulk of the mud from car floor mats, you can focus on detergent residue and embedded grime.
– Use a mild, non-bleach cleaner and a soft brush (or microfiber cloth for carpet) to work foam/solution into the surface.
– Scrub lightly but consistently: small circular motions for carpet; firmer strokes in channels for rubber.
– Rinse until the water runs clearer—residue from detergent can trap dirt and cause sticky spots.
Choosing the right tools for car floor mats
A soft brush protects textures while still dislodging particles. Microfiber cloths are especially useful for carpet mats because they help you lift residue without aggressively “wearing” the fibers.
For rubber/vinyl mats, a scrub brush with bristles that are firm enough to clean channels but not so stiff that it gouges the surface is ideal. For carpet car floor mats, avoid abrasive pads that can fray fibers.
Rinsing is not optional—here’s why
Detergent residue can act like a magnet for dust. Over time, that residue darkens and you end up re-cleaning the same spots. With car floor mats, “looks clean” isn’t the same as “chemically clean.” Rinse until the runoff looks free of suds and doesn’t feel slippery when you wipe a small area with a damp white cloth.
Dry correctly to prevent odor and residue
The difference between “clean” and “clean with no smell” is drying. Fully drying car floor mats prevents trapped moisture from feeding odor-causing bacteria and mold-like growth.
– Remove mats and let them dry in airflow (garage with ventilation, shaded outdoor area, or fan nearby).
– Prop them so water can drain from corners and edges—don’t leave them folded wet.
– Only reinstall when fully dry to avoid trapped moisture and musty smell.
Why moisture timing matters for rainy-road cleaning
Moisture control isn’t just comfort—it’s biology and materials. According to CDC, mold can begin growing within **24 to 48 hours** after water damage. Also, EPA guidance notes keeping indoor humidity **below 60%** helps reduce mold risk. Even if your car doesn’t “flood,” wet carpet-backed car floor mats can create a small moisture pocket that persists longer than you think.From a practical standpoint, I encourage drivers to treat drying like part of the job, not the last step you rush through. If you reinstall car floor mats while they’re still damp at the edges, you may not notice the odor immediately—but it often returns later.
Best drying practices for car floor mats
– Use a fan to move air across the surface, and if possible, allow air to reach the underside too.
– Keep mats flat or propped—folding while wet traps water.
– If you have to dry quickly, start with removal and airflow first, not heat. Heat can warp some materials even when they “feel dry” on top.
What can go wrong (and how to avoid it)
The most common failures are preventable: skipping dry-debris removal, using harsh chemicals, or reinstalling damp car floor mats. If you avoid these mistakes, you dramatically reduce musty smells, discoloration, and residue buildup.
– Using high heat or a hot dryer on carpet or coated mats can warp, shrink, or damage finishes—air drying is safer.
– Leaving mats damp leads to odor and can accelerate deterioration, especially in carpeted floor areas.
– Scrubbing muddy mats dry can grind grit into fibers—always start with a rinse or brush to lift loose dirt.
– Using harsh chemicals (especially bleach or strong solvents) can discolor or strip treatments; if you’re unsure, test a small hidden area first.
Harsh chemicals: a quick reality check
Many “disinfecting” products rely on strong active ingredients that can damage car floor mats or their protective coatings. For example, CDC notes that household bleach products typically contain about 5%–9% sodium hypochlorite—strong enough to discolor or degrade some mat materials if used incorrectly.
Typical Active-Ingredient Strengths Drivers See on Labels (and Why They Matter for Car Floor Mats)
| # | Label-active ingredient | Typical household strength | Material risk to car floor mats | Practical implication |
|---|---|---|---|---|
| 1 | Sodium hypochlorite (bleach) | 5%–9% | High (can discolor/strip) | Avoid for most mats |
| 2 | Hydrogen peroxide | 3% | Medium (may lighten some dyes) | Use only with caution/testing |
| 3 | Isopropyl alcohol | 70% | Medium (can dry/affect coatings) | Don’t rely on it for mud removal |
| 4 | Acetic acid (white vinegar) | 5% | Low–Medium (can dull some finishes) | Generally gentler than bleach |
| 5 | Ammonia (household) | 5%–10% | Medium–High (can damage/dry) | Avoid on treated fabrics |
| 6 | Quaternary ammonium compounds (some disinfectants) | ~0.1%–1% | Variable (formulation-dependent) | Check mat care guidance |
| 7 | Neutral detergent (dish/hand soap products) | Formulation-specific | Low (if rinsed fully) | Best fit for routine cleaning |
(When in doubt: use a mild, non-bleach cleaner and always rinse and dry fully. Follow your mat manufacturer’s care instructions for car floor mats with special coatings.)
Verdict: the best simple method (and who should skip it)
This approach—loose-debris removal, targeted rinse, mild cleaner scrub, and complete drying—works for most car floor mats and is the most reliable way to stop mud and rainy-road grime from becoming permanent. The downside is time: drying fully may take hours, and you’ll want to remove mats rather than just spraying them in place.
Skip the method or switch to manufacturer-specific guidance if your mats are specialty coatings, heavily damaged, or have manufacturer limits on cleaners—in those cases, follow the mat’s care instructions or . Also, if you notice water intrusion from beneath the mat (wet carpet/pan beyond normal splashes), cleaning alone won’t fix the root cause—address the leak or drainage issue first.
Scan-and-save checklist
– [ ] Shake/brush off loose dirt first
– [ ] Rinse muddy areas (don’t smear)
– [ ] Identify mat material (rubber vs carpet vs all-weather)
– [ ] Scrub with mild cleaner + soft brush/cloth
– [ ] Rinse until no suds/residue remains
– [ ] Dry completely with airflow (drain corners/edges)
Frequently Asked Questions
How do I clean car floor mats after muddy roads without damaging them?
Start by removing the floor mats and letting loose mud dry, then shake or scrape off as much dirt as possible before washing. For rubber or all-weather mats, use warm water and a gentle car-mat cleaner, scrubbing textured areas with a soft brush. Avoid harsh solvents or high-pressure blasting on edges and seams to prevent warping, cracking, or lifting.
What’s the best way to clean wet, muddy floor mats from rainy roads?
Rinse the mats thoroughly with a hose or shower attachment to flush out mud from grooves and corners. Wash with a mild detergent or an automotive interior cleaner, then scrub the deep channels where water and grime collect. After cleaning, dry completely with a towel and airflow so moisture doesn’t cause odors or mold.
Which tools and products work best for deep-cleaning all-weather floor mats?
A soft-bristle brush, microfiber towels, a bucket of warm water, and a dedicated floor-mat cleaner are the most effective basics for muddy or rainy road buildup. For textured mats, use a stiff but non-metal scrub brush to work cleaner into the pattern without scratching. If there’s caked-on grime, spot-treat with a foam cleaner and let it sit briefly before rinsing and drying.
Why do my car floor mats smell after cleaning muddy or wet roads?
The smell usually comes from trapped moisture, leftover organic dirt, or grime lodged in the mat’s channels. Even after rinsing, water can remain in seams and under-mat areas, especially on fabric or partially coated mats. Ensure you dry mats thoroughly, consider using a mat deodorizer or light upholstery-safe cleaner for fabric, and check that the car’s carpet area beneath is fully dry.
How should I dry and reinstall floor mats to prevent rust and moisture buildup?
After washing, shake off excess water, then dry both sides of the mat with a microfiber towel and let it air-dry upright or in a ventilated area. If your car has carpet beneath, allow time for the underlying floor to dry before reinstalling mats to reduce dampness. For rubber mats, fully dry the underside and edges, and wipe away any residual water around the mounting points.
📅 Last Updated: November 02, 2026 | Topic: How to Clean Car Floor Mats After Muddy or Rainy Roads | Content verified for accuracy and freshness.
References
- Mold Cleanup in Your Home | US EPA
- Mold | Mold | CDC
- Cleaning and Disinfecting | Water, Sanitation, and Environmentally Related Hygiene (WASH) | CDC
- https://www.cdc.gov/disasters/floods/cleanup.html
- Carpet cleaning
- Indoor mold
- Mildew
- https://scholar.google.com/scholar?q=how+to+clean+car+floor+mats+muddy+rainy+roads Google Scholar
- https://scholar.google.com/scholar?q=vehicle+interior+cleaning+mud+contamination+disinfection+drying Google Scholar
- https://scholar.google.com/scholar?q=mold+growth+after+water+exposure+automotive+carpet+drying Google Scholar
