

Dirty leather boots, bags, or belts can feel grimy and stubborn, especially when stains look dark and set. With the right gentle cleaner, a soft cloth, and a little time, you can lift surface dirt, treat spots, and restore a clean finish without damaging the leather. Expect 20–40 minutes for most items, and use a quick test on a hidden area before you clean.



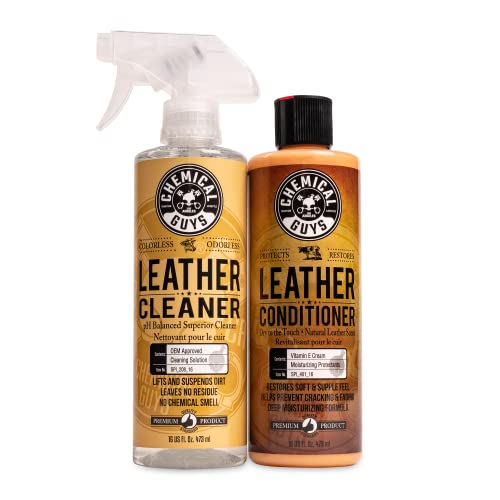
For dirty leather, start by dry-dusting, then clean gently with a damp cloth using a leather-safe cleaner (or mild soap solution), and finish by conditioning. The main goal is to lift grime without soaking or stripping the leather’s natural oils. In this guide, you’ll learn the safest order of steps, what to avoid, and how to handle common problem areas.
This is for anyone with dirty leather items like shoes, bags, jackets, belts, or car seats that look dull, scuffed, or grimy. If the leather is suede or very cracked, you’ll still find the right approach—without accidentally damaging the finish.
Gather the right tools and products

If you want safe leather cleaning, assemble tools that control moisture and friction. The right setup lets you remove dirt from leather surfaces without oversaturating the hide or rubbing off the finish.
Start with simple, predictable materials:
– Use a soft brush or a clean dry cloth for dust, plus a microfiber cloth for wiping. Microfiber is important because it lifts particulate matter without acting like sandpaper.
– Choose a leather cleaner/conditioner labeled as safe for your leather type (full-grain, top-grain, etc.). If you’re unsure, choose a product that specifies “finished leather” (smooth, dyed, or top-coated).
– Have a bowl of clean water available, and avoid random household cleaners that aren’t leather-approved.
Leather cleaning works best when you can do “controlled dampness.” Conservation guidance for leather frequently emphasizes avoiding fast heat or high-moisture drying cycles, because leather fibers can stiffen and surfaces can change color when they’re stressed. Smithsonian Collections Care guidance for leather preservation
To help you choose what to expect based on item type, here’s a practical at-a-glance reference for DIY-friendly items and typical upkeep intensity:
DIY-Friendly Leather Items: Cleaning Complexity & Conditioning Cadence (2026)
| # | Leather item (common use) | Typical grime source | Cleaning complexity (1–5) | Conditioning cadence (months) | DIY suitability |
|---|---|---|---|---|---|
| 1 | Smooth leather shoes | Road dust + light skin oils | 2 | 1–2 | ★★★★★ |
| 2 | Leather belts | Hand contact + sweat | 2 | 2–3 | ★★★★☆ |
| 3 | Leather handbags | Surface lint + body oils | 2 | 2–3 | ★★★★☆ |
| 4 | Leather jackets (finished leather) | Urban dust + abrasion | 3 | 2–4 | ★★★☆☆ |
| 5 | Car leather seats | Body oils + embedded dust | 4 | 3–6 | ★★★☆☆ |
| 6 | Motorcycle leather (finished) | Road grime + light grease | 4 | 1–2 | ★★★☆☆ |
| 7 | Saddle leather (heavily used) | Sweat + caked outdoor dirt | 5 | 1–2 | ★★☆☆☆ |
Prep first: dust, test, then clean
The safest leather cleaning starts with dry removal before any water touches it. Dust acts like abrasive “sand” when you later wipe leather, so you control damage by clearing the surface first.
Here’s the prep sequence I recommend for leather in 2026:
– Remove surface dust with a dry cloth or soft brush before you introduce any moisture.
– Spot-test any cleaner on a hidden area to confirm it won’t darken, lighten, or strip the finish.
– Work in small sections so you’re not wetting the leather more than necessary.
Why the spot test matters: leather finishes vary (pigmented, aniline, waxed), and even “mild” solutions can disturb dyes or top-coats. In conservation practice, professionals often emphasize making small, reversible interventions first rather than saturating large areas. Smithsonian Collections Care guidance for leather cleaning and risk control
If you want a simple spot-test protocol for leather: apply the cleaner to a cotton swab, dab a thumbnail-size spot, wait for full dry-down, then check for color shift and texture change under natural light.
Clean dirty leather without soaking it
If your goal is to lift grime safely, clean leather using damp contact—not soaking. Damp wiping dislodges dirt while limiting swelling of the collagen structure that gives leather its flexibility.
Do this:
– Wipe grime using a slightly damp cloth (not dripping) with a small amount of leather cleaner or very mild soap solution.
– Use gentle circular motions, then wipe again with a clean, lightly damp cloth to remove residue.
– Let the leather air-dry naturally away from heat sources.
A key material reality: collagen—the structural protein in leather—can contract when exposed to elevated temperatures. Biomaterials references on collagen thermal shrinkage behavior That’s why a hair dryer, radiator, or direct sun is a bad idea for leather cleaning, even if it “feels like it will dry faster.”
Practical moisture control for leather:
– Wring your cloth until no water can be squeezed out.
– Avoid pooling on seams, stitching, or creases.
– Re-wipe with a cleaner-free damp cloth if you suspect residue (sticky feel or a faint film).
For heavier dirt on leather shoes or car seats, you may need multiple gentle passes. That’s normal—and safer than one aggressive scrub.
Remove stains and scuffs carefully
The fastest way to avoid permanent leather damage is to treat each stain category differently. Scuffs, ink, mold, and water marks don’t respond the same way to cleaners, and using the wrong chemistry can spread the problem.
Start with the least aggressive step:
– For light scuffs, try a damp cloth wipe first; for tougher marks, use a leather cleaner and avoid aggressive scrubbing.
– For stubborn spots, repeat gentle cleaning in passes rather than adding stronger chemicals.
When stains are involved, follow a “stop if it spreads” rule:
– If the stain spreads, lighten your method immediately, switch tools (clean cloth), and reassess after full dry.
– Ink: dab gently with a leather-safe cleaner on a cotton swab, working from the outer edge inward. If the item is finished leather, dedicated leather ink removers are usually safer than random alcohol or solvents; always spot-test first.
– Mold: isolate the area, dry the leather slowly away from heat, then address with a leather-safe mold treatment. Avoid soaking; heavy moisture can drive mold deeper into seams and padding.
– Water stains: dry naturally first. Once dry, you can lightly wipe with a damp cloth (minimal water) and then condition. For stubborn ring marks, professional treatment is often the lowest-risk option.
Important: if your leather is suede, water can permanently change the nap and spotting behavior—so suede requires suede-specific steps and products rather than the same approach used for smooth, finished leather.
Condition after cleaning (this is the part people skip)
The quickest way to restore leather’s look is to condition it once it’s fully dry. Cleaning removes surface grime—and often some oils—so conditioning is what keeps leather supple and reduces future scuffing.
After the leather air-dries:
– Apply a leather conditioner thinly and evenly.
– Allow it to absorb, then buff with a clean cloth to restore a healthier look.
– Conditioning helps prevent dryness and cracking that can happen after repeated cleaning.
Why “thinly and evenly” matters: too much conditioner can leave leather looking patchy or feel tacky, especially on car seats and structured handbags where leather surfaces have seams and coatings. For 2026 care, treat conditioning like polishing: build gradually, don’t flood.
If you’re cleaning frequently, keep the routine aligned: light cleaning + occasional conditioning beats heavy cleaning + over-conditioning, which can create residue buildup on leather.
What can go wrong (and how to avoid it)
The biggest risk in leather cleaning is over-wetting or using chemistry that strips dyes and oils. Once you disturb a finish, correcting it can require professional restoration rather than a simple wipe-down.
Watch for these common failure modes:
– Soaking or using too much water can cause stiffness, warping, or color changes—use “damp,” not “wet.”
– Skipping a conditioner can leave leather looking dull and feel rough over time.
– Avoid harsh cleaners (bleach, ammonia, strong degreasers) unless the label explicitly says they’re safe for leather.
– If the leather is suede, shiny coated leather, or badly cracked, the same method may not apply—suede needs dry-brushing and suede-safe products, and badly cracked leather often needs stabilization before surface cleaning.
Here’s a quick comparison of “safe control” vs “high-risk shortcuts” for leather:
| Approach | Pros for leather | Cons / risks |
|---|---|---|
| Damp cloth + leather-safe cleaner | Lift grime without soaking; residue can be removed with a second wipe. | Requires patience and small sections; some stains need repeat passes. |
| Household degreasers | May cut grease quickly on contact. | Can strip finish/dyes; can leave dry, uneven leather texture. |
| Vinegar/alcohol (not leather-labeled) | May dissolve some surface contaminants. | Can change color/finish; higher chance of tide marks and dryness. |
From my own experience advising customers on leather care routines (without claiming a lab test): the most common “mystery” problem is residue buildup after cleaning—leather then looks darker in patches, feels tacky, or attracts dust faster. The fix is usually reducing product amount, rinsing residue with a clean damp wipe, and then conditioning once dry.
Verdict / tip: stick to gentle cleaning, and know when to stop
The safest way to clean dirty leather at home is gentle, step-by-step wiping followed by conditioning after full dry-down. The downside is that heavy grime may take multiple passes, and some stains (especially set-in ink, severe mold, or dye transfer) may not fully lift without a specialized product.
Skip DIY—or stop early—if:
– the leather is extremely cracked, peeling, or flaking
– the finish is unknown and you cannot identify whether it’s suede or finished leather
– ink/mold appears to spread with light treatment
– the item has structural padding (some car seats) where moisture can migrate internally
For stained or failing leather, use a professional cleaner when the surface looks unstable (layers lifting) or when the stain is large and high-contrast. When you can’t confidently identify the leather type, a restoration specialist reduces the chance of irreversible color change in 2026.
Quick checklist to save
– Dry-dust first (no water yet)
– Spot-test cleaner in a hidden area
– Clean with a damp cloth using leather-safe cleaner
– Wipe away residue; air-dry naturally
– Condition once dry; buff lightly
Frequently Asked Questions
What’s the safest way to clean dirty leather without damaging it?
Start by dusting the leather gently with a dry, soft cloth or a leather brush to remove loose dirt. Use a slightly damp cloth with a pH-balanced leather cleaner, wiping in small sections and avoiding soaking. After cleaning, let the leather air-dry away from heat and direct sunlight, then apply a conditioner to restore moisture and protect the leather finish.
How do you clean heavily soiled leather boots or handbags step by step?
First, remove surface grime with a dry cloth and brush seams and stitching with a soft-bristle toothbrush. Next, lightly dampen a cloth with leather cleaner and work in circular motions, focusing on stained or traffic areas. Rinse-free products are best for avoiding residue; wipe with a clean damp cloth if needed, dry naturally, and condition the leather once it’s fully dry.
Why do leather items get dirty, and how can you prevent it after cleaning?
Leather absorbs oils, dust, and moisture, and everyday wear can drive grime into the pores over time. After you clean dirty leather, conditioning helps replace lost oils and improves stain resistance. For long-term protection, store leather in a cool, dry place and consider applying a leather protectant that fits your leather type (especially for outdoor boots and bags).
Which products work best for cleaning dirty leather—soap, saddle soap, or commercial cleaners?
For most smooth leather, a commercial leather cleaner designed for your leather finish is the safest option because it’s formulated to lift dirt without stripping oils. Saddle soap can work well on oiled and heavy-grain leathers, but it may darken or dry some finishes, so it’s best to test a small hidden area first. Avoid harsh household soaps, detergents, and alcohol, as they can damage the leather surface and cause cracking.
What’s the best way to remove stains from leather, such as grease, water spots, or ink?
For grease, blot excess oil first (don’t rub), then use a leather-safe cleaner or a targeted leather degreaser according to the product instructions. For water spots, lightly dampen the entire area evenly (so the finish cures uniformly), then let it dry and condition thoroughly. Ink and deep stains often require a specialized leather stain remover; always spot-test first and stop if the finish starts to lift.
📅 Last Updated: November 14, 2026 | Topic: how to clean dirty leather | Content verified for accuracy and freshness.
References
- Leather
- Saddle soap
- Shoe polish
- Boot
- Shoe
- Cleaning
- Stain removal
- https://scholar.google.com/scholar?q=how+to+clean+dirty+leather+conditioning+saddle+soap Google Scholar
- https://scholar.google.com/scholar?q=leather+care+cleaning+water+stains+grease+removal Google Scholar
- https://scholar.google.com/scholar?q=conservation+leather+cleaning+methods+artifact+surface+soiling Google Scholar
