

Learn how to clean a pool pump basket fast and safely, so your pump runs at peak efficiency. Follow the quick, correct steps to remove debris, rinse thoroughly, and avoid common mistakes that can damage the system. If you want the quickest path to a clear basket and stronger circulation, this is the method to use.



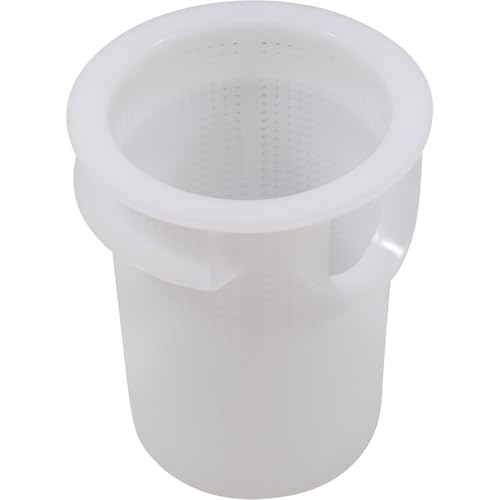
Turn off the pump, remove and rinse the pump basket, inspect and reseat the lid/o-ring correctly, then restart while watching for steady flow. Done regularly, basket cleaning prevents clogged intake flow and helps the pump prime efficiently instead of running under strain and pulling air.
If you run a typical in-ground pool circulation system, this is the maintenance step that most often fixes “low flow,” “won’t prime,” and “air in the line” symptoms. As of 2026, manufacturers still emphasize the same fundamentals: isolate power, handle the lid/o-ring gently, and verify correct seating before restarting.
Safety first: power down before opening the pump

Shut down power before you open the pump housing—this is the fastest way to avoid electrical hazards and accidental water spray around live components. Then relieve any trapped pressure so the lid opens safely and the o-ring isn’t stressed during removal.
– Switch the pump off and, if you’re not 100% sure how to isolate power, turn off the breaker before opening the trap/pump housing.
– Relieve any pressure (some lids hold pressure) and wait a moment for the system to settle.
– Keep water, tools, and your hands away from electrical connections and follow your pump’s lid/O-ring guidance from the manual.
When servicing pool pump equipment, de-energizing the circuit is the baseline safety step; if you aren’t certain, use the breaker.
GFCI devices are designed to trip around 4–6 mA ground-fault current (per UL ground-fault device standards), which is why power isolation matters before opening wet equipment. UL 943
If you’re also working near pool receptacles, NEC requires GFCI protection for receptacles within 20 ft of the pool area, reinforcing how tightly pool-zone electrical safety is regulated. NFPA 70 (NEC) 680.22
Why this matters for basket cleaning: the trap/lid area is connected to the pump volute and suction path. If the lid has any pressure behind it, opening it abruptly can push water (and debris) toward components you shouldn’t expose—especially where electrical terminals and motor wiring are nearby. In my own routine maintenance habits, the biggest “time saver” is always confirming the breaker is off first—so I never rush the lid/o-ring step.
Also, if your system is wired through an external disconnect or has multiple interlocks, breaker-only shutoff may still leave some parts energized. If you’re unsure how your specific system is configured, stop and reference the wiring diagram in your equipment manual.
Remove the basket without damaging seals
Remove the basket carefully and inspect the lid/o-ring before reassembly—most priming failures happen because the seal wasn’t reseated correctly. A gentle straight-up lift prevents scuffing the o-ring groove and avoids “invisible” pinches that later become air leaks.
– Open the pump lid/trap housing carefully, then lift the basket out straight to avoid scraping the o-ring.
– Inspect the basket and lid o-ring for cracks, flat spots, or debris trapped in the groove.
– If the o-ring looks worn or brittle, don’t force the lid back on—replace it using your manufacturer’s size/spec.
Lifting the basket straight out helps prevent nicks on the lid gasket/o-ring groove, which commonly leads to air leaks after reassembly.
A pinched or flattened o-ring can create a tiny leak that lets air enter the suction side, preventing proper priming even when the basket is “clean.”
Using the correct o-ring material and durometer for pool pump lids matters because temperature and chemical exposure accelerate rubber aging. ASTM D2000
What to check during removal (in plain terms)
– Basket condition: If the basket is clogged with fibrous debris (hair, leaves, algae clumps), you may need a longer rinse to fully clear the mesh openings. Don’t scrape hard with metal tools.
– O-ring surface: Look for flat spots (from overtightening or long-term compression), micro-cracks, or bits of grit embedded in the sealing channel.
– O-ring groove cleanliness: A single grain of sand in the groove can hold the o-ring slightly off-level—creating an air leak you can’t “see” until the pump struggles to pull prime.
Elastomer O-Ring Materials Used in Pool Equipment (Typical Service Ranges)
| # | Seal material (o-ring) | Typical service temp (°F) | Aging resistance | Chlorine/ozone resistance |
|---|---|---|---|---|
| 1 | EPDM | -40 to 300 | ★★★★★ | High |
| 2 | Viton (FKM) | -10 to 400 | ★★★★☆ | High |
| 3 | Silicone (VMQ) | -60 to 450 | ★★★☆☆ | Moderate |
| 4 | Nitrile (NBR/Buna-N) | -20 to 212 | ★★★☆☆ | Low |
| 5 | Neoprene (CR) | -30 to 220 | ★★★☆☆ | Low–Moderate |
| 6 | Hypalon (CSM) | -20 to 250 | ★★★★☆ | Moderate–High |
| 7 | Polyurethane | -30 to 180 | ★★☆☆☆ | Low |
Note: exact o-ring material and temperature spec depends on the manufacturer and part number—use your pump’s manual to confirm compatibility.
Rinse and clean the basket thoroughly
Rinse debris out first, then scrub only as needed so you clear buildup without harming plastic or sealing surfaces. A clean basket restores correct flow through the strainer, but the seal (o-ring and lid seating) still determines whether the pump primes without drawing air.
– Rinse out leaves, hair, and grit with a garden hose, directing water so debris flows out rather than packed deeper.
– Scrub as needed with a soft brush to remove stuck buildup (avoid sharp tools that can gouge the basket or sealing surfaces).
– Check the pump intake area for lingering debris before reassembling—missing a few pieces can keep the issue coming back.
A hose rinse clears most basket clogs, but debris trapped around the pump intake can keep flow restricted even when the basket looks clean.
Sharp scraping tools can damage basket plastics or sealing faces, increasing the risk of leaks and air ingestion on restart.
When you restore a clear suction path, pump performance typically improves because the system experiences less restriction and easier priming through the strainer.
A practical method that doesn’t pack debris back in
1. Rinse from “inside out.” Start with water pressure aimed so loosened debris is pushed out through the basket opening rather than forced into the mesh.
2. Use soft mechanical action only where needed. If you see algae film or sticky buildup, a soft brush (nylon/poly) is usually enough. Avoid metal bristles and scraping blades.
3. Inspect the intake “ring.” The pump basket sits in a housing where debris can collect behind the mesh funnel area. If you don’t clear that, the pump can still restrict flow or re-clog quickly.
4. Let the area drain briefly. Water droplets in the lid area aren’t a problem, but heavy water pressure under the lid can make the o-ring shift. After rinsing, give it a short moment so the seal seats naturally.
Clear flow paths so the pump primes correctly
To prime properly, the suction path must be clear and the lid/o-ring must seal evenly—both affect airflow and water flow. After reassembly, restart and watch for steady circulation, normal motor sound, and the absence of air bubbles.
– After cleaning, confirm the pump intake and surrounding surfaces are free of debris buildup.
– Reinstall the basket correctly (seated/centered) and make sure the lid and o-ring sit evenly—crooked seals cause leaks and air in the system.
– Close the lid firmly per your pump design, then restart the pump and observe for steady flow and normal sounds.
Even small air leaks at the trap lid can prevent priming because the pump must move a fully water-filled suction column to start circulating.
Correct basket centering reduces bypass gaps that can let air work into the seal interface on restart.
If you hear cavitation (a rattling/gurgling sound) and see unstable flow, re-check lid alignment and o-ring seating before continuing repeated restart cycles.
What “good” looks like on restart
– Flow stabilizes quickly: Return jets and skimmer suction look consistent (within your system’s normal response time).
– Sound is smooth: A healthy pump has a steady tone; air in the system often changes the sound.
– No sustained air stream: Occasional bubbles can happen during start-up, but continuous air patterns typically indicate a leak or trapped air.
Common reassembly details that matter
– Basket seating: If the basket is cocked, it can interfere with the lid alignment.
– O-ring evenness: The o-ring should sit uniformly in the groove—no pinching at one quadrant.
– Lid closure technique: Many pump designs call for closing “firmly but without forcing.” When you feel resistance, stop and re-check alignment instead of tightening harder.
What can go wrong (and how to fix it)
Most issues after cleaning fall into two buckets: sealing problems (air leaks) or restriction problems (still-clogged suction). If you methodically verify o-ring seating and recheck the intake area, you usually resolve the problem quickly.
– Air leaks / won’t prime: Usually from a mis-seated lid or pinched/damaged o-ring—open up and reseat the seal.
– Pump still clogged quickly: Could be a basket that’s technically clean but you’re pulling debris from a wider source (skimmer blockage, nearby landscaping shedding, or poor suction alignment).
– Damaged seals from forcing parts: If the lid won’t close easily, stop—don’t tighten against resistance; inspect the o-ring and basket placement.
If the pump won’t prime after basket cleaning, the most common root cause is air entering at the lid/o-ring interface rather than debris still inside the basket.
Repeated “open/close/tighten harder” can worsen seal damage by flattening or pinching the o-ring, turning a solvable alignment issue into a replacement problem.
When debris returns rapidly, the basket is often doing its job but another component upstream (skimmer, suction line, or equipment positioning) is feeding the restriction.
Quick fault map (symptom → likely cause → fix)
| Symptom after restart | Likely cause | Fix you can take next |
|---|---|---|
| Won’t prime (no circulation) | Pinched lid o-ring | Re-open, remove grit from groove, reseat o-ring evenly |
| Air bubbles continue | Mis-seated lid or warped seal | Inspect o-ring for flattening/cracks; replace if needed |
| Low flow but running | Basket not centered / intake restriction | Re-seat basket correctly; re-rinse housing intake ring |
| Cavitation/rattling sound | Air in suction line | Power down; re-check lid closure and o-ring |
| Tripping breaker immediately | Electrical fault unrelated to basket | Stop servicing and follow your electrical safety/diagnostic steps |
| O-ring rolls when closing | O-ring not seated in groove | Re-seat o-ring in groove before closing lid |
| Lid won’t close without force | Basket interference or wrong o-ring | Remove basket, inspect seating surfaces, avoid over-torque |
| Basket gets clogged weekly | Upstream debris source feeding system | Check skimmer throat, nearby landscaping, and suction alignment |
| Debris bypasses basket | Basket mesh damaged/incorrect type | Inspect basket condition; ensure correct basket model |
| Seal looks fine but still leaks | O-ring groove contaminated | Clean groove thoroughly; remove trapped grit before reassembly |
If you suspect an electrical issue (breaker trip patterns, burning smell, unusual vibration), pause and consult qualified service—don’t keep restarting.
Verdict: clean it regularly, but skip when you’re unsure
Cleaning the pool pump basket is generally straightforward and low-risk as long as you shut off power, handle seals gently, and follow your pump’s lid/o-ring method from the manual. The tradeoff: if you frequently find heavy debris, you likely have an upstream flow issue—basket cleaning won’t fully fix system inefficiency.
Downsides to plan for:
– Worn o-rings are consumables: even with correct cleaning, rubber ages—eventually it needs replacement.
– Frequent clogging may indicate a system problem: skimmer restriction, suction configuration, or debris source may be the real driver.
– Forcing parts makes it worse: repeated tight closures against resistance damages seals and increases air leak likelihood.
Skip or get help if you’re unsure about your pump’s pressure/lid design, can’t identify the correct o-ring, or repeatedly see leaks after reassembly—especially in 2026 when equipment revisions and seal designs can vary by model year.
Regular basket cleaning protects flow, but persistent “won’t prime” behavior after correct reassembly usually signals a sealing or system-level issue beyond simple debris removal.
If lid closure requires force, treat it as a stop condition—over-tightening can pinch or deform the o-ring and cause air leaks.
A manufacturer’s troubleshooting guide is the safest reference when your symptoms persist, because lid designs, o-ring profiles, and priming behavior vary by pump model.
Quick checklist (scan before you start)
| Step | What to do | Good sign |
|---|---|---|
| Power down | Turn off pump and consider breaker off | No humming, safe to open |
| Open housing | Lift lid carefully | No pinched o-ring |
| Remove basket | Lift straight out | Basket comes out intact |
| Rinse + scrub | Hose rinse; soft brush if needed | No stuck debris visible |
| Inspect seals | Check o-ring for damage | O-ring looks supple and seated |
| Reassemble | Basket seated; lid tight (not forced) | No obvious gaps |
| Restart | Turn pump back on; watch flow | Steady circulation, normal sound |
Sources
– Your pool pump’s owner’s manual / trap lid and o-ring installation instructions (manufacturer documentation).
– Your pool system’s equipment documentation for priming, trap maintenance, and safety warnings.
– If applicable: local electrical/pool safety guidance for servicing pump equipment with power off (consult your jurisdiction’s guidance).
In short: power down, remove and rinse the basket, inspect and correctly reseat the lid/o-ring, and restart while observing for stable circulation. If you still see leaks or the pump won’t prime, re-check seal alignment and intake cleanliness before retrying—then pause and consult your pump manual or support if the lid/pressure design isn’t clear.
Frequently Asked Questions
How do I clean a pool pump basket without damaging it?
Turn off the pool pump at the breaker or switch, then remove the lid and lift out the pump strainer basket. Rinse the basket thoroughly with a hose to remove debris, and use a soft brush to scrub algae or residue without scratching the plastic. Check the basket for cracks or warped areas and replace it if it won’t sit properly. Reinstall the basket and lid with the correct O-ring alignment to prevent leaks.
What’s the best way to remove leaves, hair, and debris from my pool pump basket?
Start by emptying large debris first—use a gloved hand or a small scoop to prevent clogging the rinse water flow. Then rinse the basket in sections, using steady water pressure to flush out trapped grime from the basket holes. For greasy buildup, soak the basket in warm water with a mild, non-abrasive cleaner for a few minutes, then scrub gently and rinse well. Always remove all debris so water can circulate freely through the pump strainer.
Why is it important to clean the pool pump basket regularly?
Cleaning the pool pump basket helps maintain strong water flow and improves filtration efficiency, which keeps your pool cleaner and safer. When debris accumulates, the pump must work harder, increasing strain on the pump motor and raising energy costs. Regular cleaning also reduces the risk of clogs that can cause pressure problems or premature wear on pool equipment.
How often should I clean the pool pump strainer basket during swim season?
Many pool owners clean the pump basket every 1–2 weeks, but heavy debris seasons may require weekly cleaning or more frequent checks. If you notice reduced flow, higher pump noise, or the basket is filling quickly after storms, clean it sooner. In autumn or windy conditions, inspect the basket every few days until the leaf fall slows down. Consistent maintenance keeps your pool pump basket from becoming a bottleneck.
Which tools and cleaning products work best for cleaning a pool pump basket?
Use a garden hose for rinse, a soft nylon brush for scrubbing, and disposable gloves to handle debris safely. For stubborn algae or mineral buildup, a mild pool-safe cleaner or warm water soak is usually enough—avoid harsh chemicals that can damage plastic or degrade seals. Don’t use metal scrubbers that scratch the basket, since scratches can trap debris. Keep the pump lid O-ring clean and lubricated as recommended so the lid seals correctly after cleaning.
📅 Last Updated: October 16, 2026 | Topic: how to clean pool pump basket | Content verified for accuracy and freshness.
References
- Swimming pool
- https://www.cdc.gov/healthywater/swimming/pools/spa/index.html
- https://www.cdc.gov/mahc/operations-maintenance.html
- https://www.cdc.gov/mahc/index.html
- https://www.who.int/publications/i/item/9789241548002
- https://www.mass.gov/guides/swimming-pools-and-spas
- https://www.cdph.ca.gov/Programs/CEH/DF/DM/Pages/Swimming-Pools-and-Spas.aspx
- https://scholar.google.com/scholar?q=pool+pump+strainer+basket+cleaning Google Scholar
- https://scholar.google.com/scholar?q=swimming+pool+pump+basket+maintenance+guide Google Scholar
- https://scholar.google.com/scholar?q=pool+filter+strainer+basket+cleaning+procedures Google Scholar
