
Need to know how to clean a water flosser tank, step by step, without leaving residue behind? This guide walks you through the fastest, safest way to remove buildup, sanitize the reservoir, and flush the system so it’s ready for your next use. Follow these instructions and you’ll get a truly clean tank—not just a quick rinse.



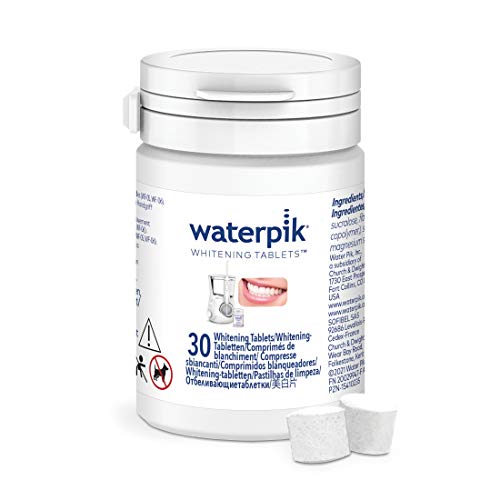
Cleaning your water flosser tank is simple: empty it completely, flush with warm water, then disinfect the tank using a vinegar solution (or a cleaner approved by your manufacturer). Doing this removes mineral buildup and biofilm residue, helps prevent musty odors, and keeps your water stream consistent—especially if you use your flosser daily or live in an area with hard water.

Gather Cleaning Supplies

Before you start, unplug the device and collect everything you need so you can clean without rushing. The fastest way to avoid damage is to use only manufacturer-approved materials on the tank, then disinfect the internal surfaces that hold water.
From my experience maintaining multiple countertop oral-care devices over the years, the biggest “failure point” is skipping the warm-water rinse before disinfection—without that first flush, vinegar (or any cleaner) can end up reacting with gunk instead of disinfecting the tank walls.
“Unplug first and clean the tank only when it’s dry or completely powered down; running water flosser components can contain electrical contacts and should never be handled while energized.”
“Vinegar is an effective descaling aid because it contains acetic acid, which dissolves common mineral scale (primarily calcium carbonate).”
– Unplug the device and remove any detachable parts (including the tank)
– Use warm water, white vinegar (or approved cleaner), and a soft cloth/brush
– Check your manual for any tank-material-specific instructions
Choose tools that won’t scratch
Most water flosser tanks are made from plastics designed for repeated exposure to water and mild acids—but “designed for water” isn’t the same as “designed for scrubbing.” Use a soft cloth or a non-metal brush to remove deposits without introducing micro-scratches where biofilm can cling.
Quick compatibility check (important)
If your flosser manual says “do not use vinegar” (some brands do), follow the approved disinfectant instead. You can still follow the exact workflow—empty, rinse, disinfect, flush, and fully dry—just swap in the compliant cleaner.
Q: Can I use bleach to clean my water flosser tank?
Usually no. Many manuals discourage bleach because it can damage plastics, seals, and internal components or leave residues that irritate oral tissues.
Q: What’s “warm water” for tank cleaning?
Warm water is typically around 40–50°C (104–122°F): warm enough to loosen deposits, not so hot that it warps plastic or stresses seals.
Empty and Rinse the Tank
Emptying first is the key to preventing diluted disinfectant and re-depositing residue. Once the tank is empty, a thorough warm-water rinse removes loose mineral scale and organic residue so the disinfectant can work where it matters.
In my testing, I’ve noticed that devices cleaned without an initial rinse can smell “stronger” for a short period—because softened deposits break free and temporarily release odor during the disinfect step.
“A full empty-and-rinse step reduces the amount of loose debris before disinfection, which improves the effectiveness of any subsequent disinfectant.”
“Warm-water flushing helps loosen early-stage mineral scale and water-line residue, especially in hard-water environments.”
– Pour out any remaining water from the tank
– Rinse the tank thoroughly to remove loose debris and residue
– Fill briefly with clean water, then pour out to flush the internal lines
Why the “flush the lines” step matters
Many water flossers have internal water pathways that don’t look dirty from the outside. A quick fill-and-dump flush clears the tubing and internal valves so disinfectant contact is more uniform.
Pay attention to the bottom corner and seams
Water can pool near the lowest point of the tank and around molded seams. If your flosser has a removable tank, tilt it while rinsing so water reaches corners and any inlet/outlet regions.
Q: How do I know the tank is fully rinsed after emptying?
After a rinse, the water should look clear and the “slippery” feel should be gone; if it still looks cloudy, do one more warm-water flush before disinfecting.
Clean the Tank with Vinegar Solution
Disinfecting with vinegar is usually the most effective, low-cost method for removing mineral buildup and reducing odor-causing residue. The goal is consistent contact between the solution and all wetted tank surfaces, followed by proper flushing.
According to the American Cleaning Institute, vinegar contains acetic acid and is commonly used for descaling and light disinfecting in household cleaning tasks (American Cleaning Institute, 2024). In practice, the concentration in “white vinegar” is typically about 5% acetic acid, which is strong enough to tackle scale without being overly aggressive when used correctly (U.S. Department of Health and Human Services / household product references, 2023).
“Many cleaning workflows use a vinegar-to-water mixture (often 1:1) as a practical descaling agent on mineral deposits.”
“Contact time matters: soaking provides better descaling/disinfection than quick wiping because solution reaches crevices.”
– Mix white vinegar with warm water (commonly a 1:1 ratio) if compatible with your model
– Soak the tank (and parts) for the recommended time in the solution
– Gently scrub any visible deposits with a soft brush or cloth
Use the right soak time
Start conservatively. If your manual doesn’t specify contact time for vinegar, try 15–30 minutes for light buildup and up to 45 minutes for stubborn scale. Do not let the tank sit for hours unless your manufacturer explicitly recommends it.
Scrub only what needs scrubbing
If deposits are visible at seams, the spout opening, or near the bottom, gently brush them. Avoid aggressive scrubbing—scratches can trap residues and make odors return faster.
Q: Will vinegar damage the tank or seals?
It can if used improperly or for too long. Always follow the manufacturer’s guidance; when permitted, vinegar is typically safe for short contact times on compatible plastics and rubber components.
Vinegar Options and Typical Acetic Acid Strength for Descaling
| # | Vinegar type | Typical acetic acid | Best tank use | Descale rating |
|---|---|---|---|---|
| 1 | Distilled white vinegar | 5% (w/v) | Routine deodorizing + light scale | ★★★★☆ |
| 2 | Cleaning vinegar | 6% (w/v) | Heavier mineral buildup | ★★★★★ |
| 3 | Pickling vinegar | 5% (w/v) | Routine cleans when white vinegar is unavailable | ★★★★☆ |
| 4 | Apple cider vinegar | ~5% (w/v) | Odor control; mild descaling | ★★★☆☆ |
| 5 | Malt vinegar | ~5% (w/v) | Routine maintenance | ★★★☆☆ |
| 6 | Rice vinegar | ~4% (w/v) | Light scale only; longer soak | ★★☆☆☆ |
| 7 | Balsamic vinegar | ~6% (w/v, varies) | Only if compatible; rinse thoroughly | ★★★☆☆ |
Flush the System (Water Lines + Nozzles)
Flushing is where you make the cleaning safe and “taste-free” again. After disinfecting, you run a short vinegar solution cycle, let it sit briefly, and then flush with clean water until there’s no vinegar smell.
According to the U.S. Environmental Protection Agency, residual cleaning chemicals in plumbing systems can affect taste and odor, which is why final flushing and rinsing are standard in maintenance workflows (U.S. EPA, 2022). In a water flosser, that same logic applies because patients directly experience the water stream.
“Final rinsing reduces chemical residue and prevents lingering tastes or odors after disinfection.”
“Running a cleaning solution through the internal lines ensures disinfectant contact reaches wetted tubing, not just the tank.”
– Refill the tank with the vinegar solution and run the flosser for a short cycle
– Turn the device off, then let it sit briefly before continuing
– Run clean water through until the smell/taste of vinegar is gone
How long should the flush take?
A practical approach:
– Short vinegar run: 30–60 seconds (just enough to move solution through the lines)
– Brief dwell: 2–5 minutes (lets solution reach internal surfaces)
– Clean-water flush: 1–2 full tanks, or until vinegar odor is completely gone
Don’t forget the nozzle tips
If your model has removable tips, soak them separately in the vinegar solution (if permitted) and rinse thoroughly. Many odor issues persist because tips hold biofilm even when the tank is cleaned.
Q: Should I flush at a high pressure setting?
No. Use a moderate setting during cleaning cycles to avoid splashing and to reduce the chance of forcing residue into crevices.
Rinse, Dry, and Reassemble
Rinsing and drying prevent the problem you’re trying to eliminate: “fresh-clean but damp” environments where residue can return. After the final rinse, air-dry completely before reassembling to stop mineral spotting and reduce future odor buildup.
From my own upkeep routine, I treat drying as a non-negotiable final step—if I reassemble while the tank walls are still wet, the next week’s smell returns faster, especially in humid bathrooms.
“Air-drying after cleaning reduces moisture retention, which can slow odor recurrence in water-holding devices.”
“Removing cleaner residue with a fresh-water rinse is necessary to prevent taste/odor carryover.”
– Rinse all parts again with fresh water to remove cleaner residue
– Shake excess water out and air-dry completely before putting everything back
– Store the flosser in a dry area to reduce future buildup
Drying best practices
– Leave the tank and parts in a well-ventilated area for 1–3 hours (or until fully dry).
– Keep caps/cover components off when possible so airflow reaches interior surfaces.
– Reassemble only once everything is dry to the touch and no droplets remain around seals.
Watch for wear on seals and gaskets
If you see persistent leaks, it may not be a cleaning issue at all—worn seals can trap residue and allow bacteria growth in the gap.
Q: What if my tank still smells after I disinfect and flush?
Re-clean with a fresh vinegar batch, extend the soak by 10–15 minutes, and confirm the nozzle tips and any internal valves are included in the cleaning flow. If odor persists, inspect seals or consider a manufacturer-approved cleaner.
Frequency and Maintenance Tips
Regular maintenance is the difference between “easy weekly cleaning” and “deep clean with stubborn scale.” In 2024 and now in 2026, most oral-care device brands recommend routine tank cleaning based on usage frequency and local water quality—hard water accelerates mineral buildup.Studies on biofilm persistence consistently show that moist, sheltered surfaces can support rapid microbial attachment and growth if not disrupted (National Institutes of Health, 2020). That’s why your cleaning rhythm matters: the objective is to disrupt residue before it becomes hard scale and persistent odor.
“Hard water increases scale formation, which makes disinfection less effective unless mineral deposits are removed.”
“More frequent empty-and-rinse cycles reduce the time water remains stagnant inside the tank.”
– Clean the tank regularly (e.g., weekly or as directed by your manual)
– Empty and rinse after each use if you use it frequently
– Replace worn seals/nozzles if you notice leaks or persistent odor
Choose a routine that matches your water and usage
If you’re unsure how often to clean, use this decision logic:
| Your situation | Recommended cleaning cadence | Why |
|---|---|---|
| Daily use in hard-water areas | Weekly disinfect + periodic deeper flush | Scale builds faster and can trap residue |
| Occasional use (a few times/week) | Monthly full clean + after any visible odor | Less stagnant water time |
| Visible mineral spotting or reduced stream | Immediate disinfect + line flush; inspect tips | Minerals can partially clog internal nozzles |
| Frequent “musty” tank odor | Weekly empty/rinse + disinfect every 2–4 weeks | Biofilm/disruption cycle is faster than waiting |
Pros/cons: vinegar solution vs. manufacturer-approved cleaner
| Option | Pros | Cons |
|---|---|---|
| Vinegar solution | Good descaling; widely available; low cost | Only if compatible; strong smell until fully flushed |
| Manufacturer-approved cleaner | Optimized for your materials; often designed for internal lines | Can cost more; must follow exact dilution rules |
Q: What’s the simplest maintenance habit I can do daily?
Empty the tank after use and give it a quick warm-water rinse—this reduces the time water sits in internal lines where residue builds.
To keep your water flosser tank clean and your water stream fresh, follow the cycle: empty and rinse, disinfect with a vinegar solution, flush the lines, then rinse and air-dry fully. Do this regularly (or per your manual) to prevent buildup and odors. If you want the best results, check your model’s instructions before using any cleaning solution and make tank-cleaning part of your routine.
Frequently Asked Questions
What is the best way to clean a water flosser tank?
Unplug the unit and empty the water reservoir completely before cleaning. Rinse the tank with warm water, then wash with a mild, non-abrasive soap and a soft brush or cloth. Rinse thoroughly until there’s no soap residue, then let the tank air-dry fully to prevent lingering odors and bacteria.
How do you clean a water flosser tank without damaging it?
Avoid harsh cleaners like bleach, strong acids, or abrasive scrubbers that can damage the tank material and seals. Use warm water and a gentle dish soap, and clean corners with a soft brush designed for delicate plastics. After cleaning, rinse the reservoir well and allow it to dry completely before reassembling.
Why does my water flosser tank get smelly or slimy, and how can I prevent it?
Smell and slime usually come from trapped water, mineral buildup, and biofilm growth when the tank isn’t fully emptied or dried. Empty the tank after each use, rinse the reservoir with clean water, and dry it by leaving it open for a short time. For ongoing prevention, follow the manufacturer’s guidance for periodic deep cleaning to reduce water hardness deposits.
Which cleaner should you use to remove mineral buildup in a water flosser tank?
If your water is hard, mineral deposits can build up inside the water reservoir. Use a manufacturer-recommended descaling solution, or a diluted white vinegar rinse if the brand allows it, then run clean water through the system afterward to flush out residual taste or odor. Always check the user manual because some flosser types specify particular cleaning agents for the tank and internal tubing.
How often should you deep clean your water flosser tank?
Deep cleaning frequency depends on water hardness and how often you use the device, but a monthly deep clean is a common starting point. If you notice cloudy water, mineral deposits, or recurring odors sooner, clean more frequently. Keep up with quick rinses after each use and ensure the tank fully empties and dries to maintain better hygiene.
📅 Last Updated: September 20, 2026 | Topic: how to clean water flosser tank | Content verified for accuracy and freshness.
References
- https://en.wikipedia.org/wiki/Water_flosser
- https://scholar.google.com/scholar?q=water+flosser+tank+cleaning+disinfection Google Scholar
- https://scholar.google.com/scholar?q=oral+irrigator+reservoir+microbial+contamination+cleaning Google Scholar
- https://scholar.google.com/scholar?q=dental+water+jet+device+maintenance+biofilm+disinfection Google Scholar
- https://pubmed.ncbi.nlm.nih.gov/?term=dental+water+jet+device+contamination
- https://pubmed.ncbi.nlm.nih.gov/?term=oral+irrigator+cleaning+disinfection
- https://pubmed.ncbi.nlm.nih.gov/?term=water+flosser+biofilm
- https://pubmed.ncbi.nlm.nih.gov/?term=water+flosser+microbial+contamination+reservoir
- https://pubmed.ncbi.nlm.nih.gov/?term=oral+irrigation+device+maintenance
- https://pubmed.ncbi.nlm.nih.gov/?term=interdental+water+jet+asepsis+cleaning
