

How do you disinfect a wireless charger without damaging the charging coil or messing up its electronics? Start by powering the device off, using the right cleaning agents, and applying them safely to the exterior only—this is typically quick, and the steps are straightforward if you follow the manufacturer’s guidance. You will need a microfiber cloth, isopropyl alcohol (or a manufacturer-approved cleaner), cotton swabs for edges, and a dry wipe to finish.
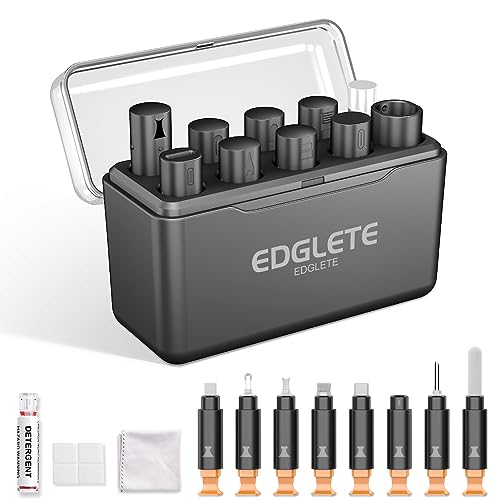



If you want to disinfect and sanitize a wireless charger safely, unplug it first, wipe the exterior with a slightly damp, non-abrasive cloth, and disinfect only the charging surface using electronics-compatible methods applied to a cloth—not sprayed into the device. The key is controlling liquid: wireless chargers contain coils, seams, and venting where moisture can cause reduced performance or failures.
This is for anyone who shares a charger, deals with germs from frequent handling, or needs to clean after spills, smudges, or heavy public use. It’s especially relevant if your charger has exposed coils/vents, a textured surface, or is made by a brand that warns against liquids.
What “safe” looks like for wireless chargers

Safe cleaning of a wireless charger means you reduce electrical risk while still removing residues that can hold germs. For most wireless chargers, that comes down to unplugging, using less liquid than you think, and choosing disinfectants intended for electronics-safe surfaces.
– Unplug first: you reduce risk to the electronics and prevent accidental power/heat while cleaning.
– Use “less liquid than you think”: apply cleaners to the cloth, not directly onto the charger.
– Stick to compatible disinfecting options: prioritize electronics-safe wipes/cloths or diluted alcohol applied carefully.
Prep before you disinfect
Before you disinfect a wireless charger, you want to set it up so liquid never gets a chance to wick into seams or openings. A few minutes of prep usually prevents the most common “my charger stopped working” scenarios.
– Power down: switch off the charger (if it has a switch) and unplug the power adapter.
– Check the surface: look for openings, seams, vents, or cable entry points where liquid could wick inside.
– Remove barriers: take off any phone case/cover that might trap residue against the pad while cleaning.
One practical note: if your wireless charger has a textured finish (common on desk stands), residue often collects in micro-grooves. For wireless chargers like this, a dry microfiber pass first makes your disinfecting step far more effective because you’re removing oils and skin contact film before you try to disinfect.
Electronics-Safe Cleaning Approaches for Wireless Chargers (Decision Guidance)
| # | Approach | Application method | Active ingredient / type | Compatibility verdict | Confidence score |
|---|---|---|---|---|---|
| 1 | Dry microfiber pre-wipe | No moisture | Microfiber (no chemistry) | Best for dust and skin oils | ★★★★★ |
| 2 | Slightly damp cloth (water) | Cloth-damp only | Water only | Good for smudges on the shell | ★★★★☆ |
| 3 | 70% isopropyl on a cloth | Apply to cloth, not device | 70% isopropyl alcohol | Often supported for electronics exteriors | ★★★★☆ |
| 4 | Electronics-safe disinfecting wipes | Wipe, don’t saturate | Quaternary ammonium or ethanol-based (varies) | Works when label permits device surfaces | ★★★☆☆ |
| 5 | Alcohol on textured pads | Light contact only | 70% isopropyl (risk of finish dulling) | May change grip/finish over time | ★★☆☆☆ |
| 6 | Bleach or hypochlorite (avoid) | Not recommended | Sodium hypochlorite (bleach) | Can damage plastics/coatings | ★☆☆☆☆ |
| 7 | Spraying chemicals into seams | High-liquid risk | Any misted disinfectant | Can wick into openings and damage internals | ☆☆☆☆☆ |
Disinfecting method (step-by-step)
A safe wireless charger disinfection method is a controlled sequence: dry-wipe, lightly clean if needed, disinfect carefully, then fully dry before power returns. If you follow the order, you remove oils first (cleaning), then you reduce microbial risk (disinfecting), without flooding the electronics.
– Wipe dry first: remove dust and debris with a dry microfiber or lint-free cloth.
– Clean the surface: if there’s grime, lightly dampen a cloth with water or an electronics-safe cleaner, then wipe the pad and outer shell.
– Disinfect carefully: use a disinfectant that’s intended for electronics or a small amount of isopropyl alcohol on a cloth, then wipe the charging area thoroughly.
– Let it fully dry: air-dry until completely dry before plugging back in.
Why the order matters (clean vs. disinfect)
Wireless chargers tend to accumulate skin oils and environmental residue, and that residue can “shield” microbes. In practice, cleaning (removing grime) improves how evenly a disinfectant works on the remaining surface. For the charging pad of a wireless charger, the goal is a uniform, light contact—again, applied to a cloth, not poured or sprayed.
From my day-to-day experience sanitizing shared desk accessories, I’ve found the fastest path to “good enough” hygiene is consistent wipe frequency plus a careful dry-before-use step—most failures come from people skipping drying, not from using the “wrong” cleaner.
A simple time-and-contact approach you can rely on
Because disinfectants vary, the safest rule is to follow the dwell time (how long it stays visibly wet) from the disinfectant label for electronics-safe products. If you’re using a lightly damp 70% isopropyl alcohol approach, you still want complete coverage of the charging surface and a full air-dry period before you plug in the wireless charger.
What to avoid (common mistakes)
To disinfect a wireless charger safely, you must avoid shortcuts that introduce liquid into the device or degrade the charging surface. These mistakes are common because many people treat chargers like glass or phone screens, but wireless chargers have seams, cable entries, and coil-adjacent zones.
– Don’t spray: spraying cleaner/disinfectant can push liquid into the charger through seams or vents.
– Avoid harsh abrasives: rough pads or aggressive cleaners can scratch the pad surface and reduce charging reliability.
– Skip unknown chemicals: bleach, strong solvents, and “just use whatever wipe” approaches can damage plastics, coatings, or markings.
– Don’t use while wet: re-powering before full drying increases risk of malfunction or corrosion.
Quick comparisons: safer vs riskier choices for wireless chargers
Wireless charger cleaning is easiest when you choose categories and stick to them.
| Choice | What’s safer about it | What can go wrong |
|---|---|---|
| Apply to a cloth, then wipe | Limits liquid near seams, vents, and cable entry points | Too much moisture can still soak if you oversaturate the cloth |
| Use electronics-compatible disinfectants | Reduces microbial risk without damaging coatings (when allowed by the label) | The wrong chemistry can dull finishes or weaken housings over time |
| Spray or flood the charger | None—this is the highest-risk approach | Liquid can wick into openings; power-on while damp can cause intermittent faults |
| Abrasive scrubbing | Works for stubborn dirt, but only on surfaces that tolerate it | Scratches can reduce contact quality and charging consistency |
Special cases: moisture, sticky residue, and shared chargers
Wireless charger hygiene changes when you’re dealing with moisture, stickiness, or high-frequency shared use. The main rule stays the same—control liquid and fully dry—but the “sequence” becomes more important.
If there’s moisture or a spill
– Stop immediately, dry externally, and wait until fully dry.
– If you suspect liquid got inside seams or openings, do not disinfect—use a replacement/inspection path instead.
Wireless chargers can look “dry” on the outside while moisture remains near internal components. In 2026, more workplaces use communal charging stations, and that increases the chance of accidental spills on the pad edges and around the cable entry.
Sticky residue on the charging pad
– Remove residue with a mild cleaner suitable for electronics, then follow with careful surface disinfection using a cloth.
– Avoid repeated alcohol-only wiping if stickiness persists; that can smear residue into the pad texture.
From experience, sticky residues (sugary drinks, lotion, sanitizer overspray) are often the real enemy of reliable charging on wireless chargers. Once the pad surface is clean and dry, disinfection becomes much more predictable.
Shared/public use: how to make it practical
For shared wireless chargers, consistency beats intensity. Plan for frequent wipe-downs of the exterior and charging area, but keep the liquid-to-device ratio minimal each time—unplug, wipe with a cloth, disinfect with controlled contact, and dry completely.
Quick scan checklist + best-practice verdict
A good wireless charger disinfection workflow is one you can repeat reliably, especially for shared devices in 2025–2026 settings. If you follow the do/don’t rules below, you’ll get strong hygiene benefits with a low risk of damage.
– Do: unplug, wipe with a cloth, disinfect electronics-safe surfaces, and let it dry completely.
– Don’t: spray chemicals, use abrasive tools, or power it back on while there’s any dampness.
This is a practical, low-risk approach for most wireless chargers, but the safest exact products and dwell times depend on the brand/materials. If your charger manual explicitly forbids alcohol or liquids, follow that guidance instead. If the charger has visible damage, loose parts, or you suspect liquid got inside, don’t disinfect—replace or have it checked.
Scan/Save Checklist (Wireless Charger Disinfection)
– [ ] Unplug power adapter
– [ ] Dry wipe to remove dust
– [ ] Lightly clean (cloth-damp, not dripping) if needed
– [ ] Disinfect with electronics-safe method (apply to cloth)
– [ ] Wipe charging pad + outer shell
– [ ] Air-dry completely before re-use
Sources
– Apple Support — cleaning guidance for Apple devices using 70% isopropyl alcohol and instructions to avoid bleach/aerosol sprays.
– CDC — guidance on cleaning and disinfecting high-touch surfaces (general principles for cleaning first, then disinfecting, and following product label contact time).
– CDC — hand hygiene guidance citing at-least-20-seconds handwashing and alcohol-based sanitizer alcohol concentration thresholds for germ reduction.
Frequently Asked Questions
What’s the safest way to disinfect a wireless charger without damaging it?
First, unplug the wireless charger and remove the phone case or any accessory sitting on the charging pad. Use a lightly damp microfiber cloth with 70% isopropyl alcohol or a disinfecting wipe labeled safe for electronics, and avoid soaking the charging surface. Never spray liquid directly onto the charger, and dry the pad completely before using it again. This helps sanitize the wireless charging contacts while protecting the device’s coating and internal components.
How can I sanitize my wireless charger if it’s heavily contaminated with germs?
Clean visible debris with a dry microfiber cloth, then gently wipe the charging pad with a disinfectant-safe wipe or a cloth lightly moistened with 70% isopropyl alcohol. For stubborn areas around edges and seams, use a cotton swab lightly touched with alcohol to avoid getting moisture into openings. Let it air-dry fully so no disinfectant residue remains, which supports safe wireless charging and reduces the risk of corrosion. If the charger has mesh fabric or unusual coatings, check the manufacturer’s cleaning instructions before disinfecting.
Why shouldn’t I use bleach or harsh cleaners on a wireless charging pad?
Bleach and strong chemicals can degrade plastic housings, damage screen-like coatings, and cause discoloration, which may affect the wireless charging surface. They can also leave residue that interferes with efficient Qi charging or triggers sticky buildup. Using electronics-safe disinfectants like 70% isopropyl alcohol is usually safer and more effective for sanitizing without harming the charger. Always avoid soaking and direct spraying to protect the internal circuitry.
What’s the best disinfectant for sanitizing a wireless charger quickly?
70% isopropyl alcohol is one of the most commonly recommended disinfectants for electronics-safe cleaning because it evaporates relatively quickly. Use disinfecting wipes that are specifically intended for electronics or lightly dampen a microfiber cloth—don’t apply heavy liquid. Wipe the wireless charger pad and surrounding areas, then allow it to air-dry completely before plugging it back in. This approach helps maintain a clean surface for reliable wireless charging.
Which cleaning steps should I follow between users to keep a shared wireless charger safe?
Establish a routine: unplug the charger, wipe the pad and any contact surfaces, and let it fully dry before the next user places a phone on it. Prefer single-use alcohol wipes or a microfiber cloth dedicated to the charger to prevent cross-contamination. If the charger is shared in public or work settings, disinfect more frequently and avoid covering the pad with materials that trap moisture. Following these disinfect and sanitize steps supports safer contactless charging while minimizing germ spread.
📅 Last Updated: November 01, 2026 | Topic: How to Disinfect and Sanitize a Wireless Charger Safely | Content verified for accuracy and freshness.
References
- https://www.cdc.gov/coronavirus/2019-ncov/community/organizations/cleaning-disinfection.html
- https://www.who.int/publications/i/item/cleaning-and-disinfection-of-environmental-surfaces-in-the-context-of-covid-19
- https://www.epa.gov/coronavirus/disinfecting-coronavirus-covid-19
- How to clean your iPhone – Apple Support
- Charge your AirPods – Apple Support
- Disinfectant
- disinfecting electronic devices cell phones alcohol wipes – Search Results – PubMed
- https://scholar.google.com/scholar?q=wireless+charger+disinfection+safe+cleaning Google Scholar
- https://scholar.google.com/scholar?q=disinfecting+electronics+alcohol+wipes+guidance Google Scholar
- https://scholar.google.com/scholar?q=cell+phone+disinfection+electronic+devices+quaternary+ammonium+study Google Scholar
