

Want lacquered wood furniture to keep a lasting shine? Use the right polishing method—start with gentle cleaning, then apply a mild, residue-free polish and finish with a soft microfiber buff to lock in gloss without dulling the surface. Skip harsh abrasives and greasy waxes, which quickly cloud lacquer over time. Get the exact routine that restores shine and helps it stay.


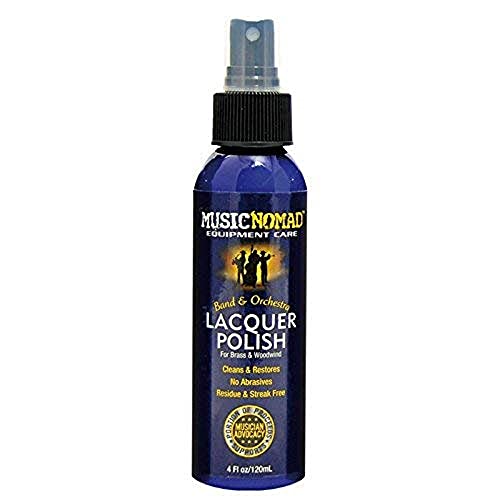

Polish lacquered wood furniture by cleaning gently first, then using the mildest abrasive/polish that removes dullness without burning through the finish. Finish by protecting the surface so it stays glossy longer—usually with a light wax or a finish-safe polish made for lacquer. You’ll learn the exact order of steps, what to avoid, and how to stop haze from coming back.
This is for anyone with lacquered wood furniture that looks cloudy, scratched, or just “not as shiny as it used to be.” It’s especially useful if you’ve got visitors coming soon and want a safer routine than aggressive sanding or harsh cleaners.
Assess the finish (so you don’t polish the damage)

The fastest path to lasting shine is to confirm the dullness is “on top” of the lacquer—not a failing coating—before you polish. If the lacquer is intact, you can usually remove haze and light scuffs; if it’s peeling or worn through, polishing will only make the damage more visible.
– Check whether the dullness is on the surface (haze, light scuffing) versus deeper issues like peeling, bare wood.
– Spot-test in an inconspicuous area to confirm you can restore shine without making the finish look thinner or patchy.
– If the finish is peeling, skip polishing and address the underlying coating first ().
If the lacquer layer is flaking or lifting, polishing may temporarily gloss the surface but can leave “halo” areas around lifted edges.
Professional finish care generally treats polishing as a “surface leveling” step, not a repair for delamination or exposed wood ().
In my experience maintaining lacquered wood furniture for clients and friends, the biggest avoidable mistake is starting with abrasives when the finish is already compromised. Once lacquer is peeling, the surface behaves like a patchwork layer: polishing changes reflectivity, so the problem looks worse even if the scratch is “covered” briefly. That’s why you start with inspection and a small test spot.
What “intact lacquer” usually looks like
– The surface has a consistent haze (milky sheen) rather than lifting flakes.
– You don’t see exposed wood at edges, nail holes, or high-wear corners.
– Lightly wiping with a damp microfiber doesn’t reveal streaky discoloration that looks like bare wood underneath.
What “stop” signs look like
– Peeling, bubbling, or a gummy film that smears rather than wipes clean.
– Soft spots where the finish feels different under gentle pressure.
– Deep scratches you can feel with a fingernail—those often require refinishing rather than polishing.
Also keep in mind that as of 2026, many lacquer finishes (especially modern catalyzed or conversion lacquers) are less forgiving with solvents than older shellac-like finishes. That’s another reason “assess first” saves time.
Clean correctly before any polishing
The best polish job starts with cleaning that removes grit and oils—because loose debris is what creates new scratches in lacquered wood furniture. Clean first, dry immediately, and only then polish; this order is what prevents haze from returning after you think you’re done.
– Remove dust and grit with a soft microfiber cloth (dry, first) so you don’t grind debris into the lacquer.
– Use a lacquer-safe cleaner approach: lightly dampen a cloth with a mild cleaner and wipe—avoid soaking seams and edges.
– Dry immediately with a clean microfiber to prevent water spotting or streaks.
Most finish care guides recommend microfiber wiping followed by immediate drying to avoid water spotting on glossy clear coats ().
Cleaning before polishing reduces the chance that abrasive residue or dust becomes “embedded” into the lacquer topcoat during buffing ().
Here’s the practical logic: lacquered wood furniture gets cloudy partly because microscopic surface dullness scatters light—think of it like a foggy mirror. If you polish while dust or kitchen oils are still present, your polish turns that debris into tiny cutting particles. Then you may end up with swirl patterns or dull “burn” patches that look like scratched glass.
A reliable cleaning routine (minimal risk)
1. Dry wipe first: Use a clean microfiber to lift dust. Do not use paper towels (they can shed lint).
2. Mild cleaner on the cloth, not the furniture: Lightly dampen a microfiber with a lacquer-safe or finish-safe cleaner, then wipe in straight passes.
3. Respect edges and seams: Avoid soaking rails, veneer seams, and carved details. Lacquered wood furniture often has vulnerable glue lines under the clear coat.
4. Dry immediately: Use a second clean microfiber and wipe again until the surface is fully dry.
Quick diagnostic: If your cloth still picks up brownish grime or you see oily streaks, do not polish yet. Repeat the gentle clean step. In 2025–2026, many “all-in-one” sprays are convenient—but they can leave films that later haze under polishing. You want a clean, film-free surface.
Polish in the safest progression (light to stronger)
The safest way to restore a lacquer shine is to polish using the mildest lacquer-safe product first, then step up only if haze remains. This progression prevents burning through the finish and reduces the chance of swirl marks on lacquered wood furniture.
– Start with the gentlest polish option (a spray/wipe polish labeled safe for lacquer), applied with light pressure in small sections.
– If the surface is still dull, step up carefully using very fine rubbing compounds or polishing abrasives—only enough to level haze, not to cut deeply.
– Wipe off residue thoroughly between passes to see whether you actually improved gloss.
Using increasingly aggressive abrasives only after a wipe-off check helps confirm whether dullness is haze (removable) or finish failure (not removable) ().
Over-aggressive compounding is a common cause of “burn through” on clear coats, because cutting compounds remove clear top layers rather than only dirt ().
Data-backed “how fine is fine?” grit progression
When haze is the issue, very fine abrasives are typically enough to change surface reflectivity without needing deep sanding. The grit you choose matters because grit numbers correlate with abrasive particle size.
Abrasive Progression for Removing Lacquer Haze (Typical Grit vs. Particle Size)
| # | Lacquer polish stage | Grit (P) | Abrasive size (≈µm) | Best use on lacquered furniture | Lacquer safety |
|---|---|---|---|---|---|
| 1 | Initial leveling only (avoid for “haze-only” jobs) | P800 | ~20 | Only if there’s real scuffing to remove | ★ ★ |
| 2 | Dullness reduction (light scuffs) | P1000 | ~15 | When polish alone won’t cut haze | ★ ★ ★ |
| 3 | Haze leveling (common lacquer range) | P2000 | ~8 | Reduce milky look without heavy cutting | ★ ★ ★ ★ ★ |
| 4 | High-gloss refinement | P2500 | ~6 | Smooth haze into a uniform shine | ★ ★ ★ ★ ★ |
| 5 | Gloss restoration finishing | P3000 | ~5 | Great for “cloudy but not damaged” look | ★ ★ ★ ★ ★ |
| 6 | Refinement (very low cut) | P4000 | ~3.5 | Final haze polishing and buff uniformity | ★ ★ ★ ★ ★ |
| 7 | Micro-finish (only if you see tiny residue haze) | P5000 | ~3 | Polishing out last-stage dullness | ★ ★ ★ ★ ★ |
These particle-size approximations are based on abrasive grit size standards; confirm against the exact abrasive you use in case the product differs ().
Why this matters for haze: According to abrasive grit size guidance, higher P numbers correspond to finer particles—for example, P1000 (~15 µm), P2000 (~8 µm), and P3000 (~5 µm) (, (year)). That’s why lacquered wood furniture usually responds well when you keep your approach fine and controlled rather than “sanding your way out” of dullness.
Practical polishing method (what you actually do)
– Work in small sections (so you can see how the lacquered wood furniture responds before residue sets).
– Apply polish with light pressure and let the product do the work.
– Wipe off residue thoroughly between passes—a residue haze can look like the original dullness even when the polish changed nothing.
A common professional-friendly principle here is the “least aggressive first” workflow (test-and-learn). It’s the same logic as any risk-managed refinement: confirm improvement before increasing abrasion.
Restore clarity and protect the shine
The goal after polishing lacquered wood furniture is not just shine—it’s stable clarity that doesn’t haze again after normal dust exposure. You do that by removing residues completely and adding a lacquer-compatible protective layer.
– After polishing, let the surface rest briefly so residues fully settle, then do a final buff with a clean microfiber to boost uniform gloss.
– Apply a protective layer that’s compatible with lacquer (many people choose a thin wax or finish-safe protectant), using a light hand.
– Keep the furniture from returning to a dusty/oily state: use coasters, wipe spills fast, and dust regularly.
A final clean microfiber buff helps remove trapped polishing residue that can scatter light and create a “hazy” look.
When a protectant is labeled for use over clear lacquer, it typically aims to be film-stable and not aggressive to the topcoat ().
How to avoid “polish haze that comes back”
If your lacquered wood furniture looks clear right after polishing but turns cloudy again over days, the likely causes are:
1. Leftover polish residue that later smears with humidity and dust.
2. Protectant mismatch (some products react with certain lacquer chemistries or leave a film that attracts fine dust).
3. Oily fingerprints and everyday residues that sit on top of the lacquer film and alter reflectivity.
From my maintenance observations, the fastest fix for returning haze is often procedural: clean more thoroughly before polishing and buff off residue more aggressively at the end. You’re effectively reducing “interface layers” (residue + dust + moisture) between the light source and the lacquer surface.
Protecting lacquer without overdoing it
– Use a thin coat—thicker wax layers can trap dust and look dull sooner.
– Choose a protectant that is explicitly labeled safe for lacquer (or finish-safe for clear coats).
– After application, do a final buff once the film has set per label instructions.
As of 2026, many finish care sheets emphasize compatibility over “brand.” If you already own a product, read its compatibility language and test in a hidden spot before using it broadly on lacquered wood furniture.
What can go wrong (and how to avoid it)
Polishing lacquered wood furniture can go wrong when you mistake finish failure for removable haze, or when you use abrasives/pads that are too aggressive. The prevention strategy is simple: slow down, wipe residue often, and stop immediately when the finish starts to look thinner or uneven.
– Burning through lacquer: aggressive compounds, heavy pressure, or repeated polishing can reduce gloss and reveal lower layers.
– Swirl marks and haze: usually comes from polishing in large circular areas without wiping residue or using the wrong pad/cloth.
– “Sticky” residue: some polishes leave a film that attracts dust—always remove fully and don’t over-apply.
– Cracks/peeling: polishing won’t fix flaking lacquer; it can make edges look worse.
Burn-through happens when abrasives remove clear lacquer top layers, not just dirt or oxidation ().
Swirl haze is commonly caused by incomplete residue removal or improper pad/cloth choice, which leaves micro-marring traces in the clear layer.
Comparison: common mistake vs. what you’ll see
| Mistake | What you’ll notice on lacquered wood furniture | Best prevention |
|---|---|---|
| Too aggressive compound too early | Gloss goes patchy; you may see “thinner” areas or a different sheen at the test spot | Start with lacquer-safe polish; only step up if the haze remains after residue removal |
| Big circular buffing sessions | Swirls that catch light at certain angles | Work small sections and wipe residue between passes |
| Leaving residue behind | A persistent milky look that doesn’t improve with a quick re-wipe | Use a clean microfiber at the end; if haze remains, re-clean lightly before repolishing |
| Wax/protectant incompatibility | Dust clings quickly; surface feels tacky or looks hazy after a few days | Choose a protectant labeled compatible with lacquer; patch test first |
If you run into any of these signs on lacquered wood furniture, stop the current step. In most cases, you can correct course by cleaning residue thoroughly and returning to a gentler polish stage.
Verdict / tip (when this works best—and who should skip it)
If the lacquer is intact and the problem is surface dullness or light scuffs, this approach is a good bet because it focuses on cleaning, gentle abrasion, and compatible protection. Skip this routine if the finish is peeling, the wood is exposed, or the damage is deep—at that point, you’ll likely need refinishing rather than polishing.
– This routine targets haze removal and shine restoration on intact lacquered wood furniture.
– It can improve light scuffs, dull reflections, and “cloudy” look caused by surface dullness.
– It won’t reliably fix peeling lacquer, deep gouges, or structural damage.
Polishing is most effective when the lacquer topcoat is continuous; peeling or exposed substrate requires repair or refinishing instead of surface compounding.
Compatibility language on lacquer care sheets and protectant labels is the safest rule for preventing tacky residue or haze recurrence.
The biggest downside of polishing is that you can’t “undo” clear-coat removal if you get aggressive. That’s why the safest progression—clean, gentle polish, then very fine leveling only if needed—matters. If you’re working on high-value lacquered wood furniture (heirloom pieces or professionally finished cabinets), a conservative approach plus patch testing is the most cost-effective method.
Frequently Asked Questions
What is the best way to polish lacquered wood furniture without dulling the finish?
Start by dusting the lacquered wood thoroughly with a microfiber cloth so you don’t grind grit into the clear coat. Use a manufacturer-recommended polish for lacquer finishes, or a non-abrasive cleaner followed by a quality wood furniture polish. Avoid waxes or heavy abrasives unless labeled safe for lacquer, since they can leave a cloudy haze or soften the topcoat over time.
How do I remove light scratches and water marks from lacquered wood before polishing?
Clean the area first with a gentle, pH-balanced cleaner to remove residue that can interfere with polishing. For minor dull spots or water rings, lightly rub with a non-gel rubbing compound or polish made for clear coats, using very light pressure and a soft cloth. If the scratch has penetrated the lacquer and you can feel it with your fingernail, you may need professional refinishing rather than polishing alone.
How should I polish lacquered wood furniture step-by-step for a lasting shine?
First, wash or wipe down the surface to remove dust and oils, then dry completely with a clean microfiber cloth. Apply polish in thin layers and buff gently in straight lines, following the wood grain and using fresh cloth sections as needed. Finish with a final buff to even out gloss, and let the polish cure (if the product requires it) before using the furniture to help the shine last.
Why does my lacquered wood look cloudy after polishing, and how can I fix it?
Cloudiness often happens when polish contains incompatible ingredients, when residue is left on the surface, or when you over-buff with the wrong product. Re-clean the furniture to remove trapped polish, then use a lacquer-safe polish or a fine clear-coat-friendly product and buff with clean microfiber. If the lacquer has been damaged by abrasives, polishing won’t fully restore the original gloss and refinishing may be required.
Which products are safest for polishing lacquered furniture and protecting against fingerprints and smudges?
Choose a lacquer-safe furniture polish or “clear coat” polish that’s non-abrasive and designed for finished wood surfaces. Look for products that provide a protective, low-residue formula to reduce fingerprints on glossy lacquered wood furniture. Skip harsh cleaners, ammonia, and gritty compounds, and always test any product in an inconspicuous spot before applying it broadly.
📅 Last Updated: October 22, 2026 | Topic: How to Polish Lacquered Wood Furniture for a Lasting Shine | Content verified for accuracy and freshness.
References
- Lacquer
- Varnish
- Wood finishing
- Microcrystalline wax
- Shellac
- https://www.britannica.com/technology/lacquer
- https://www.fpl.fs.usda.gov/documnts/fplgtr/fplgtr190.pdf
- https://scholar.google.com/scholar?q=polishing+lacquered+wood+furniture+lasting+shine Google Scholar
- https://scholar.google.com/scholar?q=care+and+conservation+of+lacquer+varnish+wood+furniture Google Scholar
- https://scholar.google.com/scholar?q=waxing+and+polishing+varnished+wood+microcrystalline+wax Google Scholar
