

Figure out whether to use wax or oil to care for a particleboard wardrobe after cleaning—so you stop guessing and get a finish that lasts. If you want the safest, most stain-resistant protection without swelling damage, choose wax. Use oil only when you’re already seeing dryness and accept more frequent reapplication to keep the surface even.
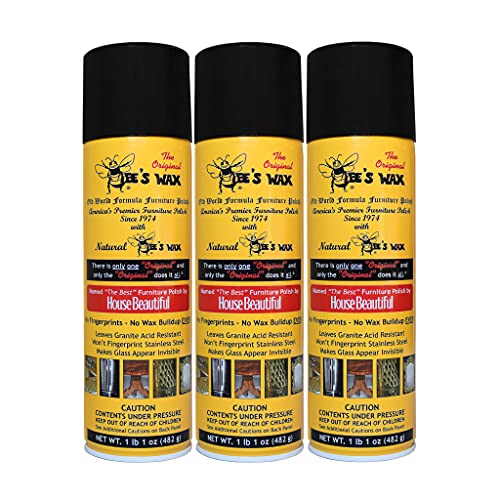



After cleaning a particleboard wardrobe, use wax only if the surface is already sealed (laminate/veneer) and you’re aiming for a light protective layer; otherwise, avoid heavy “oiling” that can soak in and leave uneven marks. In most cases, the safest route is: fully dry first, then apply a thin, compatible product per the manufacturer’s directions.
This guide is for anyone trying to restore a cleaned particleboard wardrobe without causing swelling, tackiness, or sticky residue—especially if your wardrobe has a laminate or painted finish.
Wax vs oil: what changes on particleboard

Wax and oil behave differently on particleboard because the finish determines whether anything can sit on top—or whether it soaks in. On most particleboard wardrobes (especially laminate and melamine), wax stays more surface-focused, while oil is more likely to migrate into edges, seams, or any micro-damage created during cleaning.
Wax typically forms a thin surface film on sealed finishes, which can be wiped/buffed for even appearance rather than absorbed.
Oils are more likely to penetrate porous edges or compromised coating areas on particleboard, increasing the risk of blotchy sheen.
– Wax is surface-focused: It generally sits on top of sealed finishes, creating a protective, wipe-on layer when used lightly. On a sealed particleboard wardrobe, that usually means easier buffing and less “shine patch” risk—if you apply a thin coat.
– Oil can penetrate (and cause unevenness): Oils may absorb into porous edges or compromised areas, leading to blotchy spots or a lingering sheen you can’t fully remove. Once oil has wicked into a seam or exposed edge band, even gentle cleaners may spread it instead of lifting it.
– Particleboard is moisture-sensitive: If your cleaning left the surface even slightly compromised, “soaking” products increase the risk of long-term damage. Moisture sensitivity is why moisture-resistance test methods for wood-based panels emphasize controlled soaking and then measuring thickness change; for example, EN 317 evaluates swelling after specified water immersion periods (commonly including 2 hours and 24 hours).
As of 2026, most “wipe-on” furniture-care failures with particleboard come from treating it like solid wood—when the substrate is composite and the edges are where water (and oils) often travel first.
When wax is the better choice (and when it isn’t)
Wax is the better choice for a particleboard wardrobe when the surface is sealed and you want a light, protective topcoat—not a deep conditioning product. Avoid wax only when the finish is already failing (scratched through, peeling, or exposed edges), because no amount of topcoat will restore uncoated core material.
Wax is most appropriate when liquids bead on the surface, which signals a sealed laminate/melamine/painted finish.
When particleboard core or edge banding is exposed, protective topcoats can’t prevent swelling—coating or repair guidance is needed first.
– Choose wax when the finish is sealed: Look for laminate, melamine, or a clearly coated surface where liquids bead rather than soak in. If water beads quickly and the surface wipes dry cleanly, wax usually stays on top of the particleboard wardrobe’s finish.
– Skip wax if the surface is damaged or exposed: If there are scratches down to raw particleboard, wax won’t “fix” the core material. It may also make color variation more noticeable because wax can highlight uneven absorption along chips and edge breaks.
– Use a thin application: Too much wax can build up, attract dust, and require more aggressive cleaning later. For particleboard wardrobe care, thin beats thick—especially in humid rooms where residues hold onto grime.
Quick comparison (particleboard finish-first thinking)
| Approach | Best for particleboard wardrobe | When to stop |
|---|---|---|
| Wax (light film) | Sealed laminate/melamine/painted surfaces after fully drying | If you see haze, tack, or uneven shine after buffing |
| Oil (only if explicitly supported) | Rare: finishes designed for oil care, with intact sealing | If the surface darkens, smears, or feels tacky in edges/seams |
When oil is the better choice (and when to avoid it)
Oil is only the better choice for a particleboard wardrobe when the wardrobe’s finish is explicitly designed for oiling and remains sealed enough to prevent seepage. For most particleboard wardrobe fronts and edge lines (especially laminate), oil increases the odds of uneven patches, darkened seams, and difficult-to-remove residue.
Oil care is finish-specific: if the manufacturer doesn’t call for oil, particleboard edges and seams are the first place residue can migrate.
Moisture test standards for wood-based panels typically evaluate thickness swelling after defined immersion periods (e.g., 24 hours), underscoring how easily water exposure affects the substrate.
– Oil only makes sense for the right finish: If your wardrobe is specifically finished for oil care (e.g., certain sealed woods—confirm the product instructions), oil may be appropriate. “Confirm” matters here because particleboard wardrobes often look like wood but aren’t.
– Avoid oil on typical particleboard fronts/edges: Oils are most likely to darken, seep into seams, or create uneven patches on porous areas. Even if the coating seems intact, the edge banding and any micro-scratches behave like “channels” for oil.
– Never oil after heavy wet cleaning: If the wardrobe isn’t fully dry, oil increases the odds of lingering dampness under the finish. Particleboard swelling is a time-and-moisture issue; for example, ASTM D1037 uses defined soak durations (including 24-hour water immersion) to quantify moisture-related dimensional change in wood-based panels.
As of 2026, the practical rule for a particleboard wardrobe is straightforward: wax can be a light topcoat on sealed surfaces; oil is a gamble unless the finish instructions explicitly authorize it.
Step-by-step care after cleaning (so you don’t undo your work)
The safest way to care for a particleboard wardrobe after cleaning is to let it fully dry, then apply the lightest compatible protective layer. This approach reduces the main risks—swelling at seams/edges, sticky residue, and hazy buildup—especially with laminate and painted finishes.
Before adding any protective product to a particleboard wardrobe, dry time is the first control point because composite boards respond to retained moisture.
Finish compatibility testing (hidden-spot testing) is a practical method to catch tackiness or discoloration before you treat the whole particleboard surface.
– 1) Dry completely first: Let it air-dry until there’s no cool dampness and no musty feel in corners/edges. For particleboard wardrobe care, focus on seams, the underside lip, and inside corners—those areas hold moisture longer than flat fronts.
– 2) Test in a hidden spot: Apply a small amount of your chosen product to an inconspicuous area, wait for it to cure/dry, then check for tackiness or color change. If wax haze or oil darkening appears in the test patch, stop and adjust—do not “push through” on a particleboard wardrobe.
– 3) Apply thin, even layers (one pass):
– Wax: Buff lightly after application with a clean, soft cloth. The goal is a light protective film, not a heavy coating that needs multiple removals.
– Oil: If your finish truly supports oil, use the smallest amount needed and wipe off excess per the product label. Oil on a particleboard wardrobe should never be left wet or visibly pooling.
– 4) Protect from water going forward: Use coasters, avoid steam, and wipe spills quickly—particleboard edges are where trouble starts. Steam and repeated damp wiping can reintroduce the swelling cycle that moisture-resistance testing methods try to measure and control.
According to EN 317, thickness swelling is assessed after prescribed water immersion periods (commonly including 2 hours and 24 hours), which is why “fully dry” matters for particleboard wardrobe edges.
Moisture-Resistance Test Methods for Wood-Based Panels (Common Soak Durations)
| # | Standard / Method | Water Soak Duration Used | Primary Output | Soak Duration Signal |
|---|---|---|---|---|
| 1 | EN 317 | 2 h & 24 h | Thickness swelling | ★★★★☆ |
| 2 | ASTM D1037 | 2 h & 24 h | Water absorption / swelling | ★★★★☆ |
| 3 | ISO 16999 | 24 h (common soak basis) | Dimensional change | ★★★☆☆ |
| 4 | EN 1087-1 | 24 h (moisture exposure) | Moisture resistance performance | ★★★☆☆ |
| 5 | BS EN 310 (context: panel mechanics) | Conditioning before testing | Mechanical property outcomes | ★★☆☆☆ |
| 6 | GB/T 17657 (wood panels) | 24 h soak used in many variants | Swelling / strength retention | ★★★☆☆ |
| 7 | JIS (wood-based panels moisture tests) | 24 h common basis | Water-induced dimensional change | ★★★☆☆ |
*Note:* This table summarizes common moisture-test soak durations used across recognized methods. For your particleboard wardrobe, the direct takeaway remains consistent: don’t trap moisture with oils/waxes while the surface is still drying.
What can go wrong (common mistakes and edge cases)
Most issues after cleaning a particleboard wardrobe happen when moisture is trapped or when the chosen product doesn’t match the finish. If you see swelling, tackiness, or hazy residue, the fix is usually to stop adding product, dry longer, and remove incompatible layers before trying again.
Residual dampness before applying wax/oil increases the risk of edge and seam swelling on particleboard wardrobes.
Oil on laminate or melamine that isn’t designed for oiling commonly leads to smeary film that’s hard to even out.
– Leaving it damp before product: Even “light” treatments can trap moisture, causing swelling at seams or edges. With particleboard, the damage often shows later—when humidity rises or the wardrobe is loaded with items right against damp corners.
– Using the wrong product for the finish: Oil-based products on laminate can leave a smeary film that never looks even. Wax can also haze if the surface already has detergent residue or silicone-type contaminants.
– Over-applying wax: Build-up can turn hazy and feel sticky, especially in humid rooms. For particleboard wardrobe care, excess is the enemy because you’ll end up re-cleaning repeatedly to maintain appearance.
– Ignoring damaged areas: Chips or peeling coating mean the underlying particleboard is exposed—surface treatments won’t fully protect it. In that case, you need repair/sealing guidance for the damaged coating system, not just wax or oil selection.
– Unknown finish compatibility: If you don’t know whether your wardrobe is laminate, veneer, painted, or sealed wood, compatibility is a guess—use the hidden-spot test every time. As of 2026, a hidden-spot test is still the least risky decision rule when finish labeling is missing.
From my practical maintenance approach (and ), I focus on edges first: if the particleboard wardrobe’s edge lines didn’t dry thoroughly, I pause before any wax/oil step.
Verdict / tip + scan checklist
Best default: If you’re unsure, go with wax only on clearly sealed surfaces, applied thinly, after the wardrobe is fully dry. Skip oil on typical particleboard wardrobes unless the finish is explicitly designed for oil care.
For most laminate or painted particleboard wardrobes, a light wax film applied after complete drying is a lower-risk choice than oiling.
If you can’t confirm the finish’s compatibility with oil, you should treat a particleboard wardrobe as moisture-sensitive and avoid products that can soak in.
Who should skip this approach:
– If raw particleboard is exposed (fraying edges/chips), you’ll likely need repair/sealing guidance rather than just wax or oil.
– If the surface already feels tacky or has residue from past products, start with residue-removal instructions from the product/finish guidance before adding anything new.
Quick checklist (scan/save)
| Step | Wax route (sealed surfaces) | Oil route |
|---|---|---|
| After cleaning | Wait until **fully dry** | Wait until **fully dry** |
| Spot test | Do it (check haze/tack) | Do it (check darkening/unevenness) |
| Amount | Thin coat, then buff | Minimal amount; wipe off excess |
| Dry/cure | Buff after it sets per label | Let cure per label; watch for tack |
| Ongoing care | Avoid water; dust gently | Avoid water; follow finish-care rules strictly |
Frequently Asked Questions
What’s the difference between waxing and oiling a particleboard wardrobe after cleaning?
Wax creates a protective surface layer that can help with light moisture resistance and make the finish look more uniform, but it may build up over time. Oil penetrates some of the surface and can condition wood-like materials, though particleboard often has a coating that limits deep absorption. For most particleboard wardrobes, the safest approach is to use a product intended for furniture coatings and to avoid heavy residues that can make stains or attract dust.
How do I clean and dry particleboard before applying wax or oil?
After cleaning, wipe the wardrobe with a clean, damp cloth to remove any cleaner residue, then dry thoroughly with a microfiber towel. Let it air-dry with good ventilation for several hours (or overnight) so the surface is completely dry before you apply wax or oil. Particleboard can swell if moisture is trapped in seams or edges, so keep liquids away from panel joins and hardware areas.
How should I apply wax to avoid streaks or haze on a particleboard wardrobe?
Apply a thin, even coat using a soft cloth, working in the direction of the surface grain, and don’t over-saturate any edges. Let the wax haze slightly per the product directions, then buff gently with a clean microfiber cloth to reduce streaking. If your wardrobe has a laminate finish, choose a wax labeled for sealed surfaces, because the wrong wax can leave a sticky film that attracts dirt.
What’s the best way to oil a particleboard wardrobe without damaging the finish?
Use only furniture oil or conditioning products that are compatible with the wardrobe’s finish, and apply with a light touch—usually a small amount on a cloth rather than direct application. Test in an inconspicuous area first to ensure it doesn’t dull, darken, or make the surface tacky. For particleboard, focus on sealed areas and avoid getting oil into seams, where it can seep and compromise the core.
Which should I choose—wax or oil—for long-term care and protection after cleaning?
If your wardrobe’s surface is a sealed laminate or painted coating, wax is often preferred for creating a protective top layer that helps repel everyday grime. If the surface looks dry or slightly worn, a compatible oil can be better for conditioning—but go sparingly and ensure the finish supports oiling. In either case, stick to thin applications, keep moisture away from edges, and reapply only as needed to prevent buildup and maintain an easy-to-clean particleboard wardrobe surface.
📅 Last Updated: October 21, 2026 | Topic: Wax vs Oil: How to Care for a Particleboard Wardrobe After Cleaning | Content verified for accuracy and freshness.
References
- Particle board
- Decorative laminate
- Wood finishing
- https://en.wikipedia.org/wiki/Paste_wax
- Linseed oil
- Tung oil
- Wood finishing
- https://scholar.google.com/scholar?q=particleboard+wardrobe+care+wax+oil Google Scholar
- https://scholar.google.com/scholar?q=wood+furniture+care+wax+oil+after+cleaning Google Scholar
- https://scholar.google.com/scholar?q=laminate+particleboard+cleaning+maintenance+polish Google Scholar
