

With each bend of a charging cable, you may notice a faint dust smell and a slightly tacky feel where grime builds. That buildup can interfere with consistent contact and heat the connector during charging, making routine care matter even if the cable still looks clean. Find out the practical cleaning frequency for different environments and usage levels so your cables stay reliable.
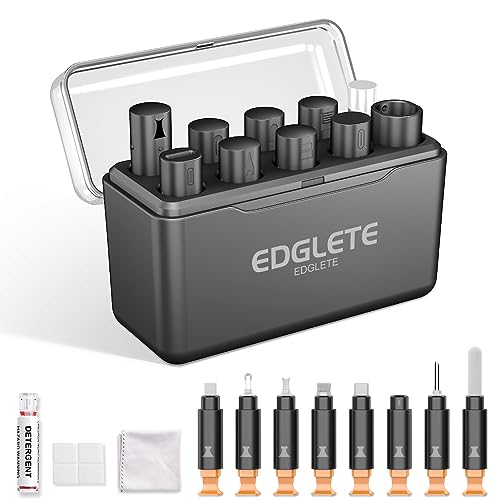



Clean your charging cable about once a month for routine grime, and clean right away if you notice dirt, dust, or discoloration near the connectors. If your cable regularly brushes pockets, gym bags, or car interiors, clean it more often—about every 2 weeks—because lint and skin oils accumulate quickly at the plug tip where contact is made.
If you charge devices daily (phone, earbuds, tablet, power bank), keeping the cable ends clean improves reliable electrical contact and lowers the risk of corrosion from debris and skin oils. This matters most for USB-C and Lightning connectors, which tend to collect lint inside the narrow contact area faster than many people expect—especially when you’re frequently plugging in outdoors, in cars, or around fabrics.
When to clean your charging cable (simple schedule)

You should use a simple cadence: monthly for most users, every 2 weeks in high-lint environments, and immediately when performance looks “off.” This schedule is designed to prevent buildup from interfering with metal-to-metal contact, which is what ultimately controls whether charging is stable.
– Monthly (baseline): A quick end-clean once per month is enough for most home or office use.
– Every 2 weeks for heavy-lint environments: If your cable regularly touches pockets, bags, or dusty areas, aim for a more frequent clean.
– Immediate cleaning when needed: Clean as soon as you see visible buildup, feel roughness on the connector, or notice charging becomes inconsistent.
Recommended Cable End-Clean Cadence by Usage Scenario (This Guide)
| # | Usage scenario | Typical environment | Suggested interval | Maintenance ease | Max days until next clean |
|---|---|---|---|---|---|
| 1 | Home desk (light carry) | Low lint exposure | Monthly | ★★★★☆ | 30 |
| 2 | Office or bedside (stored on hook) | Minimal fabric contact | Monthly | ★★★★☆ | 30 |
| 3 | Brief pocket carry (day to day) | Medium lint exposure | Every 2 weeks | ★★★☆☆ | 14 |
| 4 | Gym bag carry | High lint exposure | Every 2 weeks | ★★★☆☆ | 14 |
| 5 | Car console / glovebox carry | Dust exposure | Every 2 weeks | ★★★☆☆ | 14 |
| 6 | Mixed travel (tossed in bags) | Variable lint & dust | Every 2 weeks | ★★★☆☆ | 14 |
| 7 | Visible dirt or inconsistent charging | Detected buildup | As soon as needed | ★☆☆☆☆ | 0 |
What to clean (and what to leave alone)
You should concentrate on the connector ends, because that’s where debris blocks the electrical path. Leave the cable body mostly alone and avoid actions that push moisture or particles deeper into the port system.
– Focus on the connector ends: The area that inserts into the port and the cable tip is where debris prevents a secure electrical connection.
– Wipe the outer cable sheath lightly: Light surface cleaning can remove oils and dust without stressing the cable interior.
– Avoid soaking the cable: Moisture inside the connector can create failure modes (corrosion, intermittent contact, or charging instability), so keep cleaning limited to the outside and connector region.
Why the focus on ends? Connector reliability is designed around repeated mating cycles and clean contact interfaces. For example, according to the USB Type-C specifications, receptacles are designed for a minimum of 10,000 insertion/removal cycles (). When lint or residue accumulates, the connector can still “fit,” but contact quality can degrade due to increased gap, contamination, or reduced effective contact area.
Also, remember that normal charging conditions often involve power levels that can make contact resistance more noticeable over time. For instance, according to the USB 2.0 specification, a standard USB port can supply 5 V up to 500 mA (2.5 W) (). If the connector end is dirty, slightly higher resistance can contribute to heat at the interface—one reason inconsistent charging tends to show up before a full total failure.
Best way to clean safely (step-by-step)
You can clean a charging cable safely by doing three things: remove power, remove loose lint dry first, and only use minimal moisture when necessary. This approach reduces the chance of damaging connector plating or leaving residues that interfere with contact.
– Step 1: Power down and unplug: Remove the cable from the device and charger before cleaning. This prevents accidental stress on the connector and reduces the chance of electrical shorts if debris moves.
– Step 2: Remove loose lint gently: Use a dry, soft tool (like a dry microfiber cloth) to wipe away dust. If lint is visible, a dry, non-abrasive tool (for example, a clean wooden toothpick) can help lift surface fibers—use gentle pressure to avoid scratching.
– Step 3: Clean the connector carefully: If needed, use a lightly moistened cloth or a very small amount of alcohol on an applicator. For alcohol, many public-health guidelines consider 60–95% alcohol effective for disinfecting (CDC guidance on alcohol concentration for disinfection). For cables, the key is not “more liquid,” but “less liquid and less direct exposure.” Apply alcohol to the cloth or applicator—not into the connector housing.
– Step 4: Let it fully dry before reuse: Make sure the connector is dry before plugging back in. Even small liquid trapped at the interface can temporarily affect charging behavior.
To make the safest cleaning decisions, use this simple comparison framework:
| Cleaning method | Best for | Primary risk | Safer way to reduce risk |
|---|---|---|---|
| Dry wipe (microfiber) | Dust, lint, light skin oil haze on the outside of the plug | Dragging grit if you press too hard | Wipe with light pressure; use fresh cloth sections |
| Lightly moistened cloth (outside only) | Smudges that don’t lift dry | Moisture intrusion if the connector housing is over-wet | Use minimal moisture; never drip; dry fully before reuse |
| Alcohol on applicator (minimal) | Residue removal when manufacturer guidance allows alcohol | Residue/chemical compatibility issues | Only use manufacturer-approved chemicals; don’t spray into the connector |
What can go wrong (common mistakes and edge cases)
You can reduce charging issues with cleaning, but a few mistakes can make things worse—especially if you push liquid or abrasives into the connector. The safest rule is: clean less aggressively than you think you need, and stop if the hardware looks damaged.
– Using abrasive materials: Metal tools, rough scrubbing, or aggressive brushes can scratch plating and worsen connection reliability.
– Over-saturating the connector: Soaking or spraying cleaner directly into the port can leave liquid trapped inside. That can create new intermittent faults instead of fixing the old one.
– Trying to “fix” damaged hardware: If the connector is bent, cracked, or the strain relief is failing, cleaning won’t restore durability. In those cases, replace the cable and inspect the device port.
– Household cleaners and unknown chemicals: Avoid cleaners that leave residue; residue can interfere with contact surfaces and may attract more debris.
– If your device port is the real problem: Sometimes the cable end looks clean, but the device port is packed with lint—especially for USB-C and Lightning. If charging fails repeatedly after cable cleaning, inspect the device port area too.
A practical edge case: if a cable “works” only when you hold it at a particular angle, that points to either connector wear, internal cable damage, or port debris. Cleaning can help when contaminants block reliable contact, but it cannot correct broken strain relief or misalignment.
Verdict / tip (how to set your routine)
A monthly cable end-clean (or every 2 weeks when your cable collects lint quickly) is the best balance between reliability and effort. The main downside of overdoing it is connector wear from aggressive tools or repeated liquid exposure—so follow a gentle method and avoid soaking.
Skip this routine-clean approach if:
– The connector is visibly damaged (bent housing, cracked shell, broken strain relief).
– Charging is still unreliable after cleaning both the cable end and—if safe—examining the device port.
– You’re unsure whether a cleaner is compatible with your cable/connector type. In that case, follow manufacturer guidance or replace the cable.
Currently, in 2026, the most consistent best practice remains the same: dry-first cleaning, minimal moisture only when needed, and full drying before re-plugging. Consistency beats intensity—small routine maintenance prevents the “dirty contact” problem from ever reaching the point where you start compensating with wiggling or force.
Quick scan checklist
– [ ] Clean once a month (or every 2 weeks if your cable collects lint fast)
– [ ] Unplug and power down before cleaning
– [ ] Wipe connector ends first (don’t scrub aggressively)
– [ ] Don’t soak or spray into the connector
– [ ] Fully dry before charging again
– [ ] If charging is still unreliable, check the device port too
Sources
Cleaning your charging cable doesn’t need to be frequent or complicated: a gentle end-clean monthly is enough for most users, while every-2-weeks maintenance prevents lint-driven “sometimes it charges” problems in high-exposure routines. If you keep cleaning focused on the connector ends, avoid soaking or abrasives, and dry fully before reuse, you’ll protect both charging reliability and connector lifespan.
Frequently Asked Questions
How often should you clean your charging cable?
In general, you should inspect your charging cable every few weeks and clean it when you notice dust, lint, or residue near the connector. For regular use, a light cleaning every 1–3 months is a good baseline, especially if you charge in pockets, bags, or dusty areas. If your cable starts charging slower or you see visible grime, clean it sooner to help maintain a reliable connection.
What’s the best way to clean a charging cable without damaging it?
Start by unplugging the charger and gently wiping the cable with a dry, lint-free cloth to remove surface dust. For the connector, use a dry cotton swab or a soft nylon brush to dislodge lint carefully—avoid scraping hard or using metal tools. If there’s stubborn buildup, lightly dampen the swab with 70% isopropyl alcohol, then let the charging cable fully dry before plugging it in again.
How can you tell when your charging cable needs cleaning?
Watch for signs like intermittent charging, frequent disconnects, or noticeably slower charging speed. You may also see lint packed around the charging port area or notice a dusty or discolored connector. If you use the cable daily and it’s been weeks since your last clean, those issues are strong indicators that a cable cleaning could restore proper contact.
Why does cleaning your charging cable matter for charging speed and safety?
Dust and pocket lint can block the connector pins and reduce electrical contact, which can lead to slow charging, overheating, or unstable power delivery. Keeping the charging cable clean helps maintain consistent conductivity and reduces the chance of corrosion over time. While a dirty cable isn’t always dangerous, routine cleaning supports safer, more reliable charging performance.
Which cleaning method is safest for USB-C, Lightning, and micro-USB cables?
The safest approach for most connector types (USB-C, Lightning, and micro-USB) is gentle, dry cleaning first, using a soft brush or a dry cotton swab to remove lint from the port area. If needed, use a small amount of 70% isopropyl alcohol on the swab and allow the connector to dry completely. Avoid compressed air, liquids dripping into the connector, or aggressive tools that can bend pins or damage internal contacts.
📅 Last Updated: November 01, 2026 | Topic: How Often Should You Clean Your Charging Cable? | Content verified for accuracy and freshness.
References
- https://www.cdc.gov/coronavirus/2019-ncov/community/disinfecting-building-facility.html
- https://www.epa.gov/coronavirus/cleaning-and-disinfecting-your-facility
- https://www.who.int/publications/i/item/cleaning-and-disinfection-of-environmental-surfaces-in-the-context-of-covid-19
- Disinfectant
- mobile phone disinfection – Search Results – PubMed
- https://www.sciencedirect.com/search?qs=mobile+phone+disinfection&show=100
- https://scholar.google.com/scholar?q=how+often+clean+charging+cable Google Scholar
- https://scholar.google.com/scholar?q=cleaning+disinfection+high+touch+electronic+surfaces+frequency Google Scholar
- https://scholar.google.com/scholar?q=mobile+phone+disinfection+study+frequency Google Scholar

[…] on a charging cable without damaging it? Yes—if you wipe the connector and cable carefully and let it fully dry before reuse. You’ll need a lint-free cloth, a fresh disinfecting wipe, and patience for a short […]