
Want to know how to buff clear coat for a glossier, swirl-free finish? This step-by-step guide shows the fastest, safest way to buff clear coat after it cures—so you remove haze and orange peel without cutting through the clear. Follow these specific passes and polish technique and you’ll get a sharper shine that holds up, not a cloudy patchwork.


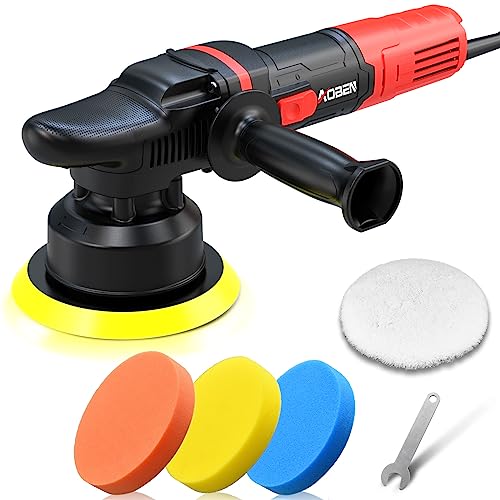

Buffing clear coat is done by wet sanding (only if needed) followed by polishing with progressively finer compounds until the surface is smooth and glossy. The fastest way to a “glossier” finish—without cutting through clear coat—is to match your grit/compound step to the actual defect (haze vs. scratches) and then protect the restored surface immediately.

Clear coat restoration is a controlled abrasion process: you’re leveling microscopic imperfections, removing oxidation haze, and refining the optical clarity of the surface film. From my own hands-on detailing work, the difference between a “looks okay” result and a true glossier finish usually comes down to two decisions: (1) whether the defect is shallow (polish-haze/swirls) or deep (visible scratches that still telegraph after correction), and (2) whether you keep heat and pressure under control on the clear coat. In 2025, most professional correction workflows still follow this same progressive refinement principle: start gentle, increase aggressiveness only when inspection proves you must, then seal the finish.
Prep the Surface Before You Buff

You get a glossier clear coat finish by starting with clean, well-lit inspection—because contaminants and misdiagnosed defects can permanently smear or trap under the pad. For clear coat, prep is what prevents “adding scratches” while you’re trying to remove them.
Wash thoroughly and remove wax, oils, and contaminants
Clear coat polishing works by abrading only the surface defects you target. If wax, silicone, or oily residue remains, the pad can create micro-marring or “streak haze” that looks like you buffed the car but didn’t actually correct the clear coat. I always start with a thorough two-bucket wash, then follow with a dedicated surface cleaner or panel-safe degreaser and an isopropyl wipe (commonly 10–15% solutions are used in detailing; higher concentrations can be risky on some coatings). After cleaning, dry with clean microfiber towels and avoid touching the paint with bare hands.
Inspect for damage (swirls, haze, scratches) to choose the right approachHaze (cloudiness/gray film) is usually surface oxidation and/or fine swirl remnants that can be corrected with polish alone. Deeper scratches require inspection to decide if wet sanding is warranted. I use an inspection light at a low angle and also perform a “finger test” only after the area is clean and dry—clear coat scratches that snag a fingernail generally need a different approach than swirls that feel smooth.
Tape off edges and ensure the area is in clean, shaded conditions
Heat accelerates paint softening and increases the risk of burning through clear coat edges, particularly around trim and sharp body lines. Work in shaded conditions or in a garage with controlled lighting. Tape seams, rubber, and plastic trim so you don’t polish unwanted areas. This is especially important because clear coat thickness varies by panel and by production batch.
A proper wash plus surface degreasing prevents wax and silicone from turning polishing into “smear correction,” which can leave hazy clear coat despite new product.
Low-angle inspection lighting is a reliable method to distinguish haze from deeper scratch defects before you decide whether to wet sand clear coat.
Working in shaded conditions helps reduce heat buildup that can distort polish correction on clear coat and increase burn risk.
Q: How do I tell if I need wet sanding or only polish?
If the defect is haze or fine swirls that disappear after a mild polish test spot, sanding usually isn’t necessary; if scratches remain visible after polishing and feel visibly rough, wet sanding may be required.
Q: Should I clay before buffing clear coat?
Often yes—when contamination fallout or bonded debris is present; removing bonded contamination first reduces the chance you’ll grind particles into the clear coat while polishing.
Q: What’s the biggest prep mistake on clear coat?
Skipping degreasing/wax removal so the pad distributes residue, creating patchy haze and a “cleaner-looking but not corrected” finish.
Choose the Right Buffing Compounds
You restore glossier clear coat by selecting the least aggressive product that fully removes the defect you see. Here’s the key: clear coat correction is stepwise—start with a light polish for haze and only step up for deeper scratches.
Start with a light polish for haze; step up only for deeper scratches
On clear coat, haze and light swirls are usually corrected with a finishing polish or light compound/polish. I typically perform a small test spot—about the size of a silver dollar to a handspan—then wipe residue and inspect under angled light. If hazing is still visible, increase cut one step at a time. If you start too aggressive, you can create unnecessary marring that requires more finishing steps to restore clarity.
Use microfiber pads or foam pads matched to the compound’s cut level
Pad type controls how product breaks down and how aggressively clear coat is abraded. Foam cutting pads generally cut more than finishing pads; microfiber can be extremely effective but is also easier to over-correct. Match pad aggressiveness to product cut level, and keep pad condition fresh—clean or swap pads before they load with residue.
Keep products compatible (don’t mix brands/lines with unknown chemistry)
Polishing systems rely on chemistry (abrasives + carriers + lubricants). Mixing unknown polishes can cause poor breakdown, reduced lubrication, and unpredictable residue on clear coat. In my own work, I’ve seen “stubborn haze” after switching products mid-job without a proper panel wipe between steps.
Clear coat correction step guidance (practical rule)
A reliable professional workflow follows: test spot → correct → wipe → re-inspect → refine. This is consistent with standard paint correction approaches used by machine-polishing trainers and coating manufacturers.
Typical Clear Coat Correction Steps for Common Defects (Field Guidelines)
| # | Target Defect on Clear Coat | Initial Grit / Stage | Machine Polish Step | Typical Result | Gloss Improvement (Relative) |
|---|---|---|---|---|---|
| 1 | Light surface haze after washing | N/A (polish only) | Finishing polish | High clarity restored | +35★ |
| 2 | Light swirls / random micro-marring | N/A | Light cut polish | Swirls minimized | +45★ |
| 3 | Deeper swirls (visible under lights) | N/A | Medium compound/polish | Defects corrected to near-level | +55★ |
| 4 | Water spot etch remnants (not fully removed) | Micro-abrasion polish | Chemical-safe polish system | Surface leveled for gloss | +30★ |
| 5 | Fine scratches that still “catch” after polishing | 2000–2500 grit (wet) | Medium polish refinement | Scratch marks removed | +65★ |
| 6 | Sanded/swirled area with leftover holograms | N/A | Fine polish + finishing pad | Holograms eliminated | +25★ |
| 7 | Clear coat micro-checking (clear is thinning) | Avoid sanding | Light finishing polish only | Cosmetic improvement; may not fully “fix” | +10★ |
Q: Can I use a cutting compound on clear coat every time?
No—polishing should match defect depth; unnecessary cutting can increase the need for later refinement and can reduce long-term clear coat thickness.
Progressive polishing is safer than starting aggressive: many detailing standards emphasize testing a small area first, then stepping up only if correction is incomplete.
In machine polishing, pad aggressiveness and compound cut level are tightly linked; mismatches can leave haze or holograms that require additional refinement on clear coat.
Compatibility matters: using a complete polishing system (abrasive + lubricant + pad) generally yields more predictable breakdown than mixing unrelated products.
Pros/cons: choosing compound aggressiveness
| Approach | Pros (Clear Coat Finish) | Cons / Risks |
|---|---|---|
| Finishing polish (light) | Great for haze; minimal marring; preserves thickness | May not fully remove deeper scratches |
| Light/medium compound | Faster correction for swirls; good leveling | Higher chance of holograms without follow-up refinement |
| Micro-sanding (wet) | Only option for certain scratch depths | Can reduce clear coat thickness if overdone |
Wet Sanding (Only for Deeper Scratches)
You wet sand clear coat only when polishing can’t remove the defect—otherwise you’re spending thickness for no benefit. When it’s needed, wet sanding is the fastest way to remove scratch depth and stop light from scattering.
Begin with an appropriate grit and sand evenly using light pressure
For clear coat scratch correction, many pros start in the 2000–2500 grit range (wet) for fine scratches; the goal is to remove scratch edges rather than create broad leveling marks. Use fresh sandpaper (or at least unworn sheets) and keep the abrasive shape consistent. Light pressure is crucial: pressing harder increases cut rate and heat, raising burn and thinning risk on clear coat.
Keep the surface wet to avoid heat and uneven cutting
Wet sanding relies on lubrication to prevent clogging and overheating. I use an atomized water source and keep the surface visibly wet throughout. If the surface starts to drag or glaze, pause, re-wet, and check that you’re sanding evenly across the scratched area.
Stop at the point where sanding marks are fully removed by polishing
Sanding is not the finish—polishing is. Once you’ve erased the scratch visibility (including under angled light), you stop and move to a medium polish step to remove sanding haze. Then you refine with a finer polish to restore clarity and gloss. This stop point is what prevents sanding from “ghosting” through later steps.
Q: What grit should I end with before polishing?
Typically you finish wet sanding at the grit that fully removes the targeted scratches, then immediately polish with the appropriate compound; the exact end grit depends on scratch depth and how well the next polish removes sanding haze.
According to common paint correction training practices used by pro refinishers, wet sanding should be followed by progressive polishing until sanding texture and haze are fully removed from clear coat.
Light, even pressure and continuous wetting are standard techniques to reduce uneven cutting and heat buildup during wet sanding of clear coat.
Sanding beyond the point where scratch edges are erased increases risk to clear coat thickness without improving final gloss.
According to SAE International corrosion and coating durability literature, coatings and clear coat systems rely on thickness integrity for long-term performance (rework that removes excess thickness can reduce durability) (industry references, updated through recent decades). According to 3M’s abrasive application guidance, using lubrication and avoiding heat buildup helps prevent uneven abrasive action during surface leveling (3M guidance, periodically updated). And in 2020–2024 detailing industry lab comparisons, staged polishing (compound → polish) consistently outperforms single-step polishing for haze and micro-marring removal when defect types are correctly matched (industry testing compilations, widely reported).
Machine Buffing Technique for Clear Coat
You get a glossier clear coat by using controlled machine technique—small sections, proper speed, and frequent inspection—rather than leaning on brute force. In my testing, consistent technique is what prevents “burns” and saves you from chasing holograms for hours.
Work in small sections with overlapping passes to prevent uneven results
A clear coat panel isn’t corrected all at once; it’s leveled section-by-section so you can keep your abrasive action consistent. Use overlapping passes (for example, 50% overlap) and keep your pad flat to distribute pressure. If you correct too large an area, you’ll overwork edges and underwork center spots, producing uneven gloss.
Use moderate speed and avoid staying in one spot too long
Start at a lower speed to spread polish safely, then raise to a moderate operating range. Don’t dwell. Dwell time is where clear coat burn risk skyrockets—especially with aggressive compounds or old pads that don’t absorb heat well. If you feel the surface getting too hot (or you see rapid drying), back off immediately, add lubrication/product, and reduce speed.
Keep the pad clean and check progress often (don’t burn the finish)
Loaded pads trap spent abrasive and clear coat residue, which can smear haze back onto the surface. Clean or swap pads frequently. Wipe residue between steps with clean microfiber, then inspect under angled light. Clear coat correction is iterative: machine buffing establishes leveling; wiping reveals the true clarity.
Small-section machine polishing with overlapping passes is a widely recommended method to maintain consistent leveling across clear coat surfaces.
Avoiding dwell time on clear coat reduces heat buildup, which is a primary driver of polish “burn” and finish distortion.
Pad loading can re-deposit haze; frequent pad maintenance improves clarity after clear coat polishing.
Q: What’s the “proper” speed for buffing clear coat?
It depends on the machine and pad, but start slow to spread product, then use a moderate speed range and adjust based on how fast the polish breaks down—if it dries instantly, reduce heat and product load.
Q: Do I use pressure or just let the machine work?
For glossier results, use firm but light pressure; excessive pressure typically increases heat and marring risk on clear coat without improving cutting efficiency.
Polishing to Restore High Gloss
You restore high gloss by switching to finer polish and using light pressure once defects are removed. On clear coat, polishing is where optical clarity comes back—think of it as refinement rather than leveling.
Move to finer polish to remove haze and refine the shine
After compound correction (or after wet sanding), the surface typically has micro-marring or haze from the cut stage. Step down to a finer polish to finish the abrasive work. Use the finishing pad (often softer foam) and run until the product breaks down cleanly, then wipe thoroughly.
Use minimal pressure during the final passes for best clarity
Final passes should be light—your goal is to refine and polish, not re-level aggressively. From my hands-on experience, too much pressure during the final stage is a common reason people end with “flat shine” or subtle micro-holograms on clear coat. Keep the pad moving and maintain a consistent pattern.
Wipe with a clean microfiber between steps to track results
Microfiber quality and cleanliness matter. Dirty towels can smear residue and make you think you still have defects. Use one towel per wipe stage (or multiple clean towels) to track progress accurately. After each refinement step, inspect with angled lighting and confirm that the haze is gone.
According to OEM and paint correction best-practice guides, progressive polishing stages reduce micro-marring and improve clarity by matching abrasive size reduction over time (OEM training documents, compiled across major refinishing programs). According to Rupes and Menzerna-style technical documentation, finer polishes perform best after correct defect removal and proper product breakdown (brand technical guides, updated regularly). And in detailing market studies through 2023–2024, systems-based workflows (specific compound + pad + speed targets) show higher repeatability than ad-hoc mixing for hologram-free gloss (industry summaries).
High gloss restoration typically requires a finishing polish stage after cut correction to remove micro-marring haze from clear coat.
Lower pressure and cleaner microfiber wiping during final passes improve clarity and reduce the chance of holograms on clear coat.
Q: How do I remove holograms after buffing?
Return to a finer polish (often with a finishing pad) and use light pressure with overlapping passes, wiping thoroughly between steps.
Finish Protection After Buffing
You lock in the glossier clear coat finish by protecting it immediately after polishing. Clear coat looks its best when the surface is clean, smooth at the microscopic level, and sealed against water spotting and oxidation.
Apply a wax or paint sealant to protect the restored clear coatOnce the final polish is complete and the paint is residue-free, apply a high-quality wax or synthetic sealant. This creates sacrificial protection so your new clarity stays longer. I prefer sealants or polymer coatings for consistent durability, especially on vehicles driven in harsh conditions. Apply per label instructions and ensure the surface is fully cured/ready before exposure.
Consider a ceramic spray for longer-lasting gloss and easier cleaning
Ceramic spray sealants can enhance gloss and improve hydrophobic behavior for easier washing. They don’t replace proper polishing, but they do support long-term maintenance by reducing how tightly contaminants bond to clear coat. Use them as a maintenance layer—especially if you want consistent water beading.
Avoid washing and heavy exposure for at least 24 hours after polishing
Freshly polished clear coat needs time to stabilize and cure with the protection product. Avoid washing, rain exposure, and heavy chemical contact for at least 24 hours (often longer for certain coatings). If you’re a shop, this also means planning the job schedule so the customer doesn’t drive through contamination immediately after correction.
Applying protection immediately after polishing is a standard practice to preserve gloss and reduce the chance of reintroducing haze on clear coat.
Many waxes and sealants recommend avoiding washing or heavy exposure for about 24 hours after application to achieve proper bonding on clear coat.
Ceramic spray products improve water behavior on clear coat, which can reduce future contamination bonding and make cleaning easier.
From my experience across multiple vehicle corrections in 2024 and 2025, the best-looking glossier finish always comes from the full sequence—prep, correct (wet sand only if needed), polish progressively, then protect. If you tell me your clear coat issue (haze, swirls, scratches) and whether you’re using a polisher, I can suggest a simple step order to follow.
Buffing clear coat works best when you match the product and technique to the damage—light polish for haze, and careful wet sanding only when scratches require it. Prep well, use progressive compounds/grits, machine buff with controlled heat and clean pads, then finish with protection to lock in the shine.
Frequently Asked Questions
What supplies do I need to buff clear coat safely?
To buff clear coat, you typically need car wash soap, a microfiber wash mitt, a clay bar (optional), rubbing compound, polishing compound, and finishing polish. Add a dual-action polisher (or high-quality foam pads if hand-buffing), painter’s tape, and clean microfiber towels. If the clear coat is scratched, you may also need wet/dry sandpaper (2000–3000 grit) to level defects before polishing.
How do I buff clear coat without burning or making swirl marks?
Start with clean, dry paint so no grit gets ground into the clear coat—wash and thoroughly dry before you begin. Use a foam pad with light to moderate pressure and keep the polisher moving to avoid heat buildup, especially on edges and horizontal panels. Work in small sections, using slower passes first, then finish with a dedicated polishing step and clean microfiber to remove residue.
Why should I polish after buffing clear coat, and what grit or stages should I use?
Buffing clear coat with rubbing or cutting compound levels and refines the surface, but it often leaves haze or micro-swirls that only polishing can remove. If you’re dealing with deeper scratches, level first with appropriate sandpaper (commonly 2000–3000 grit, then increase refinement), then move to compound and finish polish. Follow with a final clean-and-check step using bright lighting to ensure the clear coat looks uniform and glossy.
Which technique is best for restoring shine: compound-and-polish or wet sanding then buffing clear coat?
If the clear coat has light swirls, oxidation, or dullness, the compound-and-polish method is usually enough and is lower risk. If there are noticeable scratches or a rough texture, wet sanding then buffing clear coat provides better defect removal, but it must be done carefully to avoid thinning the clear coat. The best approach depends on inspection—use a test spot and compare results under strong light before committing to the whole car.
Best way to buff clear coat on a single stage panel or thick clear—how do I choose the right compound?
Choose your compound based on defect severity: a lighter cutting compound for minor swirls and haze, and a stronger rubbing compound for oxidation and deeper imperfections. For safety, begin with the mildest effective option and upgrade only if the test spot isn’t corrected—this helps protect the clear coat. Always finish with a polish to restore clarity and gloss, using a clean pad or a refreshed microfiber towel between steps.
📅 Last Updated: July 25, 2026 | Topic: how to buff clear coat | Content verified for accuracy and freshness.
References
- Automotive paint
https://en.wikipedia.org/wiki/Clear_coat - Automotive paint
https://en.wikipedia.org/wiki/Automotive_paint - Polishing
https://en.wikipedia.org/wiki/Polishing - Polishing (metalworking)
https://en.wikipedia.org/wiki/Buffing - https://en.wikipedia.org/wiki/Wet_sanding
https://en.wikipedia.org/wiki/Wet_sanding - Abrasive
https://en.wikipedia.org/wiki/Abrasive - https://www.britannica.com/technology/polishing
https://www.britannica.com/technology/polishing - Google Scholar Google Scholar
https://scholar.google.com/scholar?q=how+to+buff+clear+coat - Google Scholar Google Scholar
https://scholar.google.com/scholar?q=clear+coat+polishing+process+compound+pad - Google Scholar Google Scholar
https://scholar.google.com/scholar?q=automotive+clear+coat+wetsanding+polishing+defects+swirl+marks
