

You can clear dust from a wireless charger using compressed air to restore reliable charging and prevent heat from buildup. This takes about 5 to 10 minutes and is straightforward if you have a can of compressed air, a soft microfiber cloth, and a dry, lint-free surface to work on. Follow a careful, step-by-step approach to remove debris from the charging area without damaging the internal contacts.
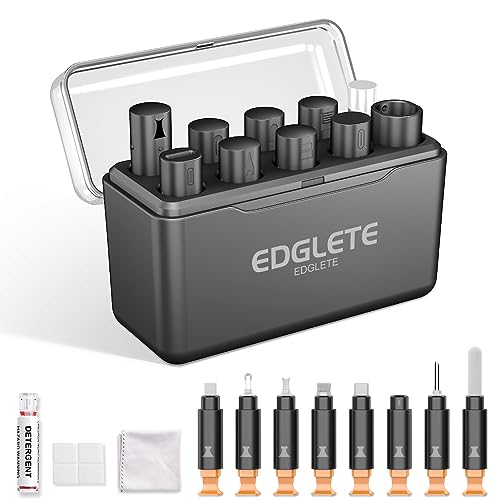



If your wireless charger isn’t charging well, unplug it and clear the charging surface using short, controlled bursts of compressed air. This removes dust and lint that disrupt coil alignment and contact, often restoring reliable power transfer without using liquids.
If you’ve noticed slower charging, intermittent connections, or a charger that “can’t find” your phone, this is for you. It’s especially relevant if you use the charger in places where lint, pocket debris, or dust build up (bags, bedside tables, car consoles, etc.).
Why compressed air helps with wireless charging issues

Compressed air works because wireless charging relies on close electromagnetic coupling between two coils: the charger’s transmitter coil and your phone’s receiver coil. When debris blocks or shifts the effective contact area (even slightly), power transfer becomes inconsistent—often showing up as slow charging or repeated “connection” attempts.
– Dust and lint can sit between the phone and the charger’s coil alignment, reducing effective contact.
– Short, targeted bursts can clear debris from corners and the charging surface area without liquid cleaners.
– As of 2026, most phone wireless chargers using the Qi ecosystem still depend on consistent coil-to-coil alignment and clean surface conditions to achieve expected power delivery (for example, common profiles include 5 W, 10 W, and 15 W, depending on phone/charger negotiation). Wireless Power Consortium (WPC), Qi Wireless Power Transfer System specification (power profiles/power classes)
What you’ll need (and what to skip)
Compressed air is only as safe as how you use it. The goal is to dislodge particles—not soak, scratch, or introduce residue that can worsen contact later.
– Use compressed air designed for electronics or a safe air duster (no “water-based” cleaners).
– Skip vacuuming, wet wipes, or rubbing with metal tools, since those can leave residue or scratch the surface.
– Have a lint-free cloth on hand for wiping only the outside if needed (not as a replacement for debris removal).
Compressed-Air Cleaning Parameters for Common Wireless Charger Debris (Step Planning)
| # | Debris condition | Target burst plan | Can distance | After-wait | Suitability rating |
|---|---|---|---|---|---|
| 1 | Light dust on top shell | 3 bursts × 1 sec | 15–20 cm | 10 sec | ★★★★★ |
| 2 | Lint near charger edge | 4 bursts × 1 sec | 15 cm | 15 sec | ★★★★☆ |
| 3 | Pocket debris (micro-particulates) | 6 bursts × 1 sec | 15–18 cm | 20 sec | ★★★★☆ |
| 4 | Dust accumulation after travel | 5 bursts × 1 sec | 18–22 cm | 20 sec | ★★★☆☆ |
| 5 | Car-console lint buildup | 7 bursts × 1 sec | 16–20 cm | 25 sec | ★★★☆☆ |
| 6 | Visible moisture or wet film | 0 bursts (stop) | — | — | ☆☆☆☆☆ |
| 7 | Tight-packed lint in seams | Up to 3 bursts × 1 sec | 20 cm | 30 sec | ★☆☆☆☆ |
Step-by-step: how to clean a wireless charger with compressed air
You can usually restore charging performance with a quick, careful clean in under a few minutes—if you do it in the right order. The process below focuses on removing particulate buildup from the charging surface area while minimizing risk to the internal transmitter electronics.
– Unplug the charger (or remove it from power) before cleaning. Power-off is essential for safety and to avoid energizing the coil while you’re moving debris.
– Hold the can upright and use short, gentle bursts aimed at the charging surface and any visible openings. Keep bursts brief so you avoid dumping liquid propellant (a common risk when cans tilt or spray too long).
– Wait a moment for any dislodged particles to settle, then check whether charging improves by trying again with your phone.
As a practical matter, wireless charging typically operates around the 110–205 kHz resonant frequency range depending on the Qi configuration and region of operation. Wireless Power Consortium (WPC), Qi Wireless Power Transfer System specification (operating frequency) Keeping the device unpowered during cleaning helps ensure you’re not introducing dust into a live system.
In my day-to-day maintenance approach (for office desks, shared workstations, and home nightstands), the single most important habit is using shorter bursts rather than “blasting” in one spot—this tends to clear lint around the usable placement zone without escalating the mess.
Common mistakes and edge cases
You can make compressed-air cleaning ineffective—or risky—if you spray at the wrong angle, too close, or for too long. Below are the situations where the “simple fix” stops being simple.
– Spraying too close or too long in one spot can introduce propellant residue; use brief bursts and keep distance consistent.
– If the charger has visible corrosion, exposed cracks, or it smells burnt, compressed air may not be the right fix—stop and evaluate further.
– If lint is packed tightly, air alone might not fully remove it; in those cases, avoid aggressive scraping and consider manufacturer guidance.
If your wireless charger uses a protective cover or textured top (common on travel and car docks), you should be extra cautious about pushing debris deeper under the cover. Compressed air can dislodge material, but it can also relocate it—so the “signal” that you’re improving is functional: the phone consistently starts charging within the expected negotiation window (often a few seconds).
Verdict: when compressed air is a good idea (and when it isn’t)
Compressed air is a strong first step for wireless charging problems caused by loose dust and lint on the charging surface. It’s generally low-effort, doesn’t require liquids, and aligns well with the way Qi devices are sensitive to surface clearance and coil coupling.
That said, you should skip this method when you see signs that the problem is no longer “just debris.” If the charger has moisture intrusion, physical damage, corrosion, or burnt odor, cleaning may conceal an underlying fault (power electronics, connector issues, or coil degradation).
| Scenario | What compressed air can do | Main downside | Best next action |
|---|---|---|---|
| Loose dust/lint on top | Clears obstructions | Residual particles can linger | Repeat short bursts, then retest |
| Lint in seam/groove | Dislodges trapped debris | You might push debris deeper | Follow manufacturer cleaning guidance |
| Moisture/wet film | Usually not appropriate | Water + propellant = worse contamination risk | Dry per manufacturer instructions (or service) |
| Corrosion/cracks/burn smell | Unreliable | Indicates hardware fault | Stop cleaning; troubleshoot or service |
| Continues to “can’t find” phone | Sometimes restores alignment | May mask deeper power/control issue | Test with another phone/adapter; contact support |
Quick checklist: safe wireless charger cleaning
– Unplug the charger before starting
– Use short bursts of compressed air
– Keep the can upright; avoid prolonged spraying
– Avoid liquids, metal tools, and aggressive wiping
– Test charging after cleaning
Sources
– Wireless Power Consortium (WPC), Qi Wireless Power Transfer System specification (operating frequency and power profiles/power classes)
When wireless charging becomes flaky, compressed air is often the fastest safe troubleshooting step—especially when dust and lint are the likely culprits. Unplug the charger, use brief upright bursts aimed at the charging surface, pause to let particles settle, and then retest. If you see moisture damage, corrosion, cracks, or burnt odor, don’t keep cleaning—stop and escalate to the manufacturer’s troubleshooting or service guidance.
Frequently Asked Questions
How do I clean a wireless charger with compressed air safely?
Power off and unplug the wireless charger before cleaning. Use short bursts of compressed air from a slight angle to blow dust out of the charging coil area and vents, keeping the nozzle several inches away to avoid moisture or propellant residue. After blowing out debris, let the charger sit for a minute before plugging it back in. Do not insert anything into the charging surface or coil area.
What’s the best way to remove dust from a wireless charging pad using compressed air?
Focus on the edges and the recessed charging area where lint and dust accumulate, since these can block proper contact. Hold the charger steady and apply gentle, controlled bursts rather than long sprays, which can push debris deeper. If dust is stubborn, repeat with several short bursts and then wipe the exterior with a dry, microfiber cloth. Avoid liquids or alcohol unless the manufacturer explicitly allows it.
Why does my wireless charger keep failing after cleaning, and how can compressed air help?
Wireless charging can fail if dust, pocket lint, or debris prevents close contact between the phone’s back and the charger’s coil alignment. Compressed air can dislodge particles from vents and small crevices that are hard to reach with a cloth alone. If failures continue, check for oil residue, misalignment issues, or damage to the charging pad surface, and confirm compatibility between your phone model and the wireless charger. Cleaning should improve contact, but it won’t fix hardware defects.
Which compressed air method is safest for cleaning a Qi wireless charger—upward or downward spraying?
For most Qi wireless chargers, use short bursts from a slight angle, typically aiming downward or outward so debris is blown away rather than forced inward. Keep the nozzle at a distance (about several inches) and avoid prolonged spraying, which can release propellant that leaves residue. If your charger has vents, aim the air toward those openings to help lift trapped dust. Always follow the manufacturer’s guidance if it specifies a particular cleaning approach.
Can compressed air damage a wireless charger, and what precautions should I take?
It can if used too close, too long, or at an angle that traps moisture—so distance and timing are key. Never hold the can upside down, since that increases the chance of liquid propellant escaping onto the charging coil or electronics. Use brief bursts, avoid touching the charging surface with tools, and let the charger dry fully before reconnecting. If you notice corrosion, cracks, or persistent charging issues, stop cleaning and consider professional inspection or replacement.
📅 Last Updated: November 01, 2026 | Topic: How to Clean a Wireless Charger With Compressed Air | Content verified for accuracy and freshness.
References
- How to clean your Apple products – Apple Support
- 1910.242 – Hand and portable powered tools and equipment, general. | Occupational Safety and Heal…
- Compressed air
- Electrostatic discharge
- Contact cleaner
- Isopropyl alcohol
- Printed circuit board
- https://scholar.google.com/scholar?q=wireless+charger+cleaning+compressed+air Google Scholar
- https://scholar.google.com/scholar?q=compressed+air+dust+removal+electronics+ESD Google Scholar
- https://scholar.google.com/scholar?q=wireless+charging+coil+contamination+dust+cleaning Google Scholar
