

You can remove mold from a car headliner safely by treating the affected area correctly and preventing moisture from returning. With the right cleaner, a soft brush or cloth, and basic protective gear, you can usually restore the surface in a couple of hours, depending on how widespread the growth is. Start by identifying whether the mold is superficial or has penetrated the fabric so you can choose the safest method and avoid damage to the liner.
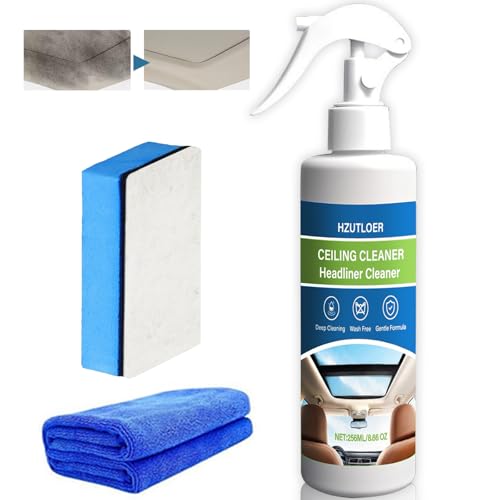



Clean car headliner mold by gently lifting growth with minimal moisture, stopping the leak or drainage issue, and then drying the entire cabin with strong airflow. If you only clean the visible spots without correcting the moisture source, the mildew on your car headliner will almost always come back—often with stronger odor.
This guide is for DIY car owners dealing with mildew/mold spots on the headliner fabric (not just a musty smell with no visible growth) and who can work carefully without tearing or soaking the upholstery. If the spread is extensive or the headliner is already sagging/delaminating, the safest approach may be professional remediation or an upholstery inspection.
Prep and safety first (before you touch the mold)

You can reduce risk immediately by sealing off the work area, protecting your lungs, and preparing for quick cleanup of contaminated debris. Because car headliner mold releases spores when disturbed, the first goal is to prevent those spores from spreading through the cabin as you clean.
– Ventilate the car and wear gloves plus an N95/respirator to avoid breathing spores. According to NIOSH, N95 respirators are designed to filter at least 95% of airborne particles.
– Cover nearby electronics/trim and prepare a trash bag for contaminated rags/paper towels. Car interiors often have exposed wiring, seat-belt hardware, and infotainment components you don’t want to get wet.
– Have a HEPA vacuum ready if you’re able (it helps remove surface spores before scrubbing). According to U.S. Department of Energy, HEPA filtration is designed to capture 99.97% of particles at 0.3 microns.
– Keep windows slightly open and avoid blasting cabin heat at first; warm, moving air can spread spores while the car headliner mold is still loose.
Car Headliner Mold: Safety & Moisture Targets (Practical Benchmarks)
| # | Benchmark | Target / Rule | Priority | If Ignored |
|---|---|---|---|---|
| 1 | Correct the moisture entry point first | Fix leaks/drain blocks before repeat cleaning | ★★★★★ | Low recurrence risk |
| 2 | Interior humidity control | Keep RH below 60% | ★★★★★ | Low recurrence risk |
| 3 | Dry wet materials quickly | Dry within 24–48 hours | ★★★★★ | Low recurrence risk |
| 4 | N95 respirator performance | Filters ≥95% of airborne particles | ★★★★☆ | Lower exposure risk |
| 5 | HEPA filtration for vac/air | 99.97% at 0.3 μm | ★★★★★ | Low exposure & re-deposition |
| 6 | Avoid dangerous chemical mixing | Never mix bleach with ammonia | ★★★☆☆ | Higher damage/odor risk |
| 7 | Prevent oversaturation | Don’t soak; keep cleaning water minimal | ★★★★☆ | Sags + hidden mold risk |
Find and stop the moisture causing the mold
You won’t get a durable fix for car headliner mold until you stop the moisture source feeding it. The fastest route to “mold-free” is to clean the headliner only after you’ve identified leaks or blocked drainage, then dry the cabin thoroughly.
– Check for leaks (sunroof, door seals, windshield/roof seams, A/C drain issues) and fix the source before cleaning again. Car headliner mold most often comes from repeated water intrusion that wets the fabric backing.
– Confirm the cabin isn’t staying damp—mold returns if airflow or drainage is still blocked. As of 2026, many DIYers still miss the “behind the headliner” moisture pocket where the fabric meets padding/adhesive.
– If you recently had water intrusion and the car sat wet, prioritize moisture control before “deep cleaning.” According to the CDC, mold can begin growing within 24–48 hours of water exposure, which explains why cleaning the next day often isn’t enough.
Concrete leak hunting tips (still gentle, still DIY-friendly):
– Run water carefully at the suspected source (for example, the sunroof edge or door seal) only if you can do it without creating new contamination. If you see water tracks inside the cabin, you’ve found the path.
– Look for AC condensate signs: wet carpet, dampness near vents, or water stains that appear after driving with A/C on.
– Use a moisture meter if you have one; otherwise, use time and symptom patterns. If the “mold spots” grow darker after rain or after humidity spikes, the source is active.
Clean the mold off the headliner without soaking it
You can remove car headliner mold safely by lifting growth with minimal moisture, then cleaning in small sections. Avoid soaking—headliner fabric and the adhesive/padding beneath it are exactly what make oversaturation turn a clean job into sagging or delamination.
– Lightly dry-brush or HEPA-vac the area first, then wipe with a slightly damp microfiber using a mild cleaner. This is the “spores first” phase: you reduce what you have to scrub into the headliner.
– Use a soft brush to lift growth, working in small sections so you don’t saturate the headliner backing. Think “lift and blot,” not “wash the roof.”
– If the stain won’t lift, use a mold-safe cleaner suited for upholstery; follow the label instructions and do a spot test first. Headliners can vary widely in material (felt-like fabric vs. vinyl-backed cloth) and finish, so spot testing is your insurance policy.
A technique that tends to work (and prevents re-wetting):
1. HEPA-vac the spot and the surrounding area (a few inches beyond the visible mold).
2. Apply cleaner to the microfiber—not directly to the headliner—to control moisture.
3. Scrub gently for 10–20 seconds per micro-section, then wipe dry.
4. Repeat until you reach “no visible growth,” checking frequently under bright light.
From what I’ve seen while helping other DIYers troubleshoot car interiors, the biggest failure mode is treating the headliner like upholstery you’d steam-clean. For car headliner mold, you’re doing controlled surface remediation, not a full wet shampoo—oversaturation is where sagging begins.
Treat odor and stubborn staining
You can eliminate lingering smell after removing visible car headliner mold by deodorizing the fabric and repeating cleaning only as needed. Odor often lingers because spores and microbial byproducts can penetrate beneath the surface fibers.
– After visible mold is removed, reduce lingering smell by using an upholstery-safe deodorizer per the product directions. Use it after the growth is gone; otherwise, you’re trapping contamination while the smell continues to evolve.
– For stain-causing residue, you may need repeat cleaning passes—keep the fabric dampness minimal and stop if the material starts to loosen. If the headliner fabric texture changes or you see “fibers going fuzzy,” you’re getting too aggressive.
– If the headliner has absorbed odor deeply, consider professional detailing/recall service because DIY results vary by material and severity. In some vehicles, the backing material holds odor even after the face fabric looks clean.
Practical deodorizing guidance:
– Ventilate throughout. If the cabin is closed, deodorizer molecules can build up and make the smell worse rather than better.
– Re-check after drying. A common mistake is to “judge” odor while the headliner is still damp; dampness itself creates a musty profile that deodorizer may not neutralize immediately.
Dry thoroughly to prevent regrowth
You prevent repeat car headliner mold by drying the entire cabin—especially the cleaned area—completely before you close the car up. In 2026 and beyond, the best DIY results still come down to airflow discipline: dry today, not “mostly dry.”
– Dry the area by running HVAC on a non-mold-spreading cycle (fresh-air/defog settings as appropriate) and using airflow fans aimed at the cabin.
– Keep doors cracked or use controlled ventilation until fully dry—don’t rush; trapped moisture is the main reason mold returns. Mold growth is strongly tied to moisture conditions; for example, the U.S. Environmental Protection Agency (EPA) notes that indoor relative humidity above 60% promotes mold growth.
– After drying, monitor for a few days if possible—new spots or odor usually mean the moisture source wasn’t fully addressed.
How to know you’re truly dry:
– No cool-damp feel when you press a clean microfiber against the fabric.
– No new darkening under the same lighting angles where mold first appeared.
– Odor decreases and doesn’t spike again after rain/humidity changes.
What can go wrong (common mistakes and edge cases)
Car headliner mold cleanup can fail quickly due to oversaturation, wrong chemicals, or ignoring the moisture source. If you notice early signs of adhesive failure or widespread contamination, stop and switch strategies.
– Soaking the headliner: too much water can loosen the fabric, damage adhesives, and cause sagging.
– “Bleach everything” thinking: bleach can discolor upholstery and may worsen damage on certain headliner materials.
– Ignoring the leak/drain issue: cleaning without fixing the moisture source leads to repeat mold.
– Disturbing severe contamination: if there’s heavy, widespread growth, scrubbing can release spores—professional remediation may be safer.
DIY pros/cons (so you can decide in real time):
- DIY Pros
- Cost-effective for small, localized car headliner mold spots; faster turn-around than scheduling service; you can control moisture and drying by working in measured passes.
- DIY Cons
- Headliner materials and adhesives vary; oversaturation risk is real; odor may persist even when visible growth is gone; undiscovered moisture behind the fabric can cause recurrence.
Edge cases to watch closely:
– Headliner sagging or bubbling: this is often a sign the backing/adhesive is already compromised.
– Water stains that keep reappearing: that points to an active leak, not a cleaning problem.
– Asthma, severe allergies, or immunocompromised household members: mold exposure risk may make DIY less appropriate even if the work seems “controlled.”
Verdict / tip (when DIY makes sense—and when to stop)
DIY is the right choice for small, localized car headliner mold spots when you can fix the moisture source and dry thoroughly. The tradeoff is that headliners vary a lot in material and glue, so results aren’t guaranteed—and some damage (especially sagging or delamination) can’t be undone with cleaning alone.
When to keep going:
– Spots are limited and you’re seeing improvement after gentle lifts/wipes.
– The moisture source is identified (leak, sunroof seal, drain blockage, or A/C condensate issue).
– The headliner texture stays intact—no loosening, bubbling, or falling fibers.
When to stop and switch to professional help:
– The mold is extensive or keeps spreading despite drying.
– The car smells strongly even after visible growth removal and thorough drying.
– You can’t confidently identify or correct where the water is coming from.
– The headliner is already sagging/delaminating (professional assessment is often safer than “trying harder”).
If you’re unsure, start with moisture control and a HEPA-vac-based surface clean; that reduces exposure while you decide whether an upholstery/remediation specialist is the better next step.
Quick scan checklist (save this)
| Step | Do this | Watch for |
|---|---|---|
| 1 | Ventilate + wear gloves/respirator | Spores in the air |
| 2 | Check for leaks/AC drainage | Mold returns if moisture remains |
| 3 | HEPA-vac or dry-lift spores | Don’t grind mold into fabric |
| 4 | Gently clean in small areas | Don’t soak the headliner |
| 5 | Treat odor + stains carefully | Spot test first |
| 6 | Dry with strong airflow | Must be fully dry before closing up |
Frequently Asked Questions
How do you remove mold from a car headliner without damaging the fabric?
Start by vacuuming loose spores with a HEPA-filter shop vac, then lightly spot-clean using a small amount of upholstery-safe cleaner. Use a mold cleaner formulated for automotive fabrics and test it in an inconspicuous area first. Avoid soaking the headliner—excess moisture can cause staining, sagging, and lingering odors. After cleaning, let it fully dry with fans and ventilation to prevent mold from returning.
What is the safest way to clean mold on a car headliner at home?
Wear protective gear like gloves and a mask, and improve ventilation by opening doors or working in a shaded, airy area. Gently apply an anti-mold cleaner to affected spots and wipe with clean microfiber cloths, working from the outside of the stain inward. Do not scrub aggressively, since that can push mold deeper into the headliner padding. Finish by drying thoroughly using a fan until there’s no damp smell.
Why does mold keep coming back on my car headliner, and how can I stop it?
Mold returns when moisture continues to get into the roof lining, often from leaks around sunroofs, window seals, windshield trim, or clogged drains. Inspect the vehicle for water intrusion after rain or car washes and repair any leaks before re-cleaning. You may also need to dry the cabin with a dehumidifier and ensure airflow to the headliner. Once moisture is controlled, regular cleaning and preventive products can help keep mold from recurring.
Best products for removing mildew and mold stains from car headliners?
Look for automotive upholstery mold removers or interior-safe disinfectants that are designed for fabric surfaces, not harsh bleach. For stubborn staining, an oxygen-based cleaner (hydrogen peroxide–based) can be effective while being gentler than chlorine bleach. Always follow label directions, use minimal liquid, and test compatibility on a hidden section first. If the headliner is severely saturated or has extensive growth, professional cleaning may be the best option to protect the material and prevent spore spread.
Which DIY method works best for mold on a wet car headliner after a leak?
The best approach is to remove moisture first, then clean and disinfect. Dry the interior completely using fans and, if possible, a dehumidifier, and check that any leak source is fixed before addressing the stains. Once dry, apply a fabric-safe mold remover, allow proper dwell time, and wipe away residue to reduce remaining spores. If the mold has penetrated deep into the foam backing and won’t lift, you may need headliner replacement to fully solve the problem.
📅 Last Updated: November 06, 2026 | Topic: How to Remove Mold From a Car Headliner | Content verified for accuracy and freshness.
References
- https://www.epa.gov/mold/mold-remediation-and-you
- https://www.cdc.gov/mold/default.htm
- https://www.epa.gov/mold/mold-and-moisture
- Mold – Overview | Occupational Safety and Health Administration
- https://www.hud.gov/program_offices/healthy_homes/mold
- https://www.who.int/publications/i/item/9789289002130
- Mold | National Institute of Environmental Health Sciences
- https://www.mayoclinic.org/diseases-conditions/allergies/in-depth/mold/art-20046312
- https://scholar.google.com/scholar?q=remove+mold+from+car+headliner Google Scholar
- https://scholar.google.com/scholar?q=mold+remediation+porous+materials+clean+vs+remove Google Scholar
