

You can return rusty grill grates to a clean, ready-to-cook surface by removing corrosion safely and restoring smooth contact between food and metal. This step-by-step approach takes about 30–60 minutes for most grates and uses common tools such as a grill brush, aluminum foil or a scraper, and a rust-safe cleaning method. Follow along to protect your hands and finish with grates that look and work like new, even after stubborn spots.


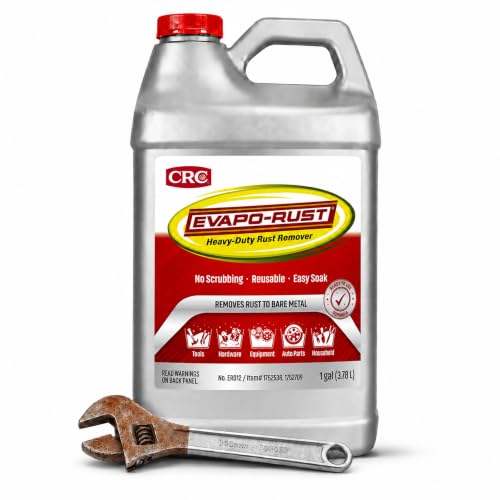

If your grill grates have rust, the fastest safe approach is to loosen grime with a grill brush, then remove the rust using a paste or soak (like baking soda or vinegar) before re-seasoning. After that, a light oil coating helps slow new rust so you’re not fighting the same problem next cook. This guide walks you through practical methods, what to avoid, and how to protect the metal afterward.
If you grill outdoors or store your grill uncovered, rust can appear even with normal use—especially on grate bars and corners. This is for cast iron, stainless, or steel grates where you want them cleaner and less flaky without damaging the cooking surface.
Gather the right tools (and avoid the risky stuff)

You don’t need specialized equipment to remove rust safely, but you do need the right abrasiveness to avoid damaging coatings or leaving scratches. The goal is to clean enough to stop active rust while protecting the cooking surface for the next grill session.
– Use a grill brush (brass or stainless bristles depending on grate type), a stiff scrub pad, and heat-resistant gloves.
– Have a rust-fighting option ready: baking soda, vinegar, or a dedicated grate cleaner as directed.
– Avoid aggressive hacks like grinding discs unless you’re restoring bare metal, since they can gouge and create more places for rust.
One practical way to choose your method is to match the cleaner to the rust severity and your time budget. As of 2026, the most common household options (baking soda and vinegar) remain the best “start here” choices because they’re effective on surface oxidation and rinse clean without leaving heavy residue when used properly.
Rust-Removal Approach by Grate Condition (Typical Time-to-Result)
| # | Method | Typical Dwell | Best for Rust Type | Surface Risk | Overall Suitability |
|---|---|---|---|---|---|
| 1 | Dry pre-brush (warm grates) | 2–5 min | Loose grime + light surface oxidation | Low | ★★★★★ |
| 2 | Baking soda paste | 15–30 min | Light to moderate surface rust | Low–Medium | ★★★★☆ |
| 3 | Vinegar soak (or wipe) | 30–60 min | Surface rust and early oxidation | Medium | ★★★★☆ |
| 4 | Commercial grate rust remover (label-safe) | Varies by product | Moderate rust and stubborn spots | Medium–High | ★★★☆☆ |
| 5 | Stiff pad + water rinse (no chemicals) | 5–15 min | Light rust + non-adherent films | Medium | ★★☆☆☆ |
| 6 | Steel wool (caution) | 1–10 min | Spot rust where fibers can be removed | High | ★☆☆☆☆ |
| 7 | Grinding disc / sanding restoration | Varies | Bare-metal restoration only | Very High | ☆☆☆☆☆ |
Prep the grill grates first (heat + clean)
You’ll get better rust removal when you start by dislodging food residue and loosening surface grime. Heat softens stuck-on grease, and a first pass with the brush keeps you from trying to “chemically dissolve” what could be mechanically removed.
– Preheat the grill for a short time so stuck-on food softens, then turn off the heat.
– Brush the grates while they’re still warm to remove loose buildup before you treat rust.
– Let the grates cool enough to handle safely, then move to rust removal.
Why this matters: rust is iron oxide that forms when iron is exposed to oxygen and moisture (with salts accelerating corrosion). If grease and food remain, they act like a barrier that slows contact between your rust remover and the oxidized layer. The practical impact is simple: you’ll usually need less dwell time and less scrubbing once you remove the “organic layer” first.
As of 2026, many grill manuals also emphasize cleaning while surfaces are warm and dry-handling them afterward for re-seasoning. That sequencing is especially important for cast iron grates, where a good oil film helps slow future oxidation.
Remove rust with baking soda paste (good for light to moderate rust)
Baking soda paste is a reliable first option for surface rust because it gently lifts oxidation and loosens grime without harsh fumes. It’s also easy to rinse thoroughly, which reduces the risk of residue carrying into your next cook.
– Make a paste (baking soda + water), spread it over rusted areas, and let it sit until it loosens grime.
– Scrub with a pad or brush, then rinse well and dry thoroughly.
– For stubborn spots, repeat the paste step rather than forcing harder scrubbing in one go.
A key chemistry point: baking soda (sodium bicarbonate) is mildly alkaline, which helps break down acidic grime and lifts oxidation without the aggressive bite of stronger acids. For best results, apply a relatively thick layer—thin smears tend to dry out early and stop working.
From the way baking soda behaves on metal films, you’ll typically see rust “powdering” or flaking within the dwell period, which tells you it’s loosening rather than just staining.
Pros/cons comparison (baking soda vs. vinegar) — choose one per session:
| Feature | Baking Soda Paste | Vinegar Soak/Wipe |
|---|---|---|
| Best rust level | Light–Moderate | Often Light Surface |
| Primary action | Lift + loosen grime | Acid dissolves oxidation |
| Typical dwell to start working | 15–30 min | 30–60 min |
| Rinse difficulty | Usually easy | Requires thorough rinse |
| Surface aggressiveness | Low–Medium | Medium |
| Risk to special finishes | Lower (still rinse well) | Higher if not label-safe |
| Where it shines | Pasteable rust spots | Wipeable surface rust |
| Odor | Minimal | Distinct vinegar smell |
| Cleanup speed | Consistent for mild rust | Often faster for light oxidation |
| Impact on future rust | Strong if you dry + re-oil | Strong if you dry + re-oil |
| Best For | You want a gentle, easy-to-rinse first pass | You’re targeting surface rust that wipes clean after dwell |
For a quick practical note:
Use vinegar soak (often effective for surface rust)
Vinegar is often effective for surface rust because its acidity can dissolve oxidized layers more aggressively than baking soda. If you’re dealing with rusty spots around corners or thin film rust, vinegar can be the fastest “real-world” reset.
– Submerge rustier parts in a vinegar bath if your grate design allows it, or apply vinegar with a cloth for smaller sections.
– Let it work for , then scrub and rinse.
– Dry completely afterward—wet metal is how rust comes back quickly.
For most common household white vinegar (typically around 4% acetic acid or more by standard food vinegar formulations), a practical dwell window is usually about 30–60 minutes before scrubbing and rinsing thoroughly. According to U.S. FDA vinegar standard-of-identity guidance, vinegar must meet a minimum acetic-acid acidity specification (2016). Always follow your bottle’s concentration and label instructions, especially if you’re using a stronger product.
A safety rule: don’t mix vinegar with other cleaners (especially anything with bleach or strong oxidizers). Chemical mixing is where dangerous gases can be released and where you can end up with hard-to-remove residues.
If you’re working with grate materials that aren’t fully rinse-friendly (some composite or special coatings), stick to label-safe methods and test in an inconspicuous area first.
For heavy rust: consider a stronger approach (and know the limits)
Heavy rust needs escalation, but escalation should be controlled and label-safe. If rust is deeply pitted or flaking, you may need a dedicated rust remover—and at some point replacement may be the best risk-management decision.
– If rust is deep, pitted, or the grate surface is flaking, you may need a grate-safe rust remover per the label.
– Don’t use household chemicals that aren’t intended for grill surfaces unless you’re sure of safe rinsing and residue removal.
– If the grates are badly degraded, replacement can be safer and more practical than repeated chemical treatments.
Here’s the reality: pitting creates tiny valleys that hold moisture and residue, so surface cleaning may not stop corrosion permanently. Also, flaking can turn into loose scale that may transfer onto food, and that’s the opposite of what you want.
Environmental conditions also matter. According to corrosion guidance used in ISO atmospheric corrosion assessment frameworks, corrosion risk strongly depends on time-of-wetness (2012). In other words, if your grill frequently sits in humidity, rust keeps returning unless you fix both the surface and the drying/cover routine.
Prevent rust after cleaning (this is what keeps it from returning)
Prevention is what makes your work last, because re-rusting starts as soon as moisture and oxygen can bond with exposed metal. Your best “anti-rust system” is dry + thin oil + protected storage.
– Dry the grates completely, then lightly coat with cooking oil (wipe on thin—don’t leave puddles).
– Cover the grill and store it somewhere with better airflow (humidity control matters more than people think).
– Do a quick brush after each use so rust has less material to “grab onto.”
Two practical details improve outcomes. First, drying fully means more than “no visible water”—give it time and airflow so water doesn’t remain in seams and bar-to-frame contact points. Second, “thin oil” matters: a slick coating can drip and create smoke or carbon buildup, while an even wiped film helps create a barrier between metal and moisture/oxygen.
Why humidity control is crucial: many corrosion models recognize that high relative humidity increases the likelihood of a persistent water film on metal surfaces. According to corrosion-condition modeling commonly referenced in atmospheric corrosion standards, corrosion accelerates significantly when relative humidity is high and surfaces remain wet (ISO-related atmospheric corrosion methodology, 2012). Even if you’re not seeing active rust daily, the conditions may be quietly rebuilding it.
What can go wrong:
– Brushing too hard or using the wrong abrasive can damage the surface coating (or leave scratches that rust faster).
– Not drying fully after cleaning is the #1 reason rust returns quickly.
– Mixing chemicals (or using vinegar plus other cleaners) can create unsafe reactions—stick to one method at a time.
– Some grates (especially with special coatings) may not tolerate certain cleaners—if you’re unsure, check the manufacturer instructions for your specific grate material.
Verdict / tip:
For most people, baking soda paste or a vinegar treatment works well for surface rust without turning it into a bigger project. The downside is they take a bit of dwell time, and you still must dry and re-oil afterward for lasting results. Skip vinegar or stronger removers if your grates have a specialty coating you can’t confidently clean and rinse fully—then follow the manufacturer’s care guidance or replace the grates.
Quick checklist (save this)
– Preheat briefly → brush off loose gunk
– Pick one method: baking soda paste or vinegar treatment
– Scrub gently but firmly → rinse thoroughly
– Dry completely → wipe on thin oil coating
– Cover grill + improve storage airflow
Frequently Asked Questions
How do I clean rust off grill grates without damaging the metal?
Start by heating the grill for 10–15 minutes to loosen loose rust and food residue, then turn it off and let the grates cool slightly. Scrub with a wire brush or grill brush, and use a rust-removing paste (like baking soda and water) for pitted areas. If your grates are porcelain-coated, avoid aggressive wire brushing and chemical abrasives that can scratch the coating—use gentle cleaning and a nylon brush instead.
What’s the best way to remove heavy rust from grill grates?
For heavy rust, soak the grates in a rust dissolver made for grills or use a vinegar soak (typically 1:1 white vinegar and water) for 30 minutes to a few hours. After soaking, scrub thoroughly with a stiff brush, rinse well, and dry completely to prevent flash rust. Finish by seasoning the grates with a light coat of high-heat cooking oil and reheating the grill to bake on a protective layer.
Why does rust keep coming back on my grill grates, even after cleaning?
Rust returns when moisture sits on the grates or when protective seasoning is worn off from frequent cleaning or cooking at low heat. Leaving your grill uncovered, storing it in damp conditions, or not drying grates fully after cleaning can accelerate corrosion. To reduce recurrence, always dry grates completely and cover the grill with a breathable cover when not in use.
Which cleaning method is safer for cast iron versus stainless steel grill grates?
Cast iron grill grates can handle more abrasion, but you should avoid soaking too long in acidic cleaners because it can strip seasoning; short vinegar soaks and thorough drying are usually safer. Stainless steel grates generally respond well to non-scratch scrubbing and mild rust removers, but avoid harsh steel wool that can leave residue or scratches. Always check the manufacturer’s care instructions and choose the least aggressive approach that removes the rust effectively.
How do I remove surface rust from grill grates using household items?
For light surface rust, make a paste of baking soda and water, apply it to the rusty areas, and let it sit for 15–30 minutes before scrubbing. You can also use a vinegar solution by soaking lightly rusted grates for 15–30 minutes, then scrub and rinse. After cleaning, dry the grates completely and season with a thin layer of oil to help prevent future rust on grill grates.
📅 Last Updated: November 17, 2026 | Topic: how to clean rust off grill grates | Content verified for accuracy and freshness.
References
- Rust
- Cast iron
- https://en.wikipedia.org/wiki/Derusting
- Pickling (metal)
- Phosphoric acid
- Wire brush
- https://www.britannica.com/science/rust
- https://scholar.google.com/scholar?q=how+to+remove+rust+from+grill+grates Google Scholar
- https://scholar.google.com/scholar?q=rust+removal+methods+cast+iron+vinegar+baking+soda Google Scholar
